


15
15
• Empty the dust container (8) after each vacuuming (see the
section on "Emptying the dust container and cleaning the
filter” below).
• Replace the appliance for charging in the charging station
once you have finished using it. Remember to turn of the
power to the charging station after charging the appliance!
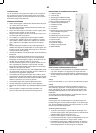
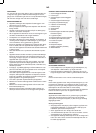
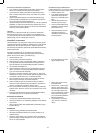
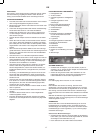
Using the hand-held vacuum
• Take the hand held vacuum cleaner out by pressing the two
release buttons (4) and pulling the hand held vacuum clear
upwards.
• Start the hand held vacuum cleaner by pushing the on/off
button (5) forward.
• Empty the dust container after each vacuuming (see the sec
-
tion on "Emptying the dust container and cleaning the filter”
below).
• Place the hand-held vacuum on the appliance so that you
hear a click, and place the apparatus in the charging station
to be charged when you are finished using the hand-held va
-
cuum. Remember to turn of the power to the charging station
after charging the appliance!
Important!
Always ensure the dust filter (9) is fitted. You must never vacuum
without a filter or when a filter is damaged. If you do, dust may
penetrate into the interior of the vacuum cleaner and damage the
motor.
DUST CONTAINER AND FILTER
This appliance is not equipped with a dust bag. The dust/dirt is
sucked up into the transparent dust holder instead. Once the
dust is in this container, it whirls around so that it does not block
suction. The air sucked in is cleaned by means of a two-compo-
nent washable permanent filter in the dust container.
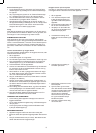
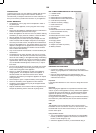
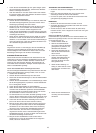
Emptying the dust container and cleaning the filter
The transparent dust container is to be cleaned after or during
each vacuuming if the container is filled up..
1. Turn off the appliance.
2. Take the hand-held vacuum off of the apparatus.
3. Turn the hand-held vacuum so that the dust container is tur
-
ned upside down.
4. Remove the dust container from the hand-held vacuum by
pressing the release button (10) and turning the dust contai-
ner clockwise.
5. Take the dust container to a dustbin.
6. Pull the two parts of the filter out of the dust container and
empty the container. If necessary, rinse the dust container
with clean water and wipe the container with a dry cloth.
7. The filter consists of two sections, both of which must be
cleaned. Brush the sections with a small brush or wash them
in lukewarm water without any detergent or similar.
8. Allow the parts of the filter to become completely dry (do not
dry in the sun or with a hairdryer).
9. Place the top part of the filter on the bottom part, and place
the filter in the dust container of the apparatus again. The top
part of the filter must cover the opening of the nozzle in the
bottom of the dust container.
10. Take care not to damage the filter, and ensure that it covers
the nozzle opening over the dust container, as otherwise the
motor or other parts of the appliance may become damaged.
11. Place the dust container on the hand-held vacuum again by
turning the container clockwise until you hear a click.
TRANSPORT AND STORAGE
• You can lift and carry the appliance using the foldable handle.
• Before storing the apparatus, the hand-held vacuum must be
in place.
• To save space, the handle can be folded by pressing the
release button(3).
CLEANING
• Clean the appliance by wiping it with a damp cloth.
• You must not use any form of solvent, or strong or abrasive
cleaning agent.
• Make sure the filter is kept clean (see above). Replace the
filter once it becomes worn or can no longer be cleaned.
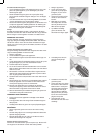
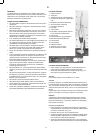
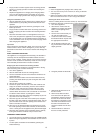
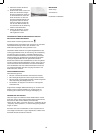
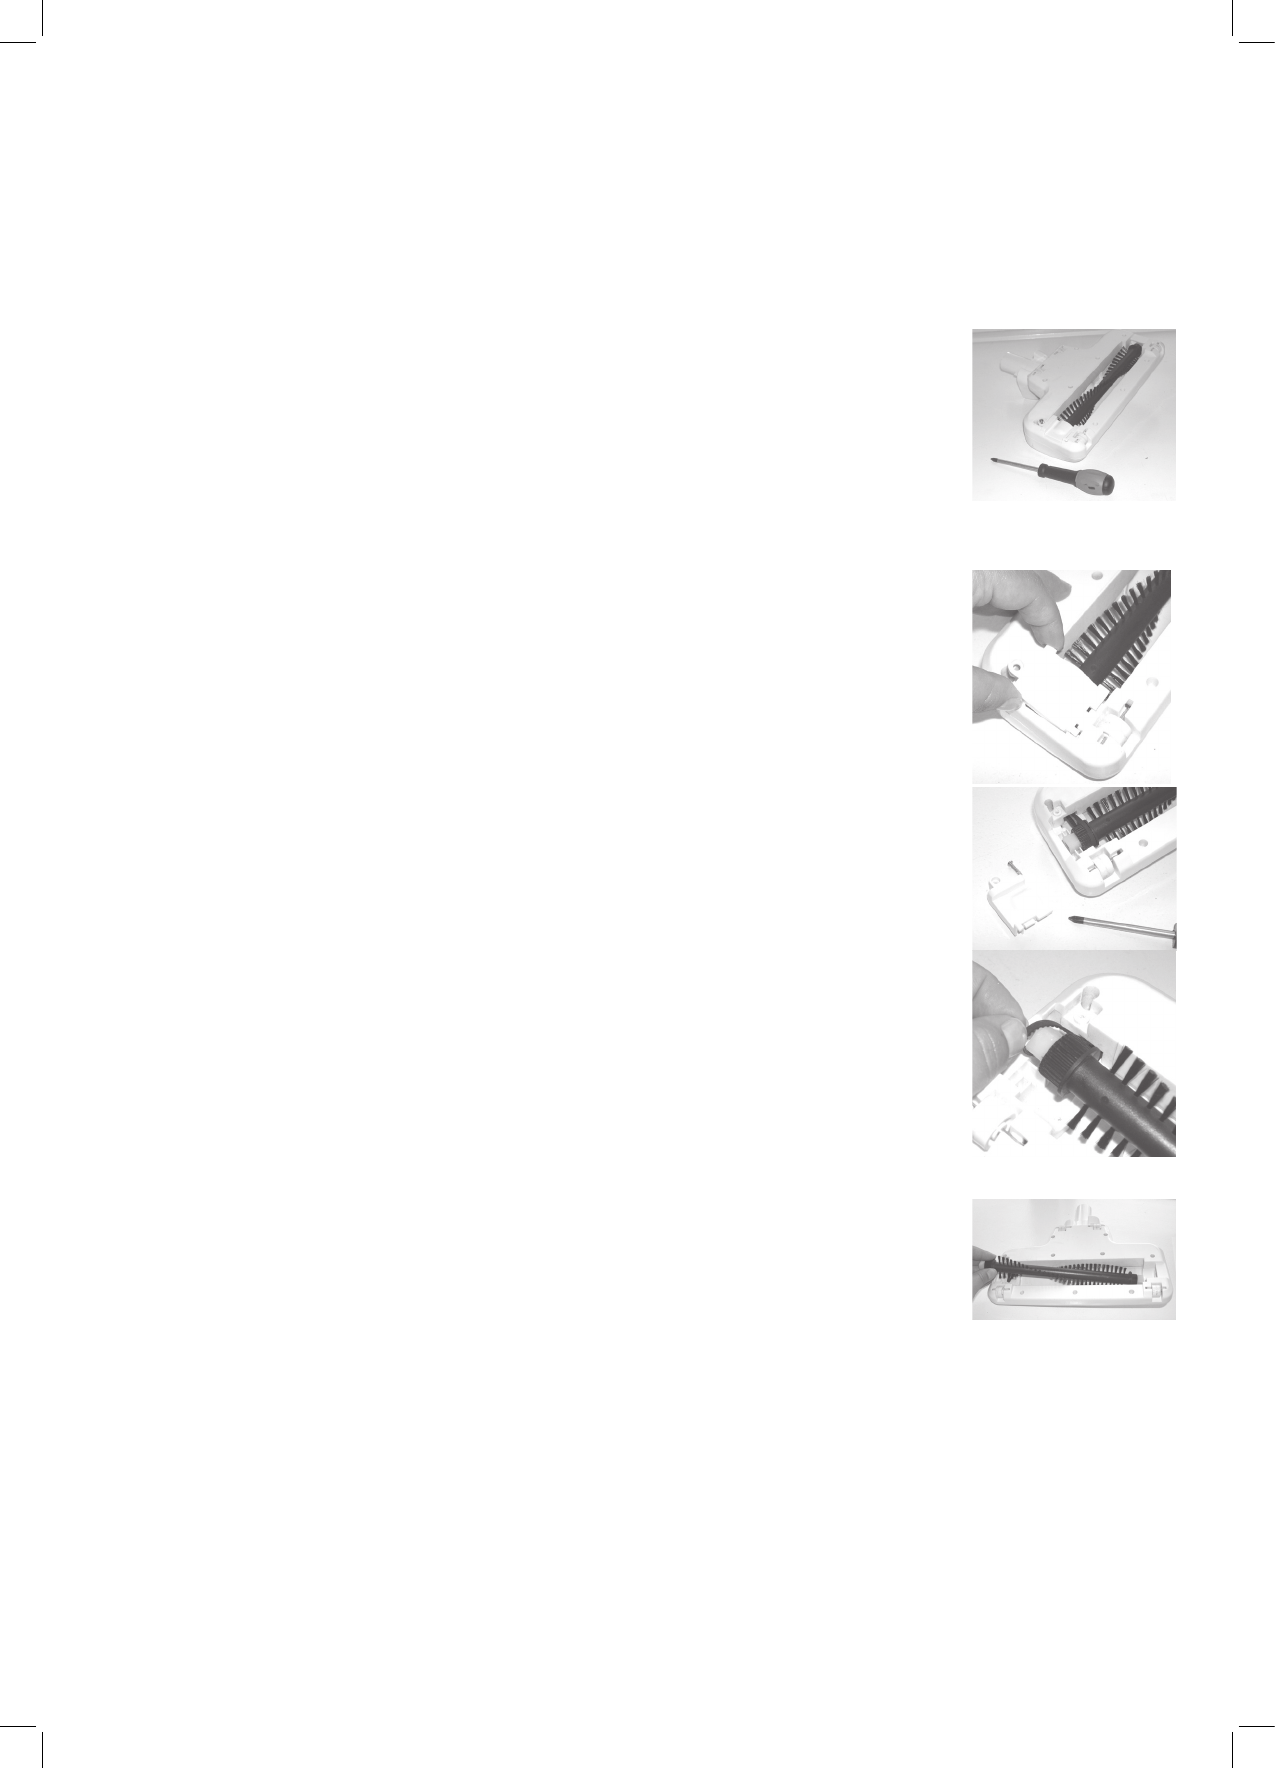
Cleaning the brush on the nozzle
There is a rotating brush in the floor nozzle (14). The brush must
be cleaned if it becomes covered in hair or other substances.
1. Turn off the appliance.
2. Take the floor nozzle off of the
appliance by pressing the release
button (12) and pulling off the
floor nozzle.
3. Turn the floor nozzle so that you
can see the rotating brush.
4. Loosen the screw on the bracket
that holds the brush in place with
the appropriate screwdriver.
5. Lift the bracket carefully by pul-
ling it towards the screw hole and
slightly upwards.
6. Pull gently the belt off the brush.
7. Afterwards, lift the brush out of
the floor nozzle.
8. Remove hair, fibers and dust
from the brush.Then place the
brush back in the floor nozzle so
that the end of the brush where
the belt drive is located is on the
same side as the bracket. Place
the belt on the belt drive and
screw the bracket onto the floor
nozzle
9. Rotate the brush to make sure
that it is correctly attached.