


OPERATING INSTRUCTIONS
OPERATING INSTRUCTIONS
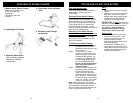
Using the Trigger Lock
The steam cleaner has a steam trigger
lock. The steam trigger will lock when
you have pushed it all the way in.
(Fig. 3)To unlock the steam trigger, just
press it in the other direction. If you
want to have continuous steam,
depress the steam trigger and then
push in the steam trigger lock.
3. Bring the velcro strips
that are on the
back side of the
steam pocket towel
over the steam pocket
frame and attach to
the inside of the
front side of the
steam pocket towel.
(Fig. 10)
NOTE: When replacing the steam pocket
towel, make sure that the steam pocket
frame has been allowed to cool before
removing or attaching a new steam
pocket towel.
Nylon Bristle Brush (x2)
It is best for cleaning grout in-between
the ceramic and marble tiles.
To use: Attach the nylon
bristle brush on to the end
of the concentrator, which
then may be used directly
on the hand grip or with extension
tubes.
Allow the unit to cool for 15 minutes
before changing accessories.
Window Squeegee
This attachment is very useful for
cleaning large windows, plastic material,
ceramic, tiled or marble surfaces.
IMPORTANT: When cleaning
windows, always avoid any sudden
changes in temperature to prevent glass
breakage or cracks.
To use: Connect the tile
squeegee to the hand
grip or use with
extension tube for
hard to reach surfaces.
Apply steam abundantly, rub with the
soft spongy edge, then remove excess
water and dirt with the glass wiping
edge.
Fig. 6
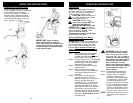
Locking Button
Hand Grip
Fig. 5
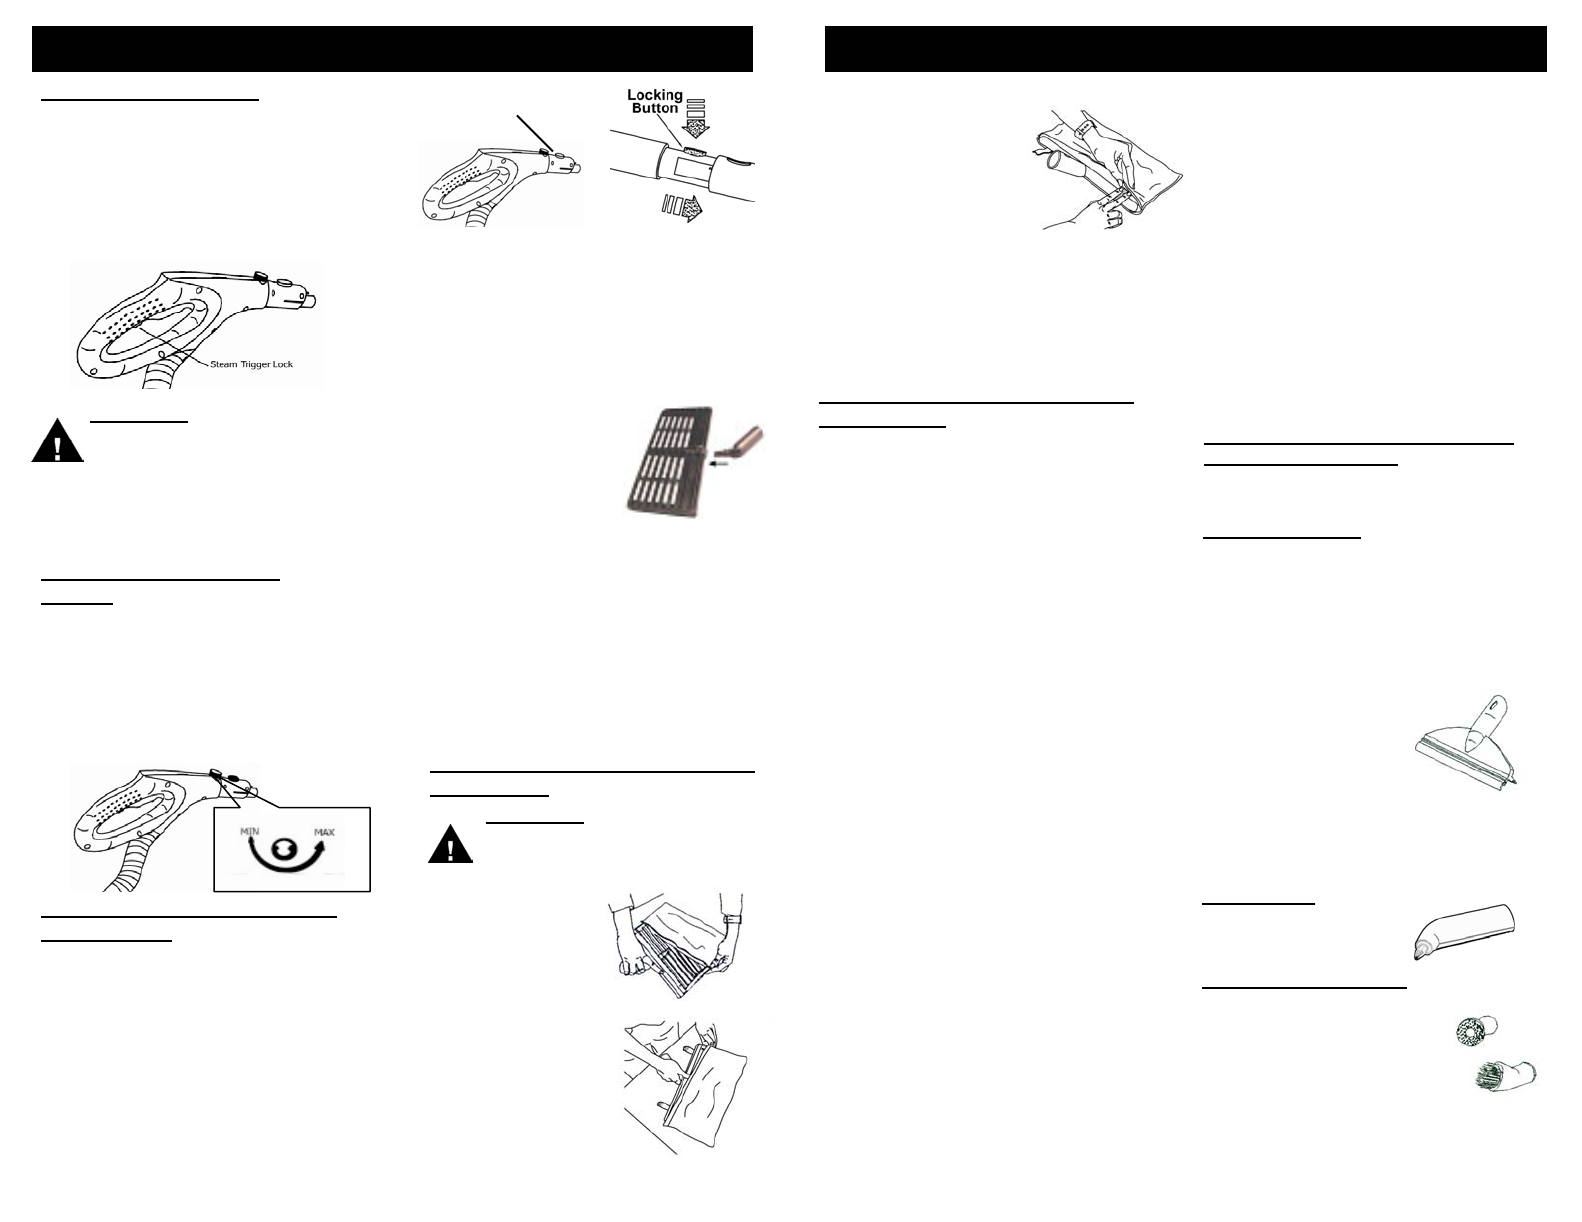
Attaching the Steam Pocket Towel
to the Frame
1. Slide the steam
pocket towel over
the steam pocket
frame. (Fig. 8)
2. Bring the towel all
the way to the top
of the steam
pocket frame.
(Fig. 9)
WARNING: Always insure the
unit is “UNPLUGGED” from the
wall receptacle prior to attaching
or removing accessories.
Fig. 8
Fig. 9
Fig. 10
Care & Maintenance of the Steam
Pocket Towel
Due to the unique cleaning ability of this
cloth, proper care of your microfiber towel is
required to ensure long life and continued
cleaning ability.
• The first thing you should do when
you get a new microfiber towel is to
wash and dry it. During the manufacturing
process the fabric has a tendency to
become flat as it picks up contaminants
from the air and machinery. There will
also be a number of loose threads that,
while they cause no harm, can be
annoying the first time you use the towel.
• To clean the towel, simply wash it in your
washing machine using the warm water
setting.
• Always wash your towels separately from
other fabrics. They have a tendency to
pick up lint and other particles from other
fabrics and the next time you use your
towel, this lint will transfer to the surface
being cleaned.
• ONLY USE LIQUID DETERGENTS, never
use dry detergents as many times the
granules do not fully dissolve and become
trapped in the towel. This can scratch the
surface that you are cleaning.
• NEVER USE BLEACH OR FABRIC
SOFTENERS! Bleach will damage the
microfiber fabric and fabric softeners
deposit a coating on the microfiber fabric
that will not allow the cloth to clean
efficiently.
Concentrator
Attach the concentrator
to the handgrip or to the
extension tubes.
Attaching the Accessories to the
Flexible Steam Hose
• Air dry the towel. Do not put in a clothes
dryer as high heat will cause the towel to
shrink and the microfibers to break down.
• If you wash your towel on a regular basis
and don’t let them get too dirty, they will
last much longer. As with any fabric, dirt
particles, grease and other contaminants
can cause the fibers to break down,
therefore regular cleaning will help
preserve your microfiber towels.
• As you use the microfiber towel, you will
notice that sometimes a thread will loosen
or pull out. This is normal and you should
NEVER PULL AT THE LOOSE THREAD!
Pulling the thread can cause the weave to
come undone. Instead, simply trim the
thread with a pair of sharp scissors.
Fig. 7
NOTE: Fit the steam pocket frame with
the angle adapter onto the extension
tube.
Step 2. If the angle adapter is not
attached to the steam pocket
frame, attach as follows: Hold
the steam pocket frame in one
hand and the
angle adapter in the
other. Insert the
angle adapter
stem into the
opening of the
steam pocket
frame as shown in
Fig. 7. Note that the flat on the
nozzle must face toward the
side of the frame with the brass
pin. Once inserted, rotate it 90°
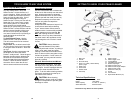
Step 3. Insert the electrical power cord
into the outlet. Heating time is
approximately 8-10 minutes with
cold water. Filling the steam
generator with hot water will
shorten the heat up time.
Fig. 3
Using Your Steam Cleaner with
Steam Pocket
Step 1: Connect one of the extension
tubes to the hand grip on the
flexible steam hose. To
attach the extension tubes
one onto the other or onto the
hand grip, press the locking
button ensuring that it fits into
the hole. (Fig. 5, Fig. 6) To
disconnect, repeat the
operation by pressing the
locking button and pulling the
two sections apart.
6
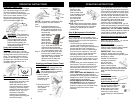
Using the Variable Steam
Feature
Your steam cleaner has a variable
steam feature that allows you to adjust
the steam flow to the job that you are
doing. The variable steam control is
located on the handgrip. To increase
the steam flow, turn the knob counter
clockwise and to decrease, turn it
clockwise. (Fig. 4)
Fig. 4
WARNING: This appliance is
under pressure. After every use,
unplug the unit and press the
steam trigger button until all
pressure has been released
before removing safety cap.
Allow unit to cool for fifteen (15)
minutes before refilling.
7