


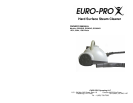
OPERATING INSTRUCTIONS
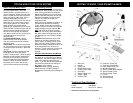
Components
On/Off Power Switch: The On/Off
switch has a light that will illuminate
when the unit is plugged into the 120V
wall outlet and the switch turned to the
“On” position.
Steam Ready Light: The steam ready
light located on the handle will turn “On”
when the steam is ready.
Caution: Read the instructions for
“Filling the Water Tank” before opening
the Safety Cap.
Caution: Always unplug before filling.
ALLOW UNIT TO COOL FOR
FIFTEEN (15) MINUTES BEFORE
REFILLING.
IMPORTANT: Do NOT add cleaning
solutions, scented perfumes, oils or any
other chemicals to the boiler in this
appliance. Use tap water or
distilled/purified water if the tap water
in your area is very hard.
Filling or Refilling Your Steam
Cleaner With Water
5
Important: Always insure that the unit is
“UNPLUGGED” from the wall receptacle
prior to initial filling or re-filling the water
tank and has been allowed to cool for 15
minutes. Never attempt to fill this unit
under a water tap, always use the filling
funnel provided.
1. Remove the plug from the electrical outlet
and allow the steam cleaner to cool for
fifteen (15) minutes.
2. Press the steam trigger on the hand grip
to vent any residual steam pressure that
is in the boiler.
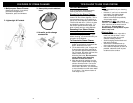
3. Place the unit on a flat, stable surface.
Push down firmly on the safety cap
and slowly turn the safety cap counter
clockwise until it is removed.
4. Place the funnel in the tank opening.
(Fig. 1) Fill with a maximum of one filling
flask or 2 cups (500 ml) of water. Do Not
Overfill. Turn the safety cap clockwise to
replace.
Note: To remove or replace the safety cap,
push down on it firmly and rotate it clockwise
to tighten or counter clock-wise to loosen. If
not depressed the cap will rotate freely
without advancing.
Note: Filling the unit with hot water will
shorten the heat up time.
Warning: Extreme care should be
taken when refilling the unit. Allow
unit to cool for 15 minutes and vent
any residual steam pressure (see
Step #2) from the boiler before
refilling. When refilling the steam
cleaner while the boiler is still hot,
there is a risk that water will squirt
back during filling and cause
scalding. Use caution when opening
the Safety Cap as cap may become
hot during use and escaping steam
can cause scalding.
5. Connect desired attachments onto
the flexible steam hose.
6. Plug the unit into a standard (120
volt, grounded) wall receptacle and
switch the On/Off switch to the “On”
position. Allow approximately 4-6
minutes for vapor to reach its
working temperature and pressure.
When the unit is ready for use, the
steam ready light will turn “On”.
Always point nozzle outlet in a safe
direction. At the start, some water
will come out from the nozzle.
This is normal.
Note: When the steam cleaner has run
out of water, steam output will cease.
7. When finished using the unit, turn it
“Off” and unplug it from the electrical
outlet.
Warning: This appliance is under
pressure. After every use, press
steam trigger button until all
pressure has been released before
removing safety cap. Allow unit to cool
for fifteen (15) minutes before refilling.
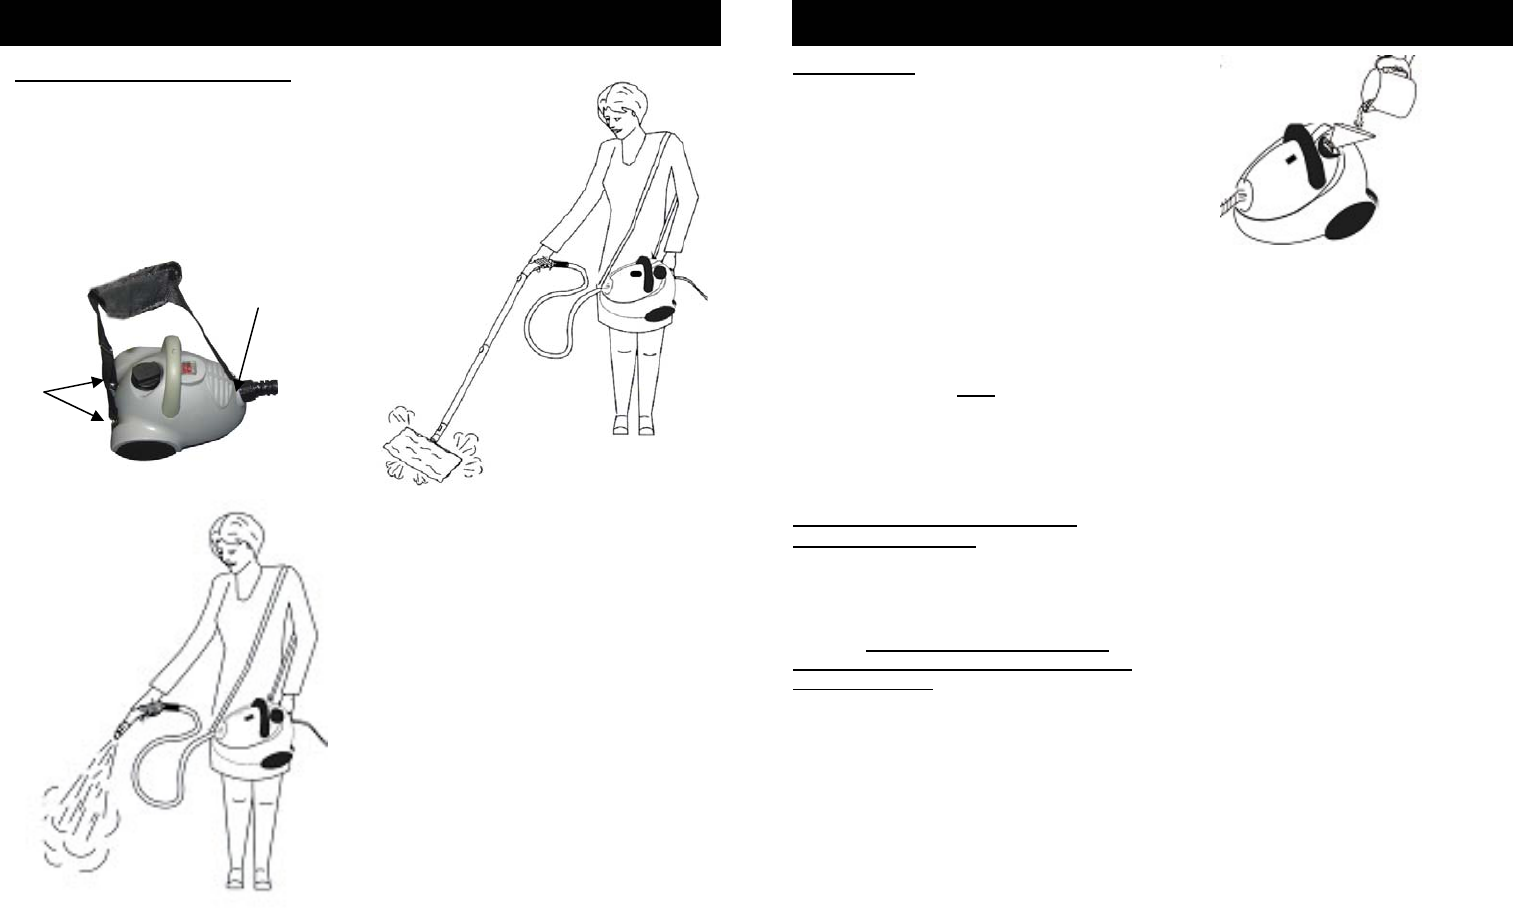
Fig. 1
Important: When using the steam
cleaner with the shoulder strap,
avoid rocking or tilting the unit
excessively as this may cause water
to enter the hose and be discharged
along with the steam.
OPERATING INSTRUCTIONS
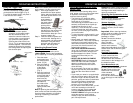
Attaching the Shoulder Strap
8
Fig. 8
Fig. 11
Fig. 10
Using the detachable shoulder strap
allows for greater freedom of movement
when both hands are needed for
various cleaning tasks. To attach the
shoulder strap to the steam cleaner,
simply snap the shoulder strap hooks
onto the connecting rings on the unit
body. (Fig. 9, 10 & 11)
Connecting
points
Connecting
points
Fig. 9