


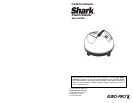
GETTING TO KNOW YOUR SHARK STEAM BLASTER
cont.
OPERATING INSTRUCTIONS
PREPARATION FOR USE
WARNING: ALWAYS unplug the appliance prior to any type
of maintenance on the unit. As all the appliances are
thoroughly tested before sale, there may be some residual
water in the boiler.
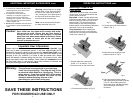
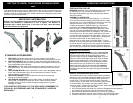
ASSEMBLY & OPERATION
To connect the tube and the accessories (fig. 1), insert part
(A) in part (B) turning this slightly to facilitate insertion. Make
sure that key (C) is securely fastened in the hole provided (D).
Open the reservoir cover (1) and pour in 3 1/4 cups
(.8 liters) of tap water or distilled water if your tap water is
particularly hard. Never add cleaning fluids. Close the
reservoir cover (1). Before plugging in the appliance, make
sure that you have assembled the tubes and accessories
correctly and the steam switch on handgrip is “Off”. Press the
on/off switch (2) to “On”; the steam ready light (3) will come
on; when the light (3) switches off (after about 1 minute), you
can start to use the appliance. To spray steam, simply press
the steam switch button on the handle (6) (fig. 2).
When there is no more steam, fill the tank again. To avoid
damage, never use the steam gun without water. If the tank is
full and no steam is sprayed, have the appliance checked by
the manufacturer. Always switch off the appliance after use,
pull out the plug and drain any residual water from water tank.
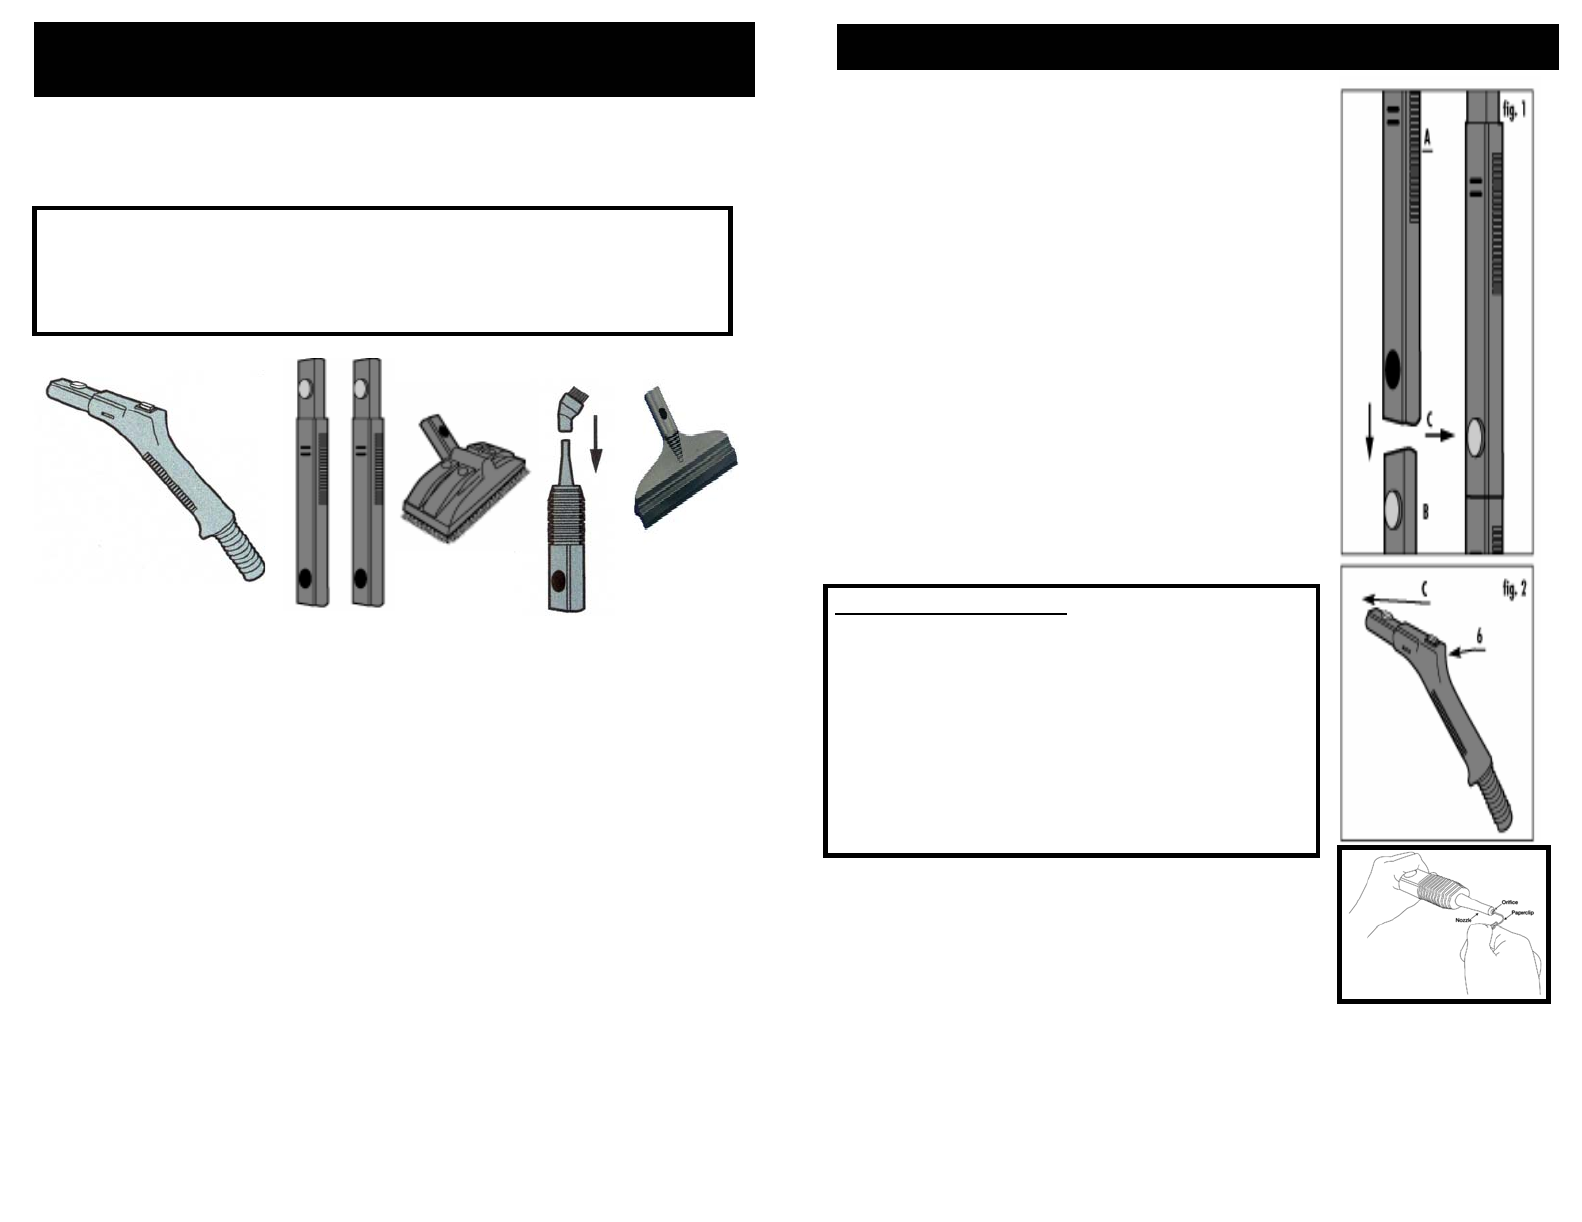
NOZZLE CLEANING INSTRUCTIONS
Your steamer should not normally require cleaning, however,
should you notice a marked decrease in steam output it may
be necessary to remove mineral deposit build-up from the
nozzle orifice. First ensure that there is water in the tank.
If tank is empty, fill with water, (we recommend using purified
or mineral water), then re-start unit noting whether steam
output is normal. If steam output is still low, follow these cleaning instructions:
1. Unplug steam cleaner from wall outlet.
2. Use a small diameter stiff metal wire such as a straightened metal paperclip
and carefully insert the end of the wire into the nozzle orifice.
3. Move wire back and forth several times to remove any deposits.
4. Reconnect appliance to power outlet, switch on and note steam output.
5. If steam performance does not improve, repeat steps #1 through #4.
This appliance cleans many types of hard surfaces with the force of steam without any
need for chemical cleaning products Obviously, it is also the ideal solution in particular
situations such as removing wall-paper, washing windows and degreasing many hard
surfaces in and around the home.
IMPORTANT INFORMATION
Before using the appliance make sure that the materials or the surfaces to be
cleaned can withstand a temperature of 212° F (100ºC). The steamer is
equipped with a safety device that, in the case of a fault, vents the steam
from the bottom of the appliance.
6
1
2
4
5
3
Important User Information
Please note that this steam cleaner has a “flow through
injection” type boiler and is not a pressurized system. It
will take approximately 45-90 seconds for the steam
injector to heat up and the “steam ready light” to go off.
Once the steam ready light has gone off, push the steam
switch on the handgrip to the “On” position (I) in order to
start the steam flow. Steam power will steadily increase
during the first four (4) minutes of use, after which time
steam output will stabilize. Some steam will condense
around the floor brush when in use and will cause hard
surfaces to become wet during the cleaning process, this
is normal.
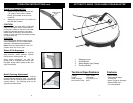
STANDARD ACCESSORIES
1. THE HOSE includes the steam switch (6) (see page 6) on the handle.
All the accessories clip onto this and can be removed by pressing the lock key.
2. THE EXTENSIONS (2) are connected to each other and to the handle of the
hose. They extend the range of action and reach of the appliance and assure a
more comfortable working position.
3. THE BRUSH provided is the ideal accessory for cleaning hardwood, vinyl, tile
and marble floors. Two clamps are provided to fasten the cloth towels to the
brush.
4. THE CONCENTRATOR makes it possible to clean in even the tightest corners
(toilet, taps, joints between tiles); the concentrated jet of steam is able to
remove stubborn, ingrained dirt.
5. THE DETAIL BRUSH is combined with the concentrator by inserting
over the tip of the concentrator.
6. THE WINDOW SQUEEGEE has two rubber edges, a scrubber edge and
wiping edge, for cleaning windows and mirrors. When cleaning outside
windows, always avoid any sudden changes in temperature to prevent
breakage or cracks.
FOR CONSTANT EFFICIENCY OF THE APPLIANCE, REMEMBER TO
CLEAN ALL ACCESSORIES AND THE STEAM SUPPLY NOZZLES
REGULARLY
4 5