


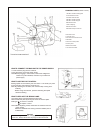
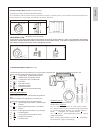
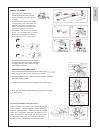

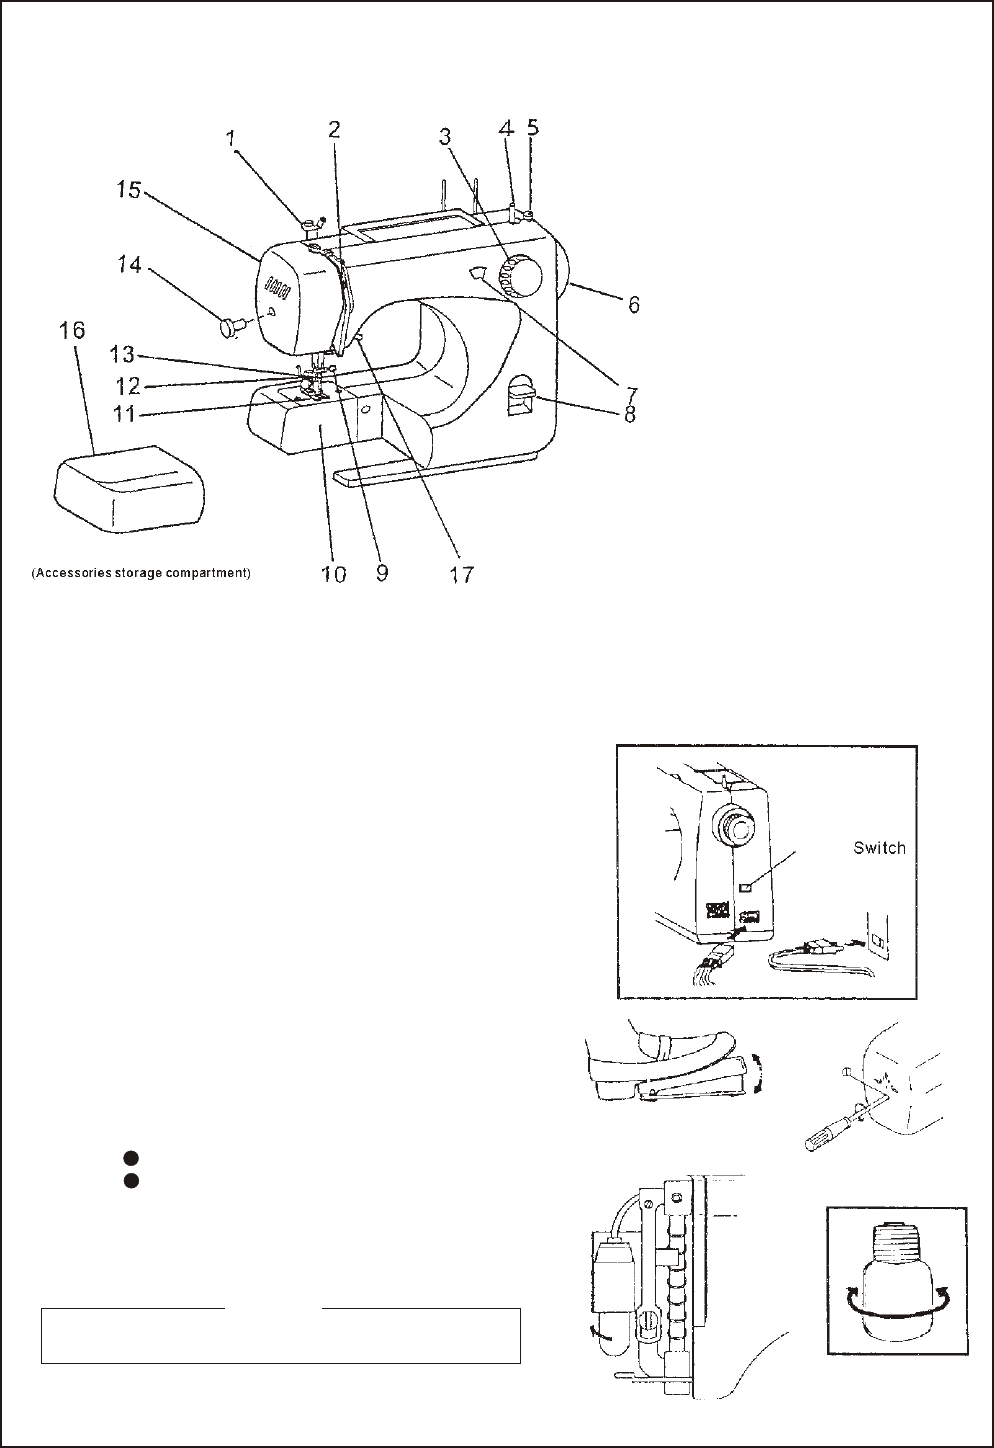
HOW TO CONNECT THE MACHINE TO THE POWER SUPPL
Y
1.Fit the machine plug into the machine.
2.Plug the power cord to the power supply.
Note:*Before plugging in the machine, ensure the voltage and
number of cycles indicated, conforms to your electrical
power supply.
Sewing speed can be varied by the foot control. The harder you press
on the controller, the faster the machine runs.
Note:*By releasing the controller, the machine stops running auto-
matically.
*Before using the machine, practice controlling the speed
without threading.
HOW TO USE THE FOOT CONTROL
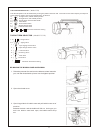
The sewing lamp is located behind the face plate.
Remove the face plate by loosing the screw of the face plate.
Note:*Before replacing a bulb, disconnect the machine from the
power supply.
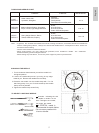
Bulb type:
To remove...Unscrew
To replace...Screw
*Bulbs are available from sewing machine retailers.(Use a
15-Watt bulb)
HOW TO REPLACE THE SEWING LAMP
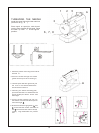
Before leaving the machine, changing parts or doing any other
work on it, always disconnect the plug from the wall socket.
Caution!
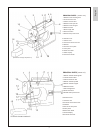
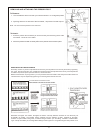
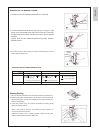
Switch
5.Bobbin winder stopper
6.Balance wheel
7.Stitch display
8.Reverse button
9.Needle clamp and screw
10.Shuttle cover
11.Presser foot
12.Presser foot thumb screw
13.Needle
14.Screw for face plate
15.Face plate
16.Extension table
17.Presser foot lifter
(Accessories storage compartment)
PRINCIPAL PARTS
( Model 373/372)
1.Bobbin winder thread guide
2.Thread tension dial
3.Pattern selector dial
4.Bobbin winder spindle
4