


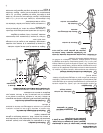
To Clean the Pleated Filter:
1. Remove dust cup from cleaner body. See above illustration
(a).
2. Remove dust cup lid by grasping lid handles and lifting
up.
3. To release the pleated filter from dust cup lid, press latch
in the bottom lid handle. Pull pleated filter away from dust
cup lid.
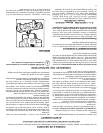
4. To remove debris, tap filter against waste container or
brush off. You may also vacuum the filter using a different
cleaner. If filter needs further cleaning, wash in warm water
using a mild detergent. To clean between filter pleats, fan
open under running water.
5. When all parts are completely dry, reattach pleated filter
to dust cup lid and follow the above steps in reverse to
reassemble.
NOTE: Do not put any parts in a dishwasher.
NOTE: Your dust cup filter may need to be replaced if
cleaning it does not restore cleaning
performance.
4
HOW TO MAINTAIN
CAUTION Turn off the switch and unplug the electrical
cord before changing the pleated filter. Never
operate the vacuum cleaner without the dust
cup or the pleated filter.
HINT: When cleaning new carpet for the first time, cup
will fill quickly. Check often.
The instructions given in this booklet serve as a guide to
routine maintenance. To avoid unnecessary service calls,
check the dust cup, filter, belt, and brush roll often. Empty
the dust cup if it is full; clean the filter, replace the belt if it is
stretched or cracked, and clean the brush roll bristles if they
are wrapped with thread and hair.
3
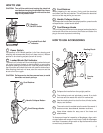
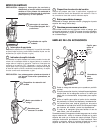
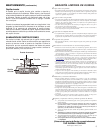
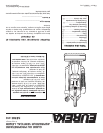
Remove the dust cup by
pressing down on the dust
cup latch (a) and pulling dust
cup away from cleaner body.
When replacing the dust cup
put bottom of dust cup in
place by aligning tabs in slots
and pivot dust cup up against
the cleaner body. Lift up on
dust cup latch to secure in
place.
a
2
Check and clean the Pleated Filter once a month to
maintain good performance. The filter can be cleaned by
washing with mild detergent and warm water. Be sure
pleated filter is completely dry before reinstalling.
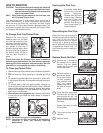
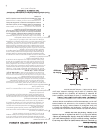
To Change Dust Cup Pleated Filter
It is clearly visible when
the dust cup is full and
needs emptying.
Remove dust cup from
cleaner body. Remove
dust cup lid from dust
cup by grasping lid
handles and lifting up.
Then dump debris in a
waste container.
Reinstalling the Dust Cup:
Grasp the dust cup lid by the lid
handles and sit back on top of dust
cup. It will fit only one way. To
replace the dust cup, put bottom
of dust cup in place by aligning
tabs in slots and pivoting dust cup
up against the cleaner body. Lift
up on dust cup latch to secure in
place (a).
a
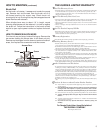
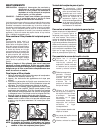
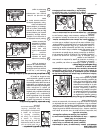
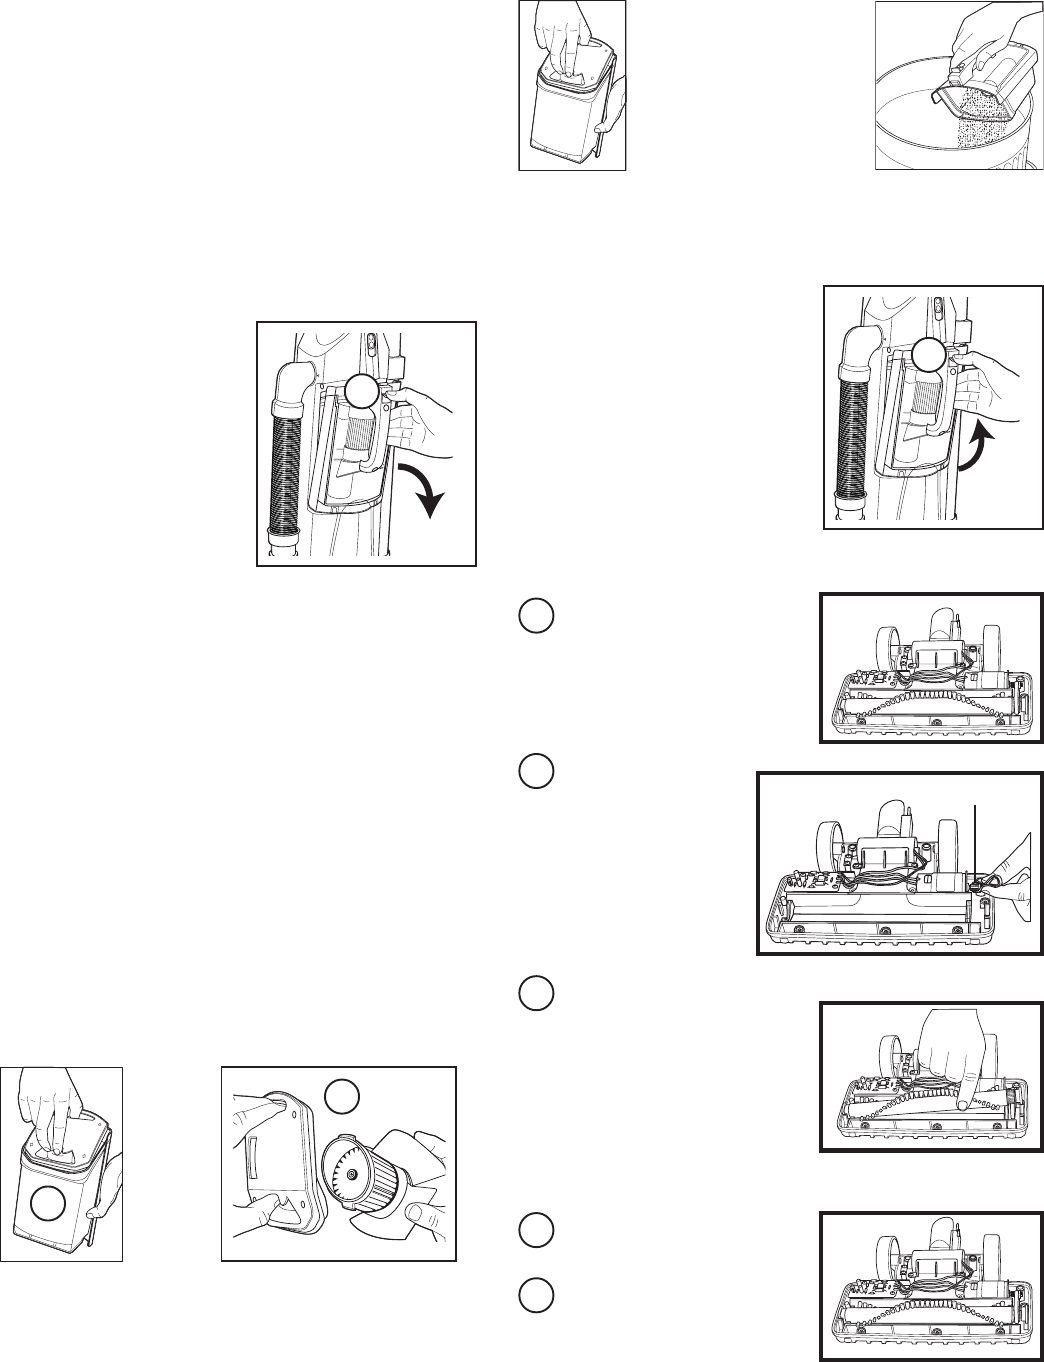
Replace Brush Roll Belt
Remove the 11 screws on
the bottom of the power
nozzle. Flip the power
nozzle back upright and
remove the hood.
1
Emptying the Dust Cup:
Remove broken or
worn brush roll belt.
Pinch new brush
roll belt together
and position new
belt so teeth
engage cog pulley
on end of motor
shaft.
Reinstall hood.
2
3
4
5
Cog Pulley
Place the other end of belt
around brush roll. Align left
end of brush roll into the
base by rotating slightly until
brush roll end cap slides
into place.
Secure right end of brush
roll into base.
The brush roll belt is now
installed.