


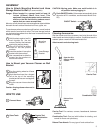
How to Attach Mounting Bracket and Hose
Storage Bracket to Wall
(on some models)
Danger: When located in a garage install at least 18
inches (450mm) above floor level. This
equipment incorporates parts such as switches,
motors or the like that tend to produce arcs or
sparks that can cause an explosion.
Mount on a wall where there are no dangerous objects hidden
beneath the wall surface like electrical wires, pipes, etc.
To use cleaner when mounted on wall bracket, mount bracket
within reach of an electrical outlet. The hose storage bracket
can be located anywhere since the hose is removed from the
cleaner for storage.
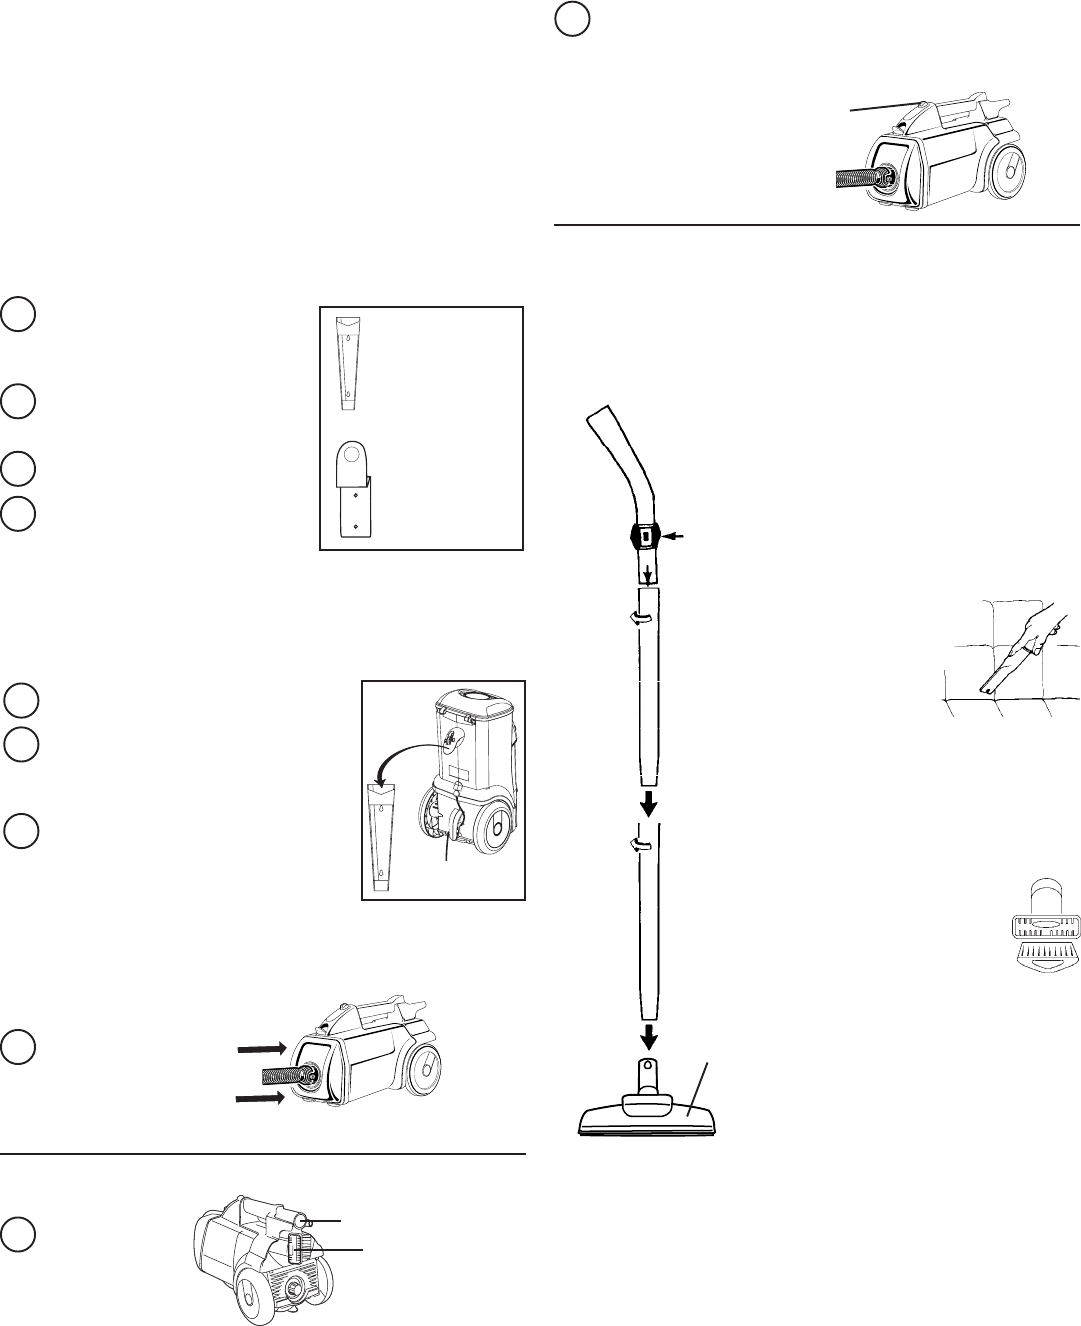
Hold brackets against wall to
mark location for the two
screws. Position the brackets
against the wall as shown.
Use a 3/16” drill bit for drilling
holes for the two plastic
anchors.
Insert the anchors. Line up the
bracket with the anchors.
Use a screwdriver to drive the
screws into the anchors to
secure the bracket.
How to Mount your Vacuum Cleaner on Wall
Bracket
Turn the rotating wheel so it faces
downward.
Hook the wheel over the v shaped
rail at the top of the mounting
bracket and let vacuum rest against
the wall.
Plug the vacuum into an electrical
outlet.
Caution: Unplug cleaner when not in
use.
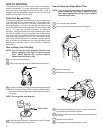
HOW TO USE
Mounting
Bracket
Hose Storage
Bracket
1
2
Connect Hose.
Store Tools
Crevice Tool
Combination
Tool
Push ON/OFF Switch (A thermostat automatically shuts
the motor off if it overheats, see Automatic Motor Shut-
Off)
3
ON/OFF Switch
Cleaning Accessories
Slip the circular end of an accessory tool onto the end of the
hose handle and twist slightly to secure. If additional reach is
needed, place a wand on the hose handle first.
Attach wands and cleaning tools
Open the Slip
Ring to reduce
suction.
Deluxe Floor
Nozzle
Crevice Tool
Combination Tool
Crevice Tool: For crevices, corners, baseboards, between
cushions.
Combination Tool: One tool with bristles for dusting, and
nozzle for floors and upholstery.
Deluxe Floor Nozzle: For any type of hard surface floor.
3
CAUTION: Moving parts. Make sure on/off switch is in
off position before plugging in.
ASSEMBLY
1
2
3
4
5
6
7