


6
ENGLISH
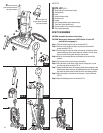
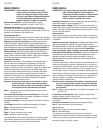
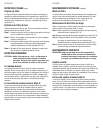
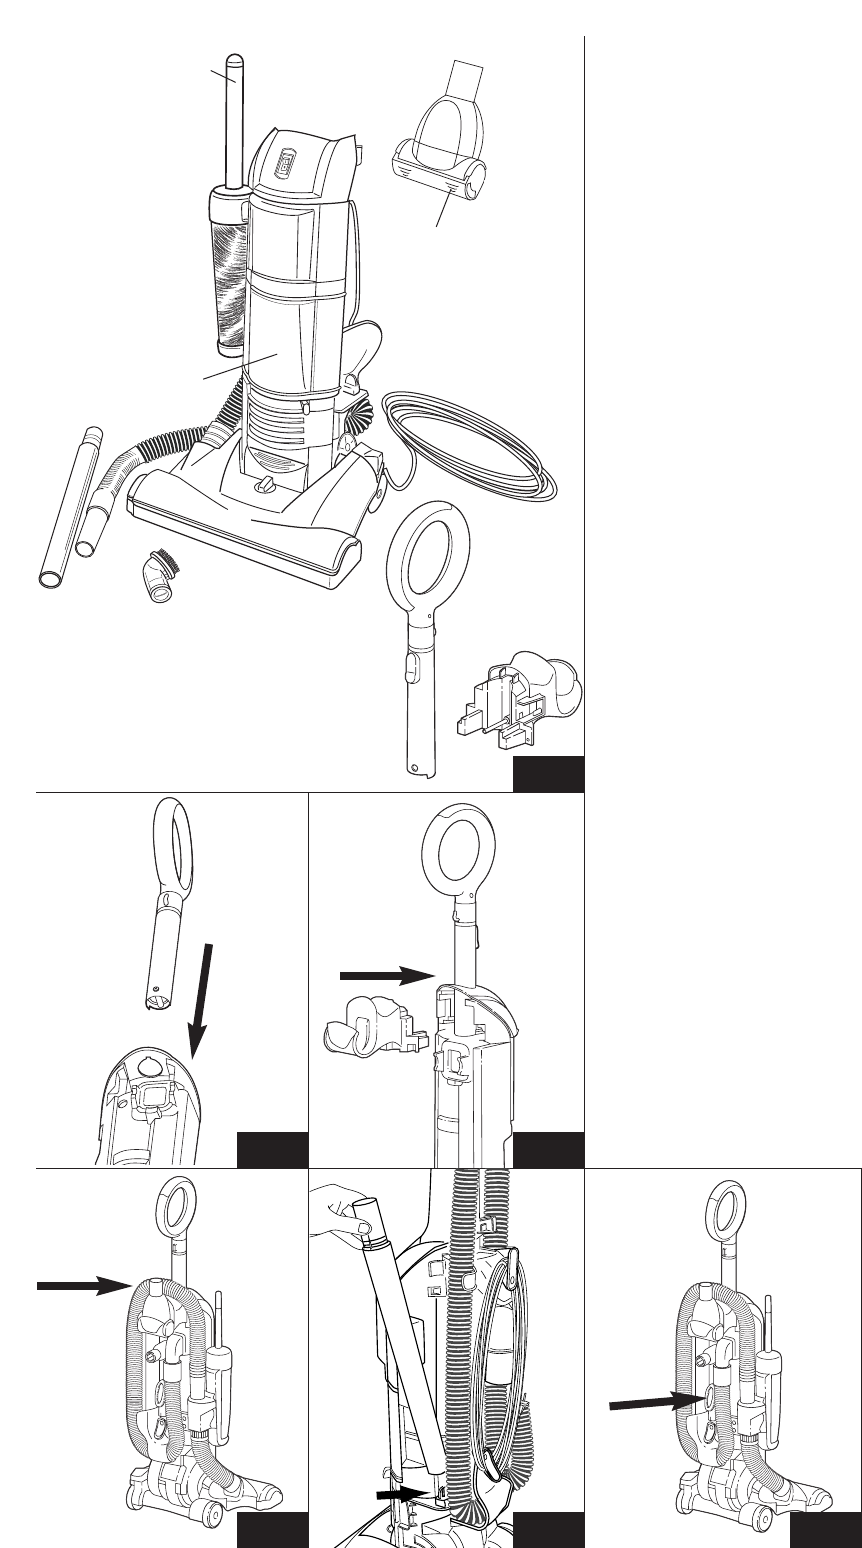
PARTS LIST (FIG. 1)
●
A
Wand and crevice wand (pull apart)
●
B
Dusting brush
●
C
Hose
●
D
Vacuum cleaner body
●
E
Electrical cord
●
F
Handle
●
G
Self-cleaning duster (some models only)
●
H
Turbo tool (some models only)
●
I
Screws located in the accessory package
●
J
Carry handle assembly
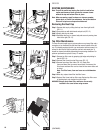
HOW TO ASSEMBLE
CAUTION: Assemble the cleaner before using.
CAUTION: Moving parts. Make sure ON/OFF switch is in the OFF
position before plugging in.
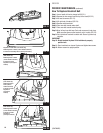
Step 1: Slide the handle into the hole as pictured (FIG. 2).
Step 2: Slide the carry handle into place as pictured; secure with 2
screws provided (FIG. 3).
Step 3: Pull the electrical cord up to the cord retainer on the back of the
looped handle and firmly push down into retainer. This will keep
the cord out of the way the next time you vacuum.
Step 4: Wind the cord around the two cord hooks on the back of the
vacuum.
Step 5: Secure plug to the cord to prevent unwinding.
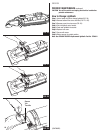
Step 6: Place the hose on the back of the vacuum, wrapping it up and
over the hose hook as shown (FIG. 4).
Step 7: Secure the bottom of the self cleaning duster (some models) to the
bottom hose; fasten into place by tightening the screw. Firmly push
the end of the strech hose into the top of the self cleaning duster.
Step 8: Store the wands on the side of the vacuum in front of the hose
(FIG. 5).
Step 9: Store the dusting brush on its holder (FIG. 6).
●
A
●
B
●
F
●
J
●
E
FIG. 1
FIG. 2 FIG. 3
FIG. 4 FIG. 5 FIG. 6
●
D
●
C
●
G
(some models only)
(certains modèles seulement)
(sólo algunos modelos)
●
H
(some models only)
(certains modèles seulement)
(sólo algunos modelos)