


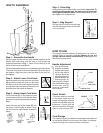
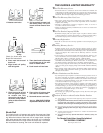
Step 1 - Assemble the Handle
Slip the upper handle and the lower handle together so the
handle bolt holes align and the slots in the handle are
positioned as shown in Fig. 1. Insert a 2-part bolt (A) in the
center of the handle and tighten.
Hold the assembled handle so it curves away from the cleaner.
Then push the handle into the handle socket (E) at the rear of
the cleaner. Align the holes, insert the other 2-part bolt (A),
and tighten.
Step 2 - Attach Lower Cord Hook
Insert the power cord into the lower cord hook
(B), as shown. Snap the hook into the lower
handle. Pull up on the cord to tighten but leave
enough slack near the base so the cord is not
strained when the handle is lowered.
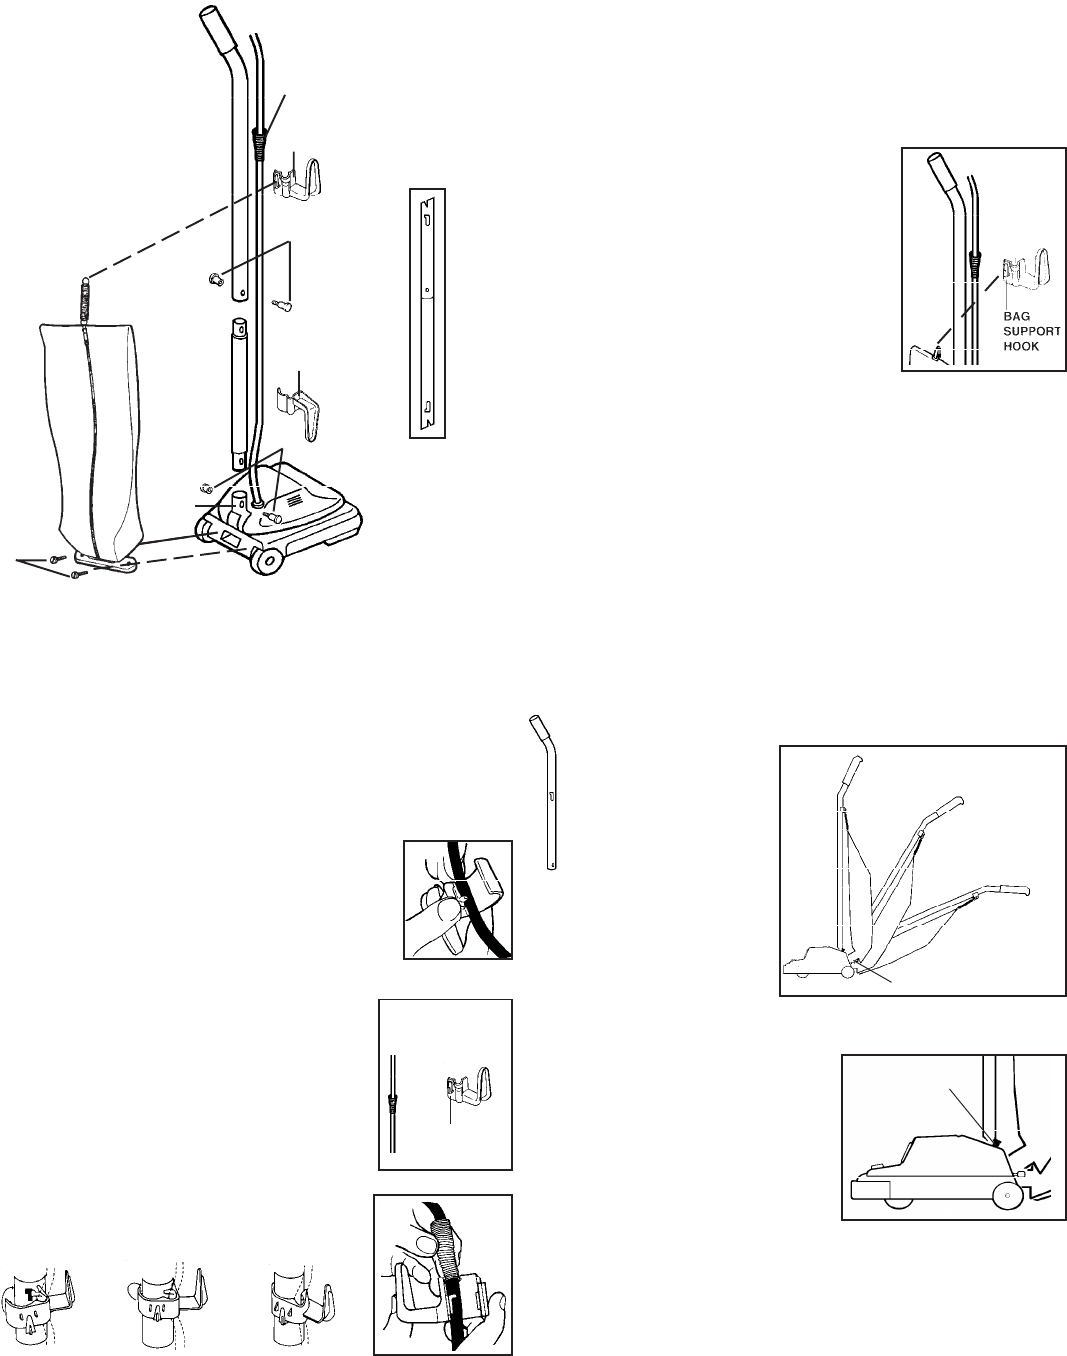
Step 3 - Attach Upper Cord Hook
Pull the sleeve (F) on the electrical cord
upward toward the top of the handle. Make
sure slots in handle are positioned properly,
Fig 1.
3
HOW TO ASSEMBLE
E
A
B
A
C
Fig. 1
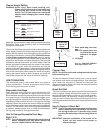
Step 4 - Outer Bag
Hold outer bag with zipper away from handle.
Important: To
provide a good gasket seal, the bag coupling must seat
firmly against the motor base.
Start the bag screws by hand,
then tighten with a screwdriver.
Step 5 - Bag Support
Slip the ring at the top of the cloth bag
over the bag support hook on the back
of the cord hook.
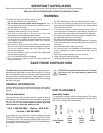
HOW TO USE
The upright vacuum cleaner is designed to be used on
multiple types of carpeting. Do not attempt to use the
upright vacuum cleaner on bare floors, as damage to the
floor covering may result.
Handle Adjustment
With the tip of the foot,
press down to release
the handle lock located
at the left rear side of
the cleaner. Move the
handle and adjust it to
the desired position for
(1) storing upright, (2)
operating the cleaner
at a comfortable height
for the user, and (3)
cleaning underneath
low furniture.
Power Switch
The power switch is mounted
on the motor hood near the
handle. Switch style varies by
model and may differ from the
illustration. A push with the
foot turns the motor ON; push
again to turn the motor OFF.
Insert the lower half of the sleeve (F) into
the upper cord hook (C) as shown. Snap
the hook into the upper handle, directions
below.
BAG
SUPPORT
3. SNAP opposite
inner tab into
place
1. Place inner
tab into
slot
2. Press hook
around
handle
ON/OFF
Handle Lock
1. Store
2. Use
3.Clean
Underneath
Cord Storage
The cleaner has two convenient cord storage hooks attached
to the handle.Wind the cord around the hooks for storage.
Fasten the plug to the cord to prevent unwinding.
D
F