


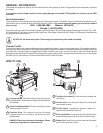
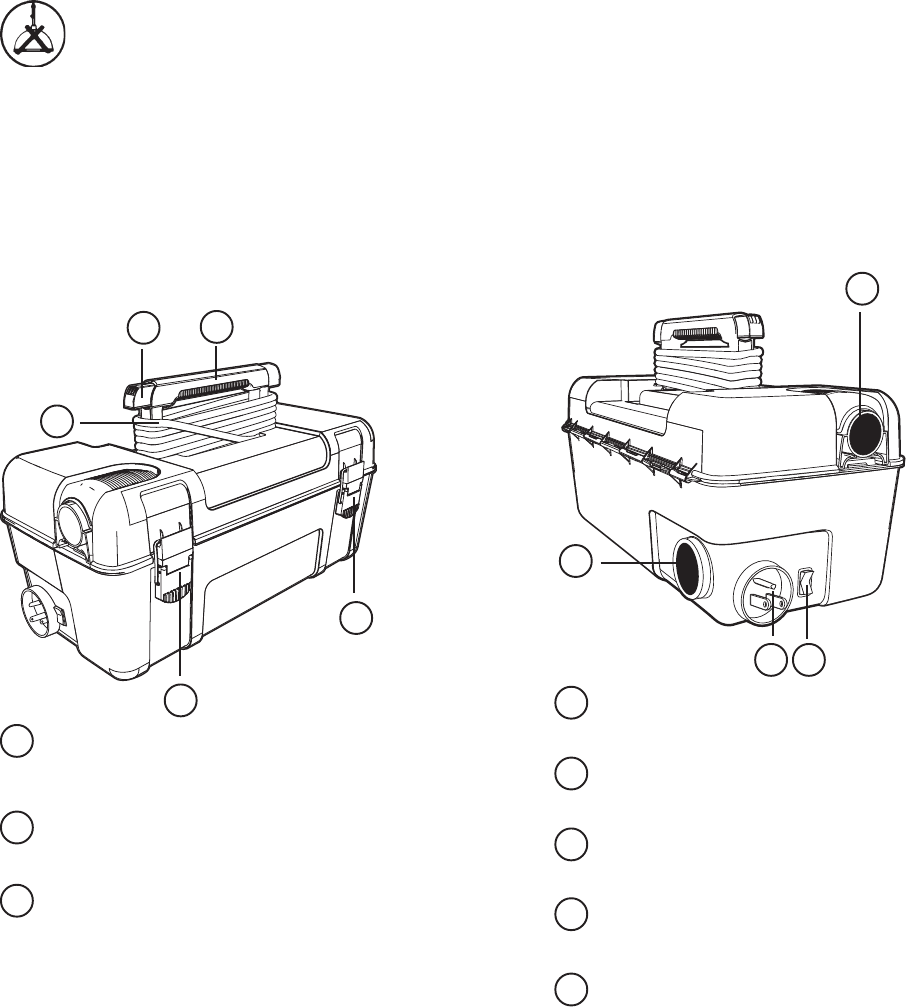
Tool Box Lid Latchs (2). Lift up on latch to release the
tool box lid.
Suction Inlet. Insert the end of the hose in the inlet to
use vacuum function.
On/Off Switch. International symbol I means On,
International symbol O means Off.
Electrical Socket. The large end of the electrical cord
plugs into this socket, the other end into a wall outlet.
Blower Port. Insert the end of the hose into the blower
port to use the blower function.
GENERAL INFORMATION
The cleaner is designed to pick up dirt and dust particles. Avoid picking up hard or sharp objects with the cleaner to prevent
hose clogs.
If an extension cord is used it must be 3 wire, grounded type and marked SJTW (suitable for outdoor use) 16 AWG
minimum.
Service Information
The instructions in this booklet serve as a guide to routine maintenance. For additional service information telephone our toll
free number for the nearest Eureka Authorized Warranty Station. You should know the model, type and serial numbers
when you call: USA: 1-800-282-2886 Mexico: 5670-6169
Canada: 1-800-282-2886
If you prefer, you can write to The Eureka Company, Service Division, 807 North Main Street, Bloomington, Illinois 61701, USA.
In Canada write to The Eureka Company, 866 Langs Drive, Cambridge, Ontario N3H 2N7. Refer to The Eureka Limited Warranty
for complete service information.
DO NOT OIL the motor at any time. The bearings are permanently lubricated and sealed.
Thermal Cut Off
This vacuum cleaner has a special thermostat that protects the cleaner in case of motor overheating. If the cleaner suddenly
shuts off, push the on/off switch off (0) and unplug the cleaner. Check the cleaner for a possible source of overheating such as
a full dust bag, a blocked hose or clogged filter. If these conditions are found, fix them and wait at least 30 minutes before
attempting to use the cleaner. After the 30 minute period, plug the cleaner back in and push the on/off switch on (l). If the cleaner
still does not run, then take it to a Eureka Authorized Service Center for repair.
3
1
2
3
4
4
5
67
8
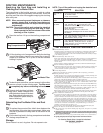
HOW TO USE
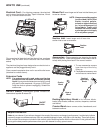
Carrying Handle. Use this handle to carry unit from one
place to another. The handle can also be used for electrical
cord storage.
Quick Cord Release Button. Press in on button for quick
access to electrical cord.
Electrical Cord. The electrical cord can be stored
wrapped around the handle or inside the tool box
compartment.
DANGER: Electrical cords can be hazardous. Please
read safety instructions on electrical cord.
1
2
3
4
6
7
8
5