


4
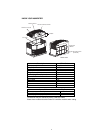
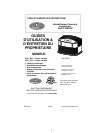
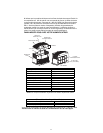
FLOAT
RETAINER
FLOAT
ROD
FLOA
T
FOAM
FLOAT
RETAINER
LOOP
RETAINER
CLIP
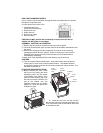
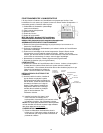
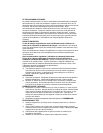
HOW YOUR HUMIDIFIER WORKS
Dry air is drawn into the humidifier through the back and moisturized as it passes
through the evaporative wick.
It is then fanned out into the room.
1. Chassis/Power Pack
(motor and fan assembly)
2. Evaporative wick
3. Water reservoir
4. Dry room air intake
5. Moist air output
CAUTION: Do NOT position the unit directly in front of a hot air duct or
radiator. Do NOT place on soft carpet.
ASSEMBLY, CONTROLS & OPERATION
1) Remove the two polyfoam inserts from the top of the humidifier.
2) Lift off the chassis/power pack and then remove the humidifier tank/cabinet from
the carton.
3) Remove any wrapping from the evaporative wick and all of the remaining
packaging materials from the cabinet. Check to see that you have all of the
following items removed from the boxes accessory kit and cabinet before
discarding the packaging:
● Caster kit ● Float (Styrofoam)/Float rod ● Retainer (key for float rod)
CASTERS
4) Turn the emptied cabinet upside down. Insert each caster stem into the four
caster holes on each corner of the humidifier bottom. The casters should fit
snugly and be inserted until the stem shoulder reaches the cabinet surface. Turn
the cabinet right side up.
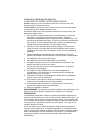
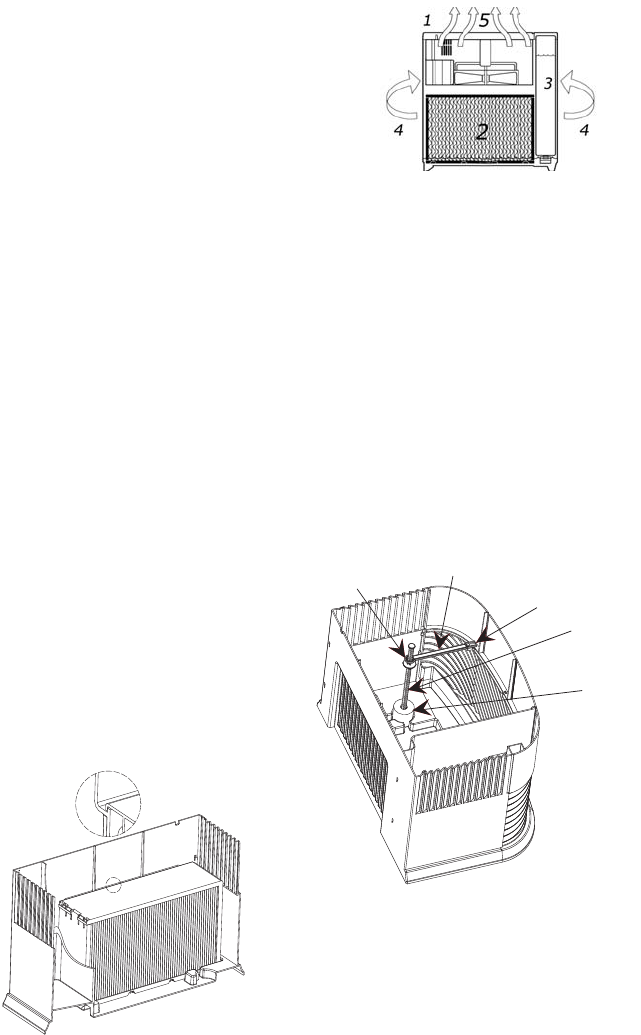
FLOAT AND WICK INSTALLATION
5) Before installing the wick, install
the float rod by placing the white
Styrofoam portion into the recess
in the bottom of the cabinet. Then
place the float retainer loop over
the float rod spindle. Slide the clip
end of the retainer onto the
extension molded into the plastic
ledge until it locks into place. See
illustration at right.
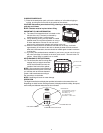
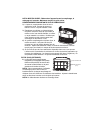
6) Install the 1041 wick into the unit with
the mounting rib on the top edge that hooks over
a rib at the back inside of the cabinet. See inset
on illustration at left.