


Caution: Under certain conditions, cold objects in the room, such
as windows and outside walls, may cause moisture to con-
dense. Severe condensation on window sills and walls may
result in water damage. When these conditions exist, a lower
speed setting is recommended. Note: The unit will not shut off
when the water bottles are empty; however, this will not dam-
age the 2 in 1 air purifier & humidifier.
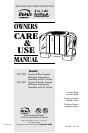
Care and Maintenance
Humidifiers provide comfort by adding moisture to dry, heated, indoor air. To
get the most benefit from the product and avoid misuse, follow all instructions
carefully, specifically the operation, care and maintenance guidelines. Please
note this is an electrical appliance and requires careful attention when in use.
In addition, if you do not follow the recommended care and maintenance
guidelines, microorganisms may be able to grow in the water within the
humidifier’s reservoir.
CLEANING THE TRAY AND REPLACING THE (MODEL
#1040) WICKS
CAUTION: Disconnect the power cord before cleaning or servic-
ing the unit.
IMPORTANT: We recommend cleaning your 2 in 1 air purifier &
humidifier at least once a week. Follow instructions.
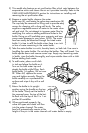
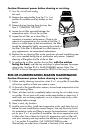
When carrying your 2 in 1 air purifier & humidifier, it must be kept level to
avoid spilling the water from the tray. ALWAYS carry the unit using the
recessed handles on the bottom of both sides of the tray. Remove and carry
water bottles separately from the tray.
Cleaning the unit regularly helps eliminate odors and bacterial and fungal
growth. Ordinary household bleach is a good disinfectant and can be used
in the humidifier tray and bottle after cleaning.
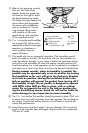
1) Turn off unit and unplug the cord.
2) Remove the water bottles from the 2 in 1 air purifier & humidifier, empty
and place them in a secure location.
3) Locate the two internal spring latches on the bottom center of each side
of the cover. Press inward while lifting up on the cover to release the
latch. Releasing these latches will allow removal of the top housing.
Place the top housing on a flat surface.
4) Remove the air cleaning filter from the inside of the unit. See CLEANING
AND REPLACING THE AIR PURIFICATION FILTER.