


3
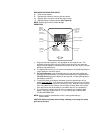
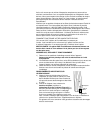
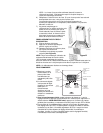
Figure A
Release
Latches
Release
Latches
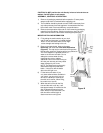
CAUTION: Do NOT position the unit directly in front of a hot air duct or
radiator. Do NOT place on soft carpet.
ASSEMBLY, CONTROLS & OPERATION
1) Remove all packaging materials before operation. Ensure plastic
wrap around wicks is removed before operating unit.
2) The humidifier should be placed at least FOUR inches away from
any walls and away from heat registers. Unrestricted airflow into
the unit will result in the best efficiency and performance.
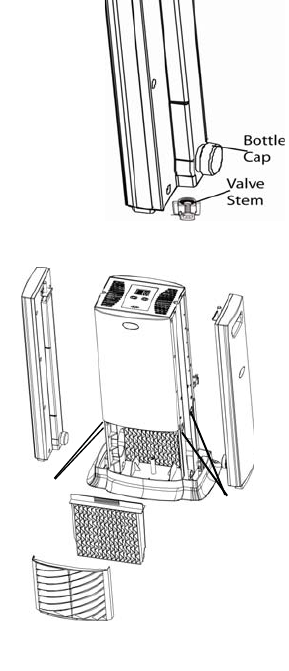
3) Remove the evaporative wicks and all of the remaining packaging
materials from the cabinet. Check to see that you have all of the
items removed from the box before discarding the packaging.
IMPORTANT FILLING INFORMATION
4) Fill by taking the tank/container to your sink
and fill with cool tap water, or bottled distilled
water. Do not use warm water as this might
cause damage and leaking to the unit.
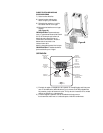
5) Remove the water bottle, observe the water
bottle cap, and locate the valve stem mechanism
(Figure A). The cap may be removed for filling and to
provide easy access for cleaning with a long soft brush.
The valve supplies a regulated amount of
water to the channel and wick. Do not
attempt to increase water flow by
modifying this valve or adding
additional holes to the bottle. Doing so
will void your warranty and may cause
water damage to your home.
NOTE: The water level can be easily
observed through the tinted water
bottle. It is time to refill the bottle
when the refill light is on.
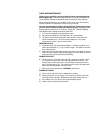
6) Fill the tanks with water. If you
only have softened water available in
your home, you can use it, but you
will notice a buildup of minerals on
the wick much sooner. When filling,
be careful not to overfill.
7) When the tank is filled for the first
time and the wick is still dry, it will
take approximately 30 minutes for the
wick to absorb the water from the
base. After this initial saturation, the
tank should be refilled again to
obtain maximum running time.
Figure B