


16943-5-0806 Page 11
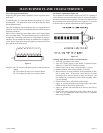
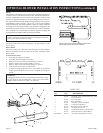
Piezo Pilot Ignitor Instructions
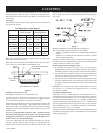
Depressing the ignitor button completely causes a spark to occur
at the pilot.
To light the pilot, it is important that the electrode be 1/8" (3mm)
from the pilot. The spark must occur at the point the pilot flame
hits the thermocouple.
On a new installation with air in the gas line, it is suggested that a
match be used. The match will light the pilot faster than the piezo
under this condition.
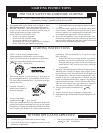
There will be a short blue inner flame with a much larger, lighter
blue, secondary flame. The burner flame may have a small yellow
tip when hot. Dust in the combustion air will produce an orange or
red flame. Do not mistake the orange or red flame for an improper
yellow flame. Clean main burner by applying compressed air into
ports and throat of main burner.
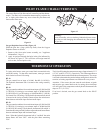
Figure 9
Attention: BF-10, Natural or Propane gas has a front and rear air
shutter.
BF-20, Propane gas only has a front air shutter.
BF-30, Propane gas only has a front air shutter.
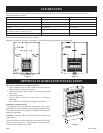
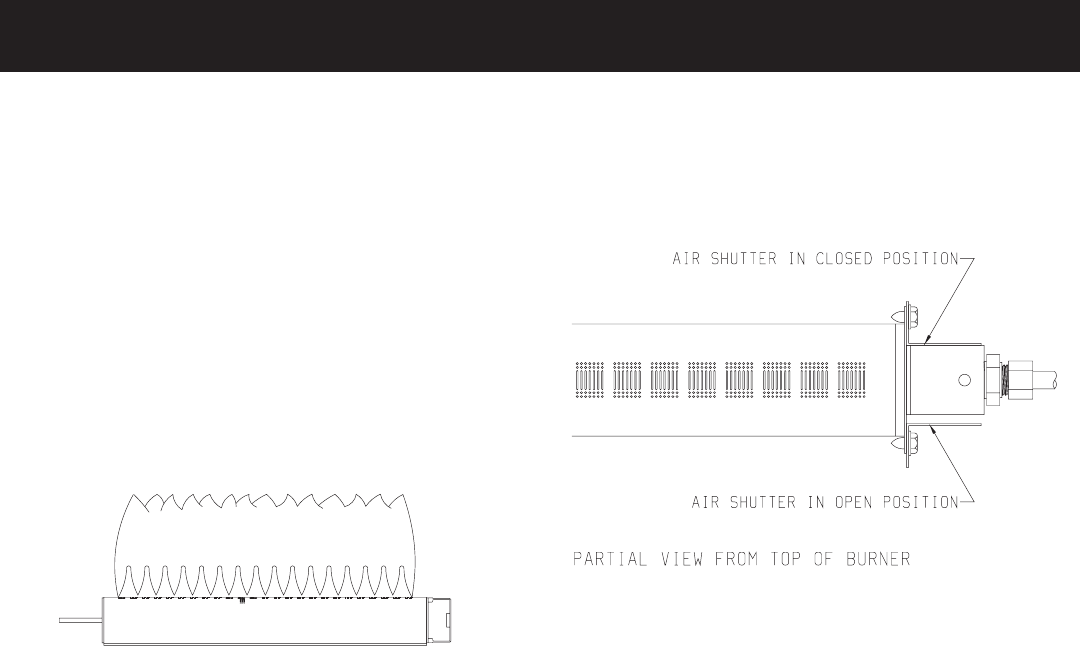
Air Shutter Adjustment (Figure 10)
The air shutter on main burner is factory set at a 3/32" opening. If
yellow flames occur on main burner loosen 1/4" screw on air shutter
in order to increase air shutter opening. The slot on air shutter allows
the air opening to be increased or decreased. Tighten 1/4" screw on
air shutter after air shutter adjustment has been completed.
Figure 10
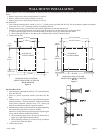
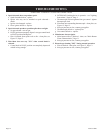
Cleaning Main Burner Orifice and Main Burner
1. Turn OFF gas supply to the heater.
2. Turn OFF electric supply to the heater if optional blower,
SRB-18T or SRB-30T is installed in heater.
3. Remove lower louver from casing assembly (2 screws).
4. Remove reflector from casing assembly (2 screws).
5. Inspect interior of casing assembly for accumulation of dust,
lint or spider webs. If necessary, clean interior of casing
assembly with a vacuum cleaner or apply air pressure. Do
not damage any components within casing assembly when
you are cleaning.
6. Remove main burner orifice from orifice holder.
7. Apply air pressure through main burner orifice and orifice
holder to remove dust, lint or spider webs.
8. Apply air pressure into main burner to remove dust, lint or
spider webs.
9. As parts are being replaced in reverse order, check for gas
leaks at all gas connections before lower louver is replaced
onto casing assembly.
MAIN BURNER FLAME CHARACTERISTICS