


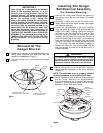
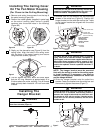

Installing The Hanger
Ball/Downrod Assembly
(For Standard Mounting)
1. Pass the 42" motor leads through the opening in
the ceiling cover. Be sure the cover is oriented
correctly.
2. Separate, untwist and unkink the three motor
leads. Route the motor leads through the hanger
ball/downrod assembly.
3. Loosen the two setscrews in the motor coupling.
Align the clevis pin holes in the downrod with the
holes in the motor coupling. Install the clevis pin
and secure with the hairpin clip (Figure 2). The
clevis pin must go through the holes in the motor
coupling and the holes in the downrod. Be sure to
push the straight leg of the hairpin clip through the
hole near the end of the clevis pin until the curved
portion of the hairpin clip snaps around the clevis
pin. The hairpin clip must be properly installed to
prevent the clevis pin from working loose. Pull on
the hanger ball to make sure the clevis pin is
properly installed.
4
HANGER
BALL/DOWNROD
ASSEMBLY
CEILING
COVER
SETSCREW
CLEVIS
PIN
HAIRPIN
CLIP
DECORATIVE
CAP
SETSCREW
MOTOR COUPLING
Figure 2
REMOVE AND RETAIN
TWO SCREWS AND LOCKWASHERS
LOOSEN THE TWO SCREWS
IN THE KEYHOLE SLOTS
CEILING
COVER
HANGER
BRACKET
Figure 1
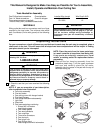
IMPORTANT
Your ceiling fan is designed to be installed
either in the standard manner, or in the
close-to-the-ceiling manner. Using the
standard method, the hanger ball/downrod
assembly will suspend the fan several inches
below the ceiling cover. Using the
close-to-the-ceiling method, the ceiling cover
installs directly on the fan motor housing,
thus mounting the fan 3-1/2 inches closer to
the ceiling than the standard method. In no
case should the fan blades be lower than
seven feet above the floor. Depending on
your desired mounting method, proceed to
“INSTALLING HANGER BALL/DOWNROD
ASSEMBLY” for standard mounting, or to
“INSTALLING CEILING COVER ON FAN
MOTOR HOUSING” for close-to-the-ceiling
mounting.
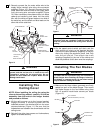
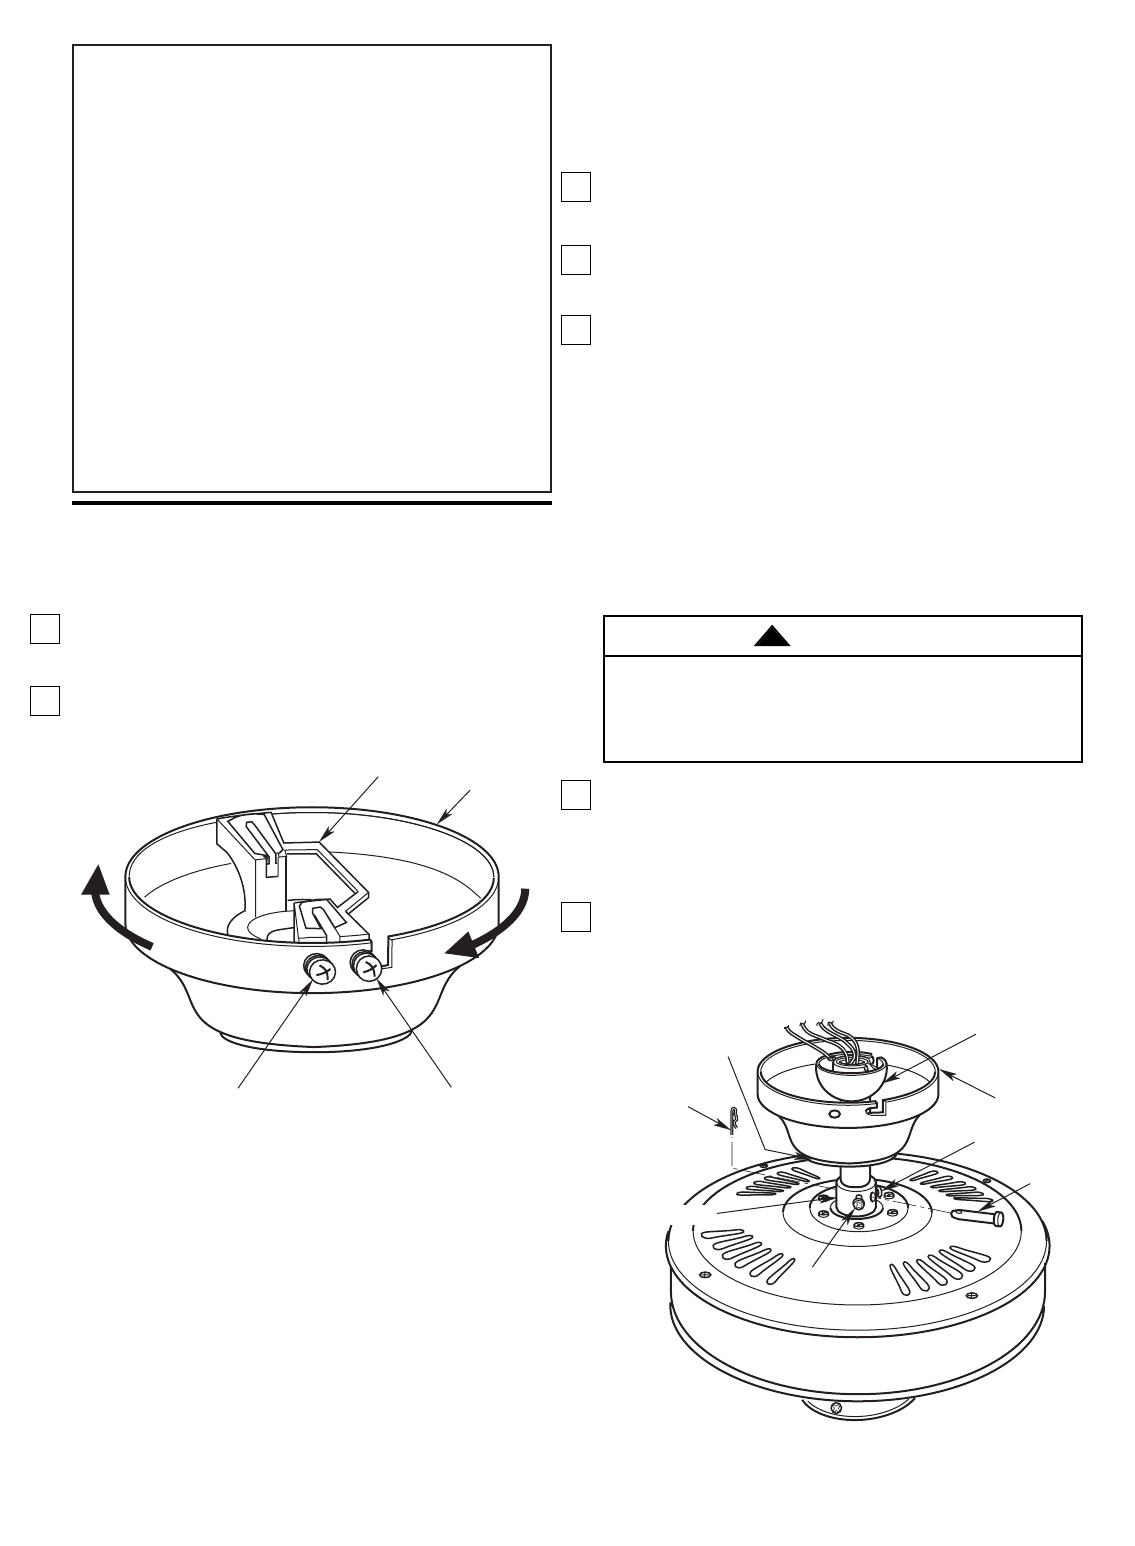
It is critical that the clevis pin in the motor coupling
is properly installed and the setscrews securely
tightened. Failure to verify that the pin and setscrews
are properly installed could result in the fan falling.
WARNING
!
4. While pulling up on the hanger ball, securely
tighten the two setscrews in the motor coupling
(Figure 2).
NOTE: The setscrews must be properly installed
as described above, or fan wobble could result.
5.The fan comes with blue, black and white leads that
are 42” long. Measure up approximately
6 to 9-inches above top of hanger ball/downrod
assembly. Cut off excess leads and strip back
insulation 1/2-inch from end of leads.
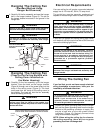
1. Loosen the two screws in the keyholes slots of the
ceiling cover. Remove and retain the other two
screws and lockwashers (Figure 1).
2. Turn the ceiling cover and remove the hanger
bracket.
Removal Of The
Hanger Bracket