


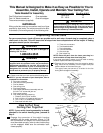
Using Your Ceiling Fan
1. Restore electrical power to the outlet box by turning
the electricity on at the main fuse box.
2. Check the operation of the fan by gently pulling on
the pull chain switch.
3. All fans are shipped from the factory with the re-
versing switch positioned to circulate air downward.
If airflow is desired in opposite direction, turn your
fan off and wait for the blades to stop turning, then
slide the reversing switch to opposite position, and
turn fan on again. The fan blades will turn in the
opposite direction and reverse the airflow.
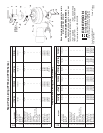
Your fan model is equipped with a 4-position,
3-speed pull chain switch. The operating sequence
is as follows:
THREE-SPEED
1st Pull – High
2nd Pull – Medium
3rd Pull – Low
4th Pull – OFF
6
If you feel that you do not have enough electrical
wiring knowledge or experience, have your fan
installed by a licensed electrician.
1. Connect the green grounding lead from the hanger
ball and the green grounding lead form the hanger
bracket (if present) to the grounding conductor of
supply (this may be a bare wire or wire with green
colored insulation).
NOTE: If you are using an Emerson Light Fixture
with your fan, remove the three screws securing
the switch cup assembly to the fan, remove the
switch cup assembly, and disconnect the
connector. Remove the screw plug from the
bottom of the switch cup and install the light in
accordance with the light kit Owner's Manual.
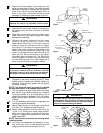
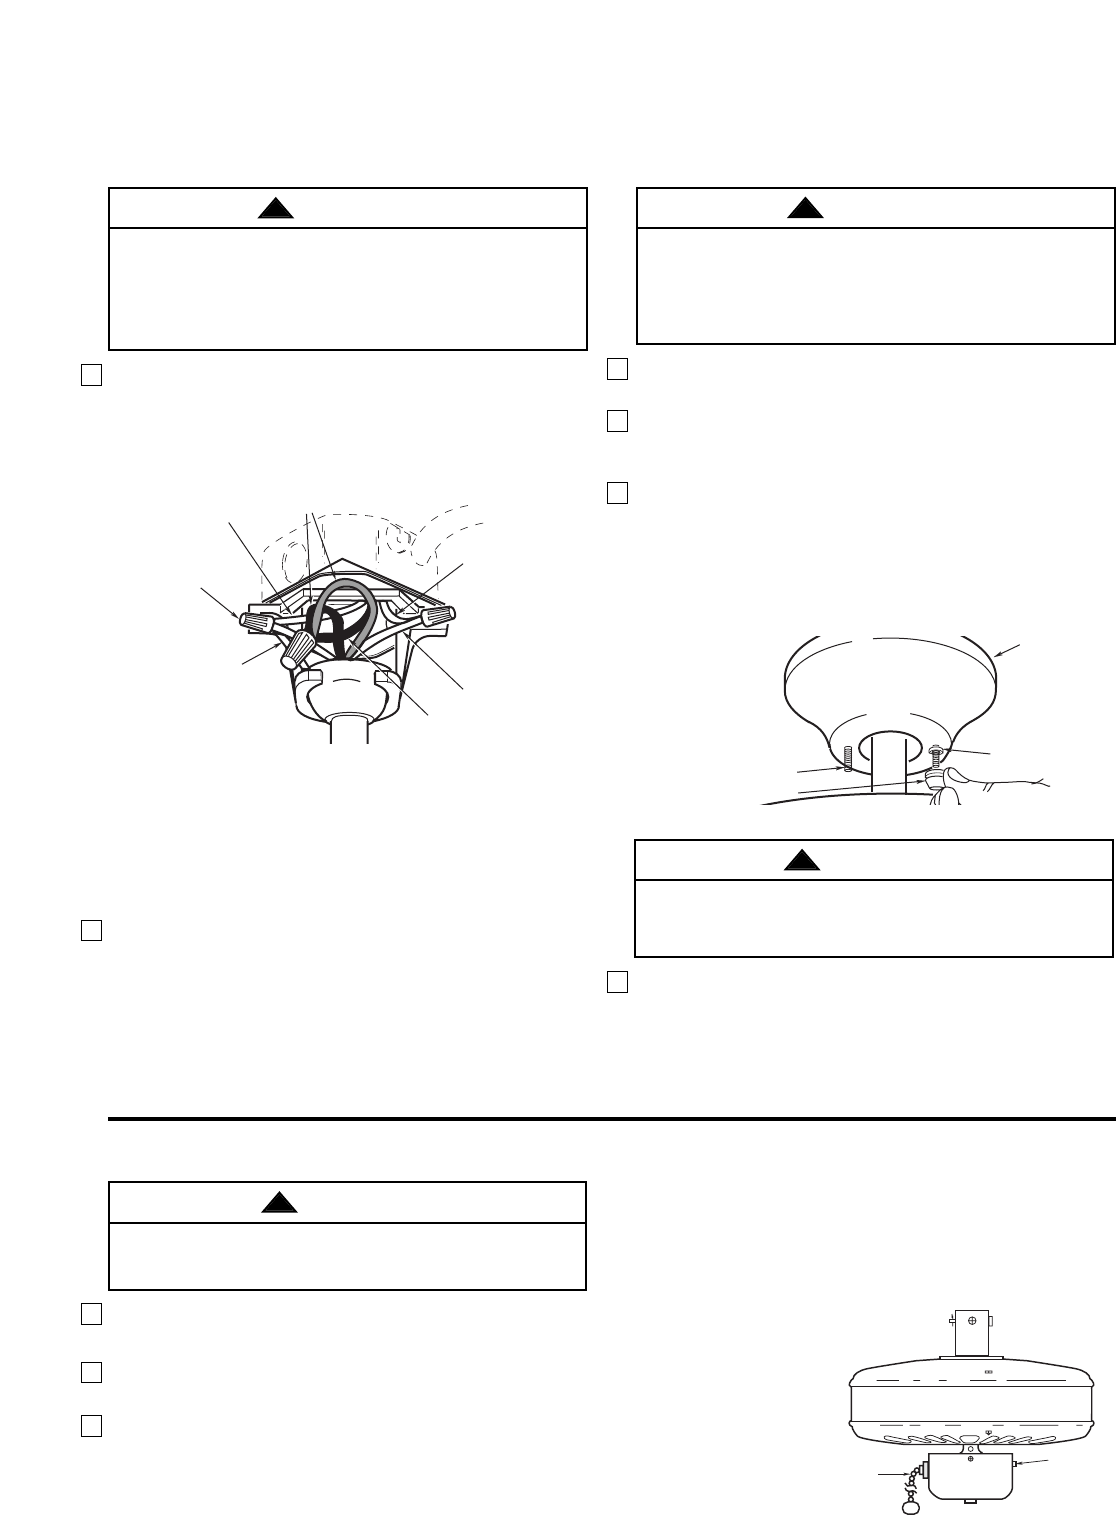
2. Connect the fan motor white wire to the supply
white (neutral) wire using a wire connector
(supplied) (Figure 9). Connect the fan motor black
wire and blue wire to the supply black (hot) wire
using a wire connector (supplied) (Figure 9). Your
fan is now wired to be turned on and off from the
fan switch. After connections have been made, turn
leads upward and carefully push leads into the
outlet box, with the white and green leads on one
side of the outlet box and the black and blue leads
on the other side of the outlet box.
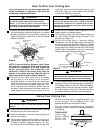
3. Screw the two threaded studs (supplied) into the
tapped holes in the hanger bracket.
4. Lift the ceiling cover up to the threaded studs and
turn until studs protrude through the holes in the
ceiling cover (Figure 10).
5. Secure the ceiling cover in place by sliding
lockwashers over the threaded studs and installing
the two knurled knobs (supplied). (Figure 10). Tighten
the knurled knobs securely until the ceiling cover fits
snugly against the ceiling and the hole in the ceiling
cover is clear of the downrod. Your fan is now wired
to be turned on and off from the fan switch.
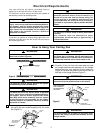
How To Wire Your Ceiling Fan
To reduce the risk of fire or electrical shock, do not
use this fan with any solid-state speed control
device.
GROUND
WIRE
WIRE
CONNECTORS (3)
GREEN WIRE
(GROUND)
FROM FAN
WHITE SUPPLY
(NEUTRAL)
WHITE FAN
WIRE
BLACK SUPPLY
(HOT)
BLACK AND BLUE
FAN WIRES
Figure 9
CEILING COVER
THREADED STUD
KNURLED KNOB
LOCKWASHERS (2)
Figure 10
SPEED
CONTROL
SWITCH
REVERSIBLE
SWITCH
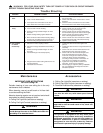
WARNING
!
6. Cut the 3-speed switch pull chain to a desired length
(optional). Connect the wood pendant (supplied) to
the 3-speed switch pull chain by sliding the wooden
pendant (small hole first) onto the pull chain. Attach
the chain coupler to the end of the chain and allow
the wooden pendant to fall down over the coupling.
To avoid possible electrical shock, be sure electricity
is turned off at the main fuse box before wiring.
NOTE: If you are not sure if the outlet box is
grounded, contact a licensed electrician for advice,
as it must be grounded for safe operation.
WARNING
!
Check to see that all connections are tight, including
ground, and that no bare wire is visible at the wire
connectors, except for the ground wire. Do not
operate fan until blades are in place. Noise and fan
damage could result.
WARNING
!
To avoid possible fire or shock, make sure that the
electrical wires are completely inside the outlet box and
not pinched between the ceiling cover and the ceiling.
WARNING
!