


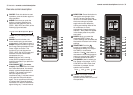
Clock adjustment
Before you start operating the air conditioner, set the clock of the remote
controller using the procedures given in this section. The clock panel on the
remote controller will display the time regardless of whether the air conditioner
is in use or not.
Initial setting of the clock
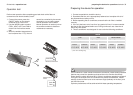
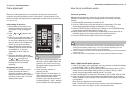
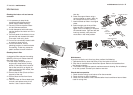
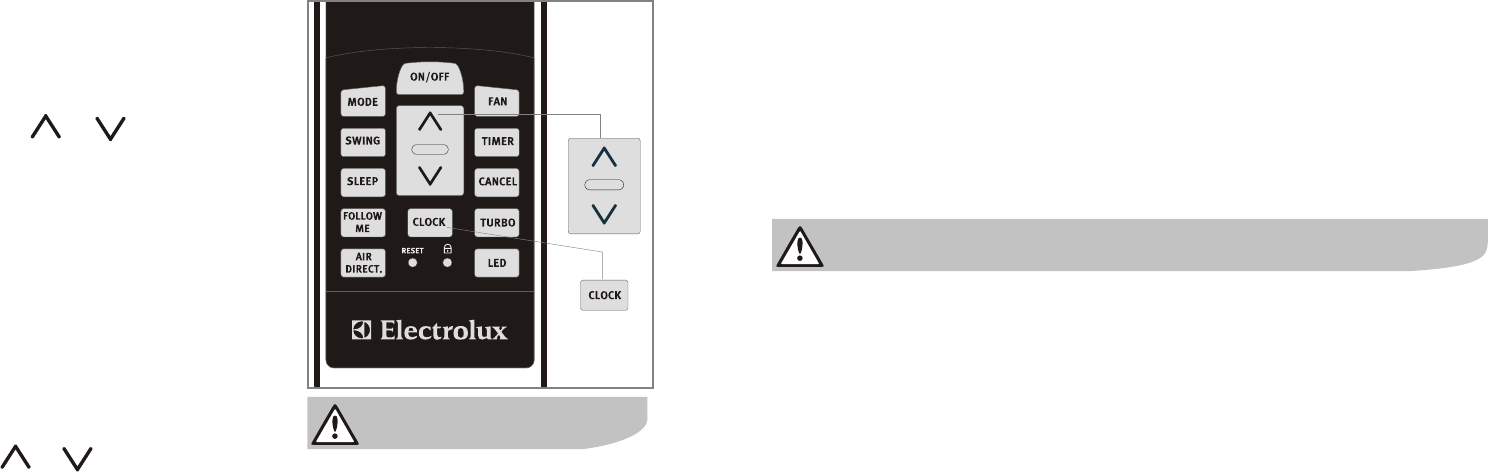
1. After batteries are inserted in the
remote controller, the clock panel
will display "12:00" and begin to
flash.
2. Press or buttons to set
time.
3. Each time you press the button, the
time moves forward or backward
by one minute depending on which
side you press. The time alters as
quickly as you push the button.
4. Keep pressing the button without
releasing, the time moves forward
or backward by 10 minutes
depending on which side you
press.
5. When the right time is achieved,
press the CLOCK button or release
the or and wait for 5
seconds, the clock time stops
flashing and the clock starts
operating.
Readjusting the clock
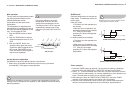
1. Press the CLOCK button on the
remote controller for about 3
seconds, the colon in the clock
display will start to flash. To set the
new time, follow 2 and 5 of "Initial
Setting of the clock".
1. The time of the CLOCK must be set
before the AUTO-TIMER feature will
operate. The CLOCK time can not
be adjusted after setting the AUTO-
ON/OFF timer.
2. Clock accuracy is within 15
seconds per day.
3. Static electricity or other factors (in
case of extremely high voltage) can
cause remote controller clock
initialize. If your remote controller is
initialized (flashing "12:00"), readjust
the clock before you start operation.
1
39 electrolux clock adjustment
How the air conditioner works
Automatic operation
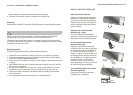
When the Air Conditioner is ready for use, switch on the power and the
OPERATION indicator lamp on the display panel of the indoor unit starts
flashing.
1. Use the MODE .select button to select AUTO.
2. Push the TEMP button to set the desired room temperature. The most
comfortable temperature setting are between 21ºC o to 28ºC.
3. Push the ON/OFF button to start the air conditioner. The OPERATION lamp
on the display panel of the indoor unit lights. The
operating mode is AUTO FAN SPEED is automatically set and there are no
indicators shown on the display panel of the remote controller.
4. Push the ON/OFF button again to stop the unit operation.
COOL / HEAT and FAN ONLY operation
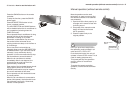
1. If the AUTO mode is not comfortable, you may manually override the settings
by using COOL, HEAT* or FAN** ONLY modes.
2. Push the TEMP button to set the desired room temperature. When in COOL
mode, the most comfortable settings are 21ºC or above. When in HEAT
mode, the most comfortable settings are 28 C or b elow.
3. Push the FAN SPEED to select the FAN mode of AUTO, HIGH, MED or LOW.
4. Push the ON/OFF button, the operation lamp lights and the air conditioner
start to operate as your settings. Push the ON/OFF button again to stop this
unit operation.
* Nota: Only for heating and cooling models
**Note: The FAN ONLY mode can not be used to control the temperature.
While in this mode, only steps 1,3 and 4 may be performed.
1. When you set the air conditioner in AUTO mode, it will automatically select cooling,
heating(cooling/heating models only), or fan only operation depending on what
temperature you have selected and the room temperature.
2. The air conditioner will control room temperature automatically round the temperature
point set by you.
3. If the AUTO mode is uncomfortable, you can select desired conditions manually.
how the air conditioner works electrolux 40