


4. CHANGING THE BATTERY
(Models Ei141 / 144 / 146 only)
1. Switch off mains power to alarm (green light on cover
should go out).
2. Remove unit as shown in “ALARM REMOVAL” section on
page 2.
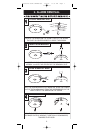
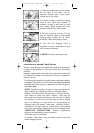
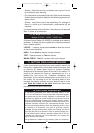
3. Locate battery slot in base of alarm as shown below.
4. Unclip battery from battery snap connectors.
5. Connect new battery by clipping back on to battery snap
connectors. Use only 9V Alkaline batteries
Duracell MN1604, Energizer 522. Other batteries can
cause problems.
We recommend that the “use by date” on the battery should
still have at least 2 years to go. Older batteries will give
beeps prematurely.
6. Slide unit back on to the base. A click should be heard as
the alarm engages. (The unit cannot be replaced on the
base unless a battery is installed).
7. Press and hold the test button - horn should sound loudly.
8. Reinstate mains power to alarm (green light on cover
should come on).
We recommend that the battery is replaced at least every
three years for optimum performance.
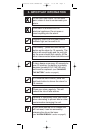
5. TESTING & MAINTAINING YOUR ALARM
INSPECTION &TESTING PROCEDURE
Check all your alarms weekly, especially after initial
installation or after re-occupation (e.g. following a holiday):
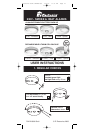
(i) Check that the green mains indicator light is on. (If it is
off check circuit breakers, fuses and wiring etc.) Check the red
light on the cover flashes every 40 seconds.
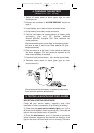
(ii) Press the test button for up to 10 seconds to ensure the
sensor chamber, electronics and sounder are working. A red
light on the cover, will flash while horn is sounding. The alarm
4
B16009-R0-160RC SERIES-U&C 17/1/07 11:13 AM Page 3