5
COMPLETION & STORAGE
1. Switchoffsteamandvacuumpumpswitches,andunplugtheunit.
2. Allowtheunittocoolcompletelyandthenemptytheunitandwastewatercollectiontankofanyremainingwater.Neverleave
water in the unit whilst being stored.
3. Once the unit has cooled, wind the cable around the base of the feet on the unit and then wind the hose around the leg clips.
Slot the steam plate into the side slots on the feet.
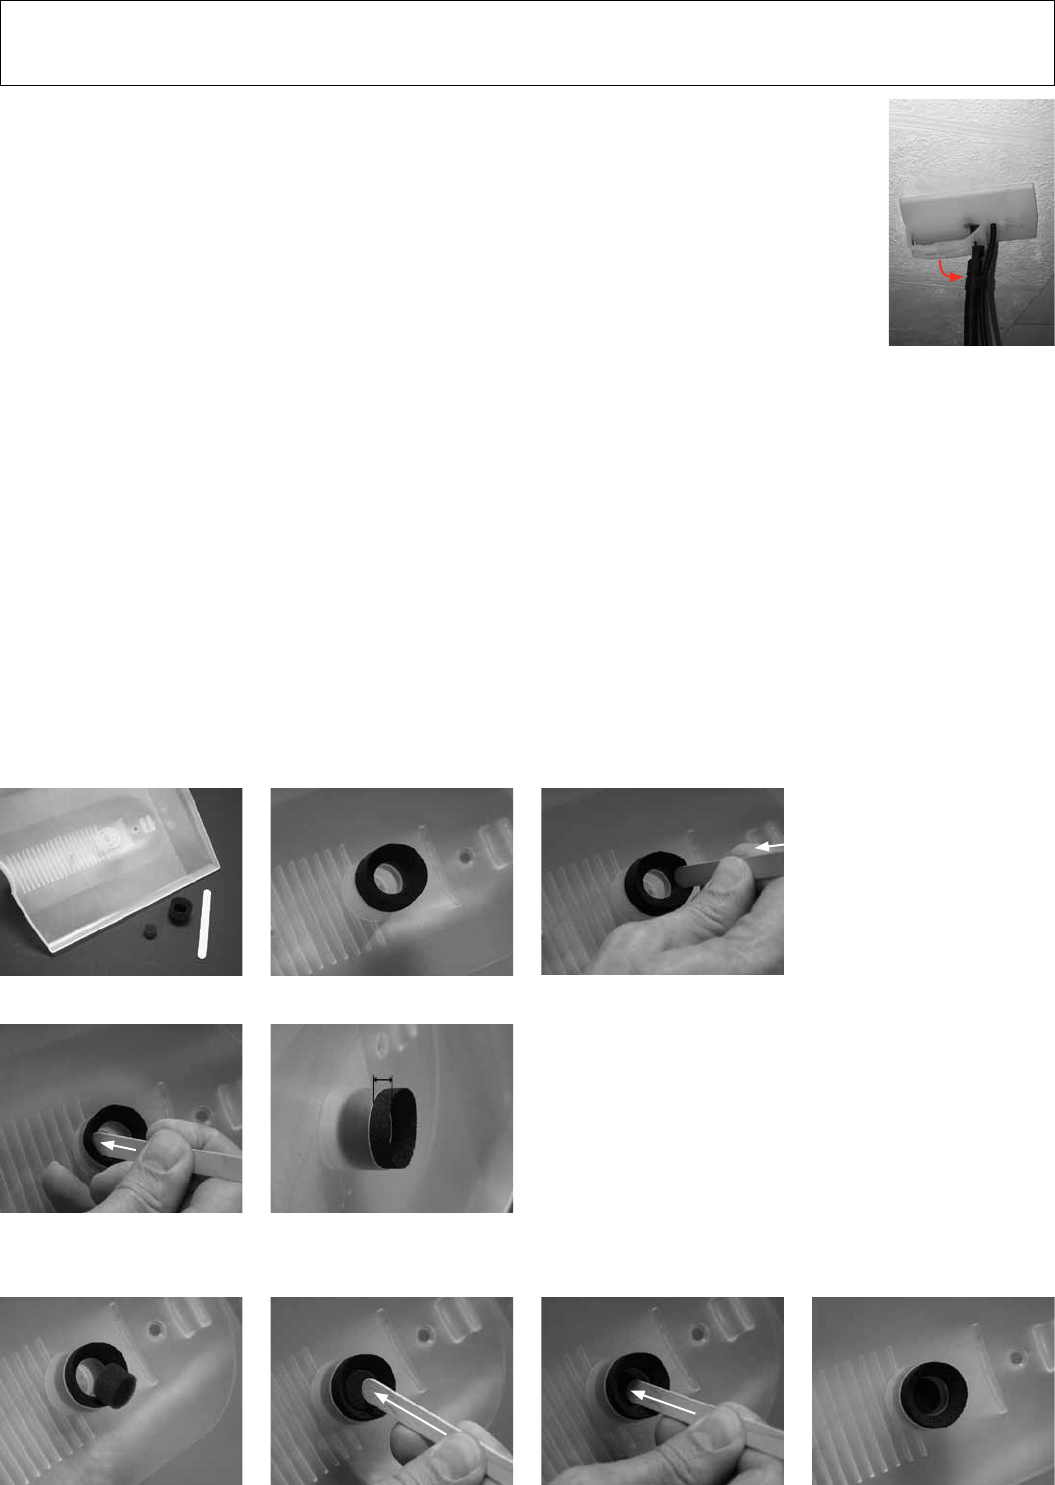
HOW TO ASSEMBLE THE SPARE VACUUM CUP
AND STEAM PLATE FILTER
Insertthevacuumseal(6)intothesteamplateasshown.
Insertthefoampumplter(7)asshown.
1.1 1.2 1.3
1.4
1.5
2.1 2.2 2.3 2.4
CEILINGS
Please note: While using the steam plate on the ceiling the unit will expel a small amount of water out of the base of the
unit from the vacuum pump exhaust hose onto the surface below. Ensure that all oor surfaces are protected by dust
sheets or plastic.
Please ensure that the hose is unclipped from the steam plate handle when working on the ceiling,
as shown. This will enable the hose to hang vertically and make sure the steam plate remains in
position.
1. Ifyouarerighthanded,holdthesteamplateinyourlefthandandplaceatagainsttheceilingwhere
youwishtocommenceremovingtheArtex
®
/paper.
2. Leavetheplateontheceilingforamaximumof10seconds.Thelengthoftimewilldependonthetype
ofcoveringyouareremoving.
3. Ifyouarelefthandedyoumaynditeasiertooperatewiththeotherhand.
4. Movethesteamplatetothesectionimmediatelynexttowhereyouhavejustbeenworkingandusea
wallscrapertoremovethesectionthathasjustbeensteamed.
5. Emptytheceilingwastewatertankwhenitstartstobecomefull.Itholdsatotalof500mlofwaterand
in78minutesshouldonlyrequireemptyingonceifafulltankisused.
6. ByworkinginthiswayyoushouldbeabletoremoveArtex
®
/papercontinuously.
7. Youmayhavetoleavetheplateontheceilingforlongerperiodsorre-steamifnotcompletelyremoved.
8. Operatethesteameruntilsteamisnolongerproduced(thereisasafetycut-outwhenwaterlevelgetstoolow),switchoffthe
vacuumandleaveforaminimumof2minutesbeforerelling.Allowtocoolcompletelybeforepackingaway.
3mm


