7
CENTRAL RV VACUUM
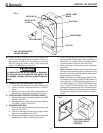
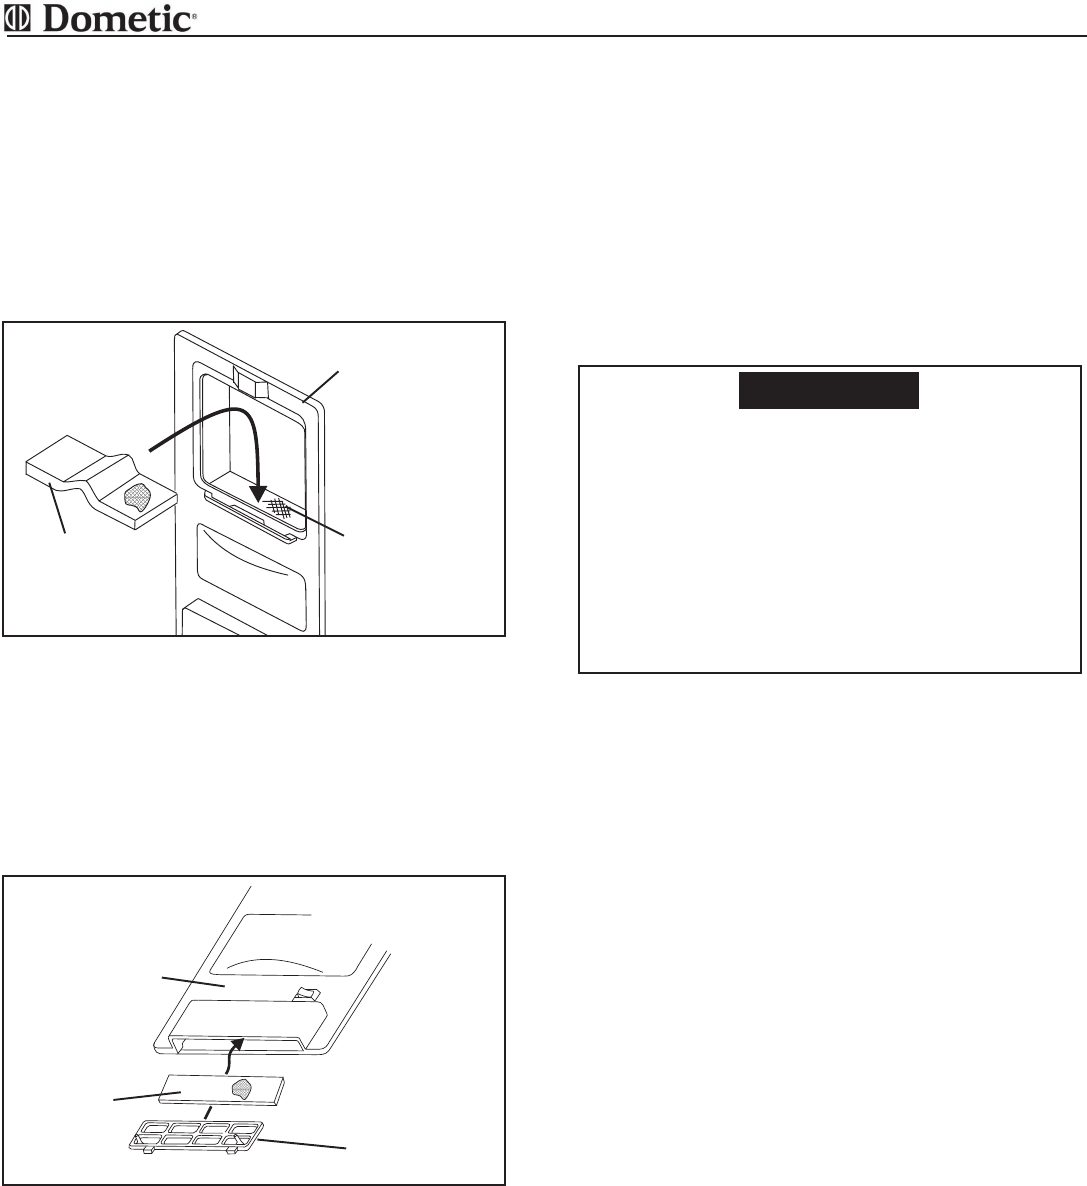
F. CHANGING MOTOR FILTER
1. Remove completely the door with the dust bag.
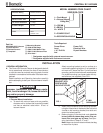
2. Remove the motor filter from the bottom of the
vacuum cleaner cavity. See FIG. 6.
3. Install the new motor filter with dark side up. Tuck
in the corners so that the filter lays flat on the grid
in the cavity.
Note: Clean the dirty motor filter by washing in mild
soap by hand. Do not machine wash. Let filter air
dry before replacing. See note in Step D Changing
Dust Bag.
FIG. 6
MOTOR FILTER
WITH DARK
SIDE UP
FRONT
PANEL
FILTER MUST
LAY FLAT ON
GRILL TUCK
CORNERS IN
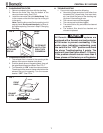
G. CHANGING EXHAUST FILTER
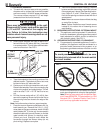
1. The exhaust filter is located in the opening at the
bottom of the vacuum cleaner front panel.
2. Push the plastic pins on the gate upward, then pull
the gate frame forward and down. See. FIG. 7.
3. Turn the switch to “ON” to start the vacuum cleaner.
The exhaust of the vacuum cleaner should blow the
exhaust filter out the opening. Turn the vacuum
cleaner “OFF”. See FIG. 4.
FIG. 7
EXHAUST
FILTER
FRONT
PANEL
GATE
H. TROUBLESHOOTING
1. If your motor stops check the following:
a. Vacuuming large amounts of dust other than
household dirt, (drywall dust, fine wood dust,
etc.) can block the pores of the dust bag rap-
idly even if the dust bag is new.
b. The vacuum hose could be clogged.
c. The vacuum tool could be clogged.
d. The motor filter is dirty and should be cleaned
or replaced.
e. The exhaust filter should be checked and
cleaned or replaced.
All Dometic built-in vacuum systems are
equipped with a thermal overload protector
at the motor to prevent overheating. If the
motor stops, indicating overheating, push
the switch to the “OFF” position and check
the above Troubleshooting 5 points. The
motor will reset itself after about 1-1/2 hours.
If the problem should reoccur more than 3
times, please call the factory or selling dealer.