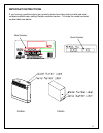
DIMPLEX MANTEL SURROUND KIT OR CUSTOM MADE MANTEL SURROUND
1. Select a suitable location that is not susceptible to moisture and is away from drapes,
furniture and high traffic.
2. Place the fireplace in the desired location to see how it will look in the room.
3. For ease of electrical hook up you may wish to locate the fireplace near an existing
outlet. (refer to NOTE 1)
4. Store the fireplace in a safe dry and dust free location.
5. Assemble the mantel surround kit (refer to the mantel assembly instructions) or
construct the custom surround with an opening of 30 ½” X 11 ¾ ” X 25 ¾”
WARNING
Do not attempt to wire your own new outlets or circuits. To reduce the risk of fire, electric
shock or injury to persons, always use a licensed electrician.
FIREPLACE INSERT INSTALLATION
1. Make sure the units MAIN ON/OFF switch is switched OFF (refer to operating
instruction section).
2. Plug the unit into a 15Amp/120volt outlet. If the cord does not reach, you may use an
extension cord rated for a minimum of 1875 watts.
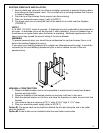
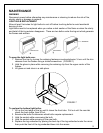
3. Push the fireplace into the opening being careful not to damage the base of the mantel
or cabinet so that the fireplace is flush with the mantel or cabinet.
4. Level the unit with shims if necessary (not provided).
5. Install the trim onto the fireplace (refer to trim installation instructions).
WARNING
Ensure the power cord is not installed so that it is pinched or against a sharp edge and
ensure that the power cord is stored or secured to avoid tripping or snagging to reduce the
risk of fire, electric shock or injury to persons.
OPERATION
Initializing The Remote Control
1. Turn on the electrical power at the circuit breaker.
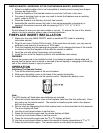
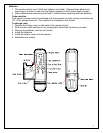
2. Slide open the battery cover on the back of the remote transmitter.
3. Install three AAA batteries into the remote control. Replace the battery cover.
Note:
The LCD display will flash when new batteries are inserted.
4. Move the remote transmitter close to the fireplace (less than five feet preferred). Press
any button on the remote control. The remote is transferring the code to the receiver
built into the fireplace.
5. Set the clock by depressing the button marked clock on the transmitter for five seconds.
The hour display will flash.
6. Use the up and down buttons to set the hour.
7. Press the clock button again and the minute display will flash.
8. Use the up and down buttons to set the minute.
9. Press the clock button again and the
0
F or
0
C display will flash.
10. Use the up and down buttons to select the remote to display temperature in
0
F or
0
C
11. Press the clock button again. The remote control is now ready for operation.
5


