


3
Maintenance
WARNING: ALWAYS DISCONNECT FROM THE MAINS SUPPLY BEFORE ATTEMPTING ANY MAINTENANCE
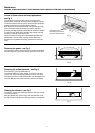
Fig. 4
Fig. 5
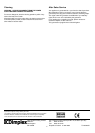
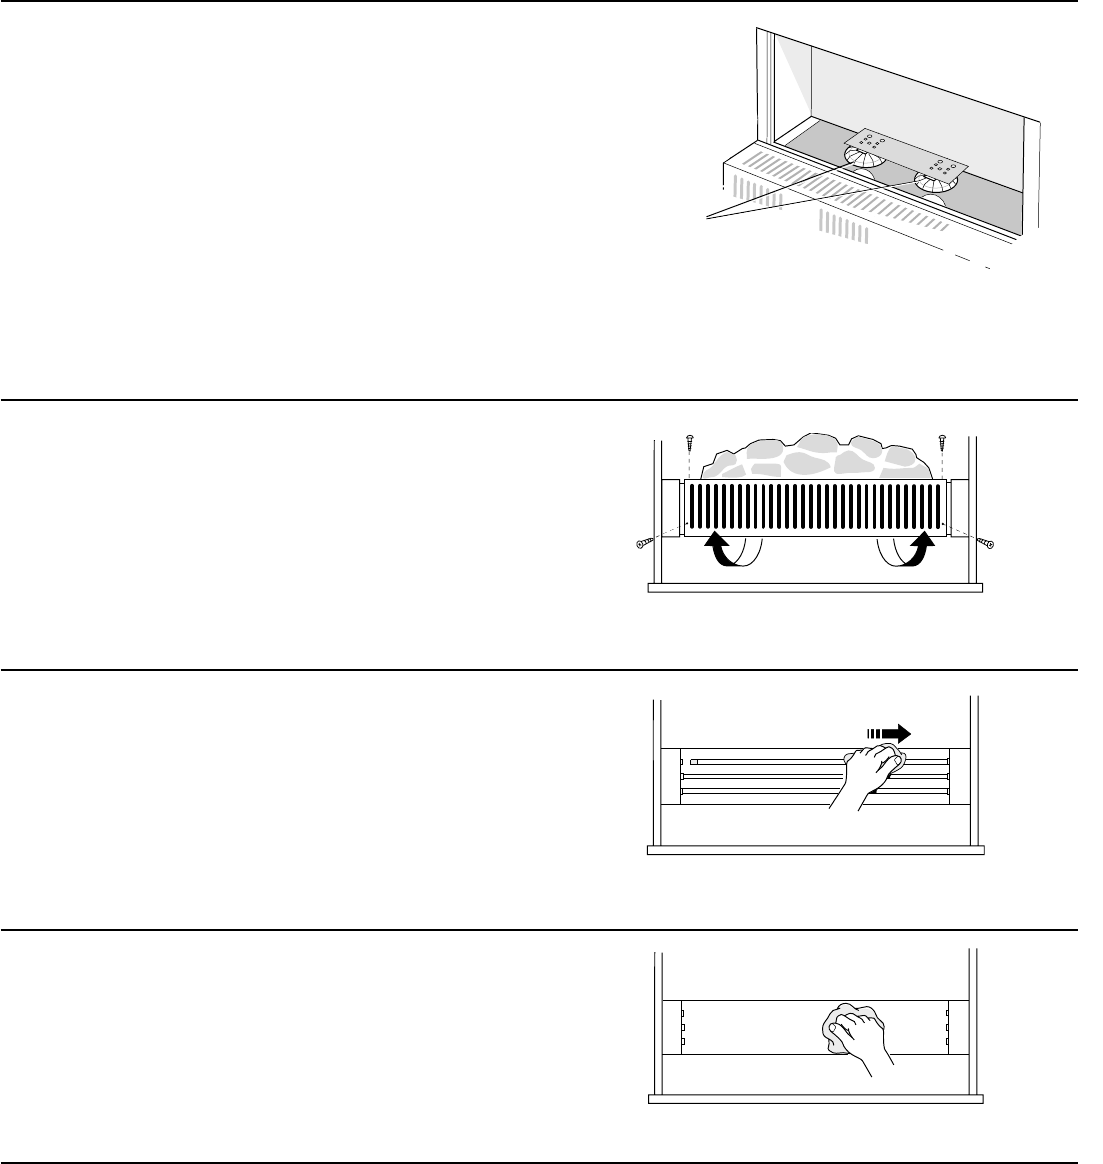
Fig. 6
Fig. 7
Access to flicker rotors and lamp replacement –
see Fig. 4
The fuel effect is secured by two screws, one at each end.
Slacken these screws (do not remove them completely) until the
fuel effect is released, then lift it clear. Ensure that the screws are
partially inserted into the fuel effect before refitting it.
Each flicker rotor should sit horizontally on its pin and spin freely
without fouling its mounting bracket. If necessary, adjust the
bracket by bending slightly (the plastic diffuser material is flexible).
To replace a lamp, bend up the defective lamp’s flicker rotor top
bracket arm carefully and lift off the rotor.
Replace the defective lamp with a 60 watt B22 fuel-effect lamp.
Reassemble in reverse order, ensuring that the diffuser/top
bracket arms are positioned correctly and the flicker rotors spin
freely.
Removing the guard – see Fig. 5
Unscrew the two screws at each end of the guard, then withdraw
the lower edge of the guard first. Refit the guard in reverse order.
Removing the radiant elements – see Fig. 6
First remove the guard, as detailed above.
The element holders are spring loaded. To remove an element,
grip one end using a soft cloth to protect the surface, then push
carefully but firmly to one side until the other end disengages from
its socket. Withdraw the element carefully. Refit in reverse order.
Cleaning the reflector – see Fig. 7
The reflector may be more easily cleaned if the elements are first
removed (see above).
Wipe the reflector with a warm soapy cloth, then buff with a soft
dry cloth. DO NOT use abrasive cleaning powders or metal polish.
Ensure flicker rotors
rotate freely on pins and that
lamps are in sockets correctly