


www.desatech.com
117148-01C
2
Left Side
Right Side
Header
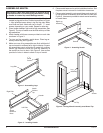
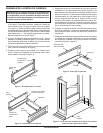
ASSEMBLING MANTEL
IMPORTANT: More than one person is required to lift
assembled mantel. Lift mantel by leg assemblies. Lifting
by header or mantel top could damage mantel.
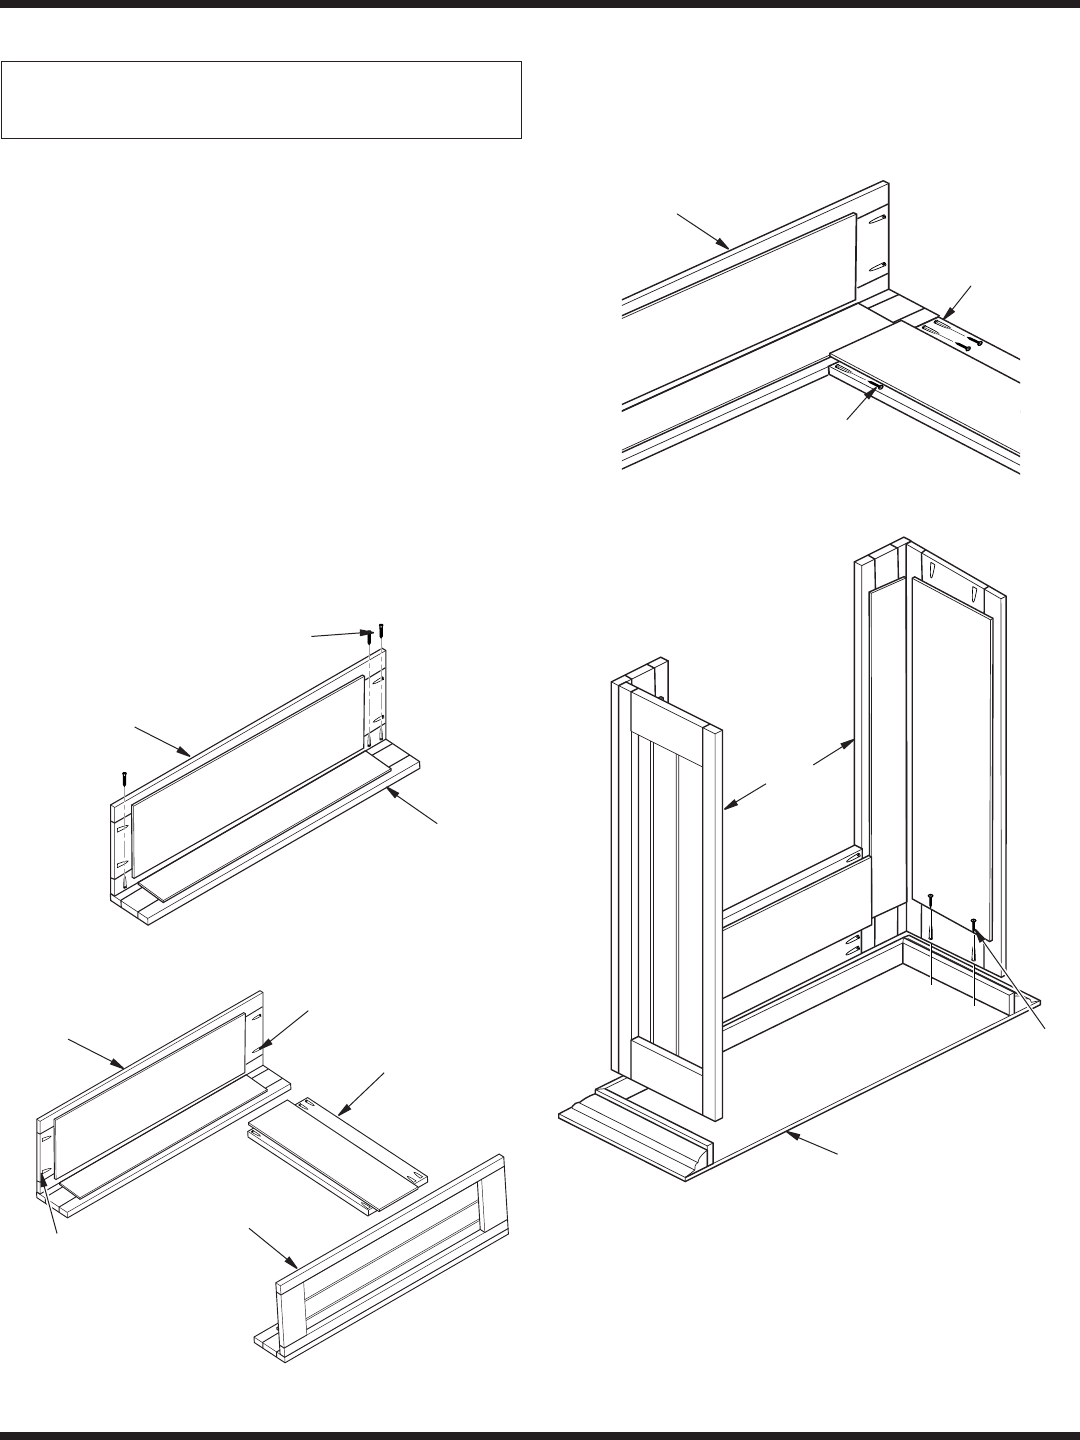
1. Some models require side/corner assembly. For these
models, lay leg side on oor. Position leg as shown in Figure
1. Align predrilled screw holes in leg and leg side. Make
sure ends are ush. Attach with two or three 1
1
/4" wood
screws, depending on your model. Repeat for other leg.
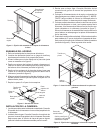
2. Place header between right and left leg assemblies (see
Figure 2). The top of header must be ush with top of side
leg assemblies.
3. Attach header with three screws provided on each side
as shown in Figure 3.
4. Turn top and leg assembly upside down. Place leg as-
sembly inside top (see Figure 4).
5. Make sure rear of leg assemblies are ush with back of
top and mantel is centered left to right inside top. Square
leg assemblies evenly with sides of mantel top, making
certain gap between mantel top and leg assembly is
the same from front to back. See Figure 4. Use screws
provided in holes in sides to attach to top of mantel.
Right Leg
Assembly
Header
Screws
Figure 2 - Installing Header
Figure 4 - Placing Mantel Assembly onto Mantel Top
Attach
Mantel to
Base
Attach
Sides to
Top
Top
Leg
Assembly
Screws
Figure 3 - Attaching Header
Figure 1 - Assembling Legs
1
1
/
4
"
Wood
Screws
Leg
Leg Side
6. Place mantel base next to wall at installation location. See
replace owner's manual for installation clearances.
7. Place mantel assembly onto mantel base and center left
to right with back of assembly ush with back of base (see
Figure 5). Use screws provided to attach mantel assembly
to mantel base.