


13
105070
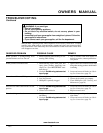
OWNERS MANUAL
INSTALLATION
Continued
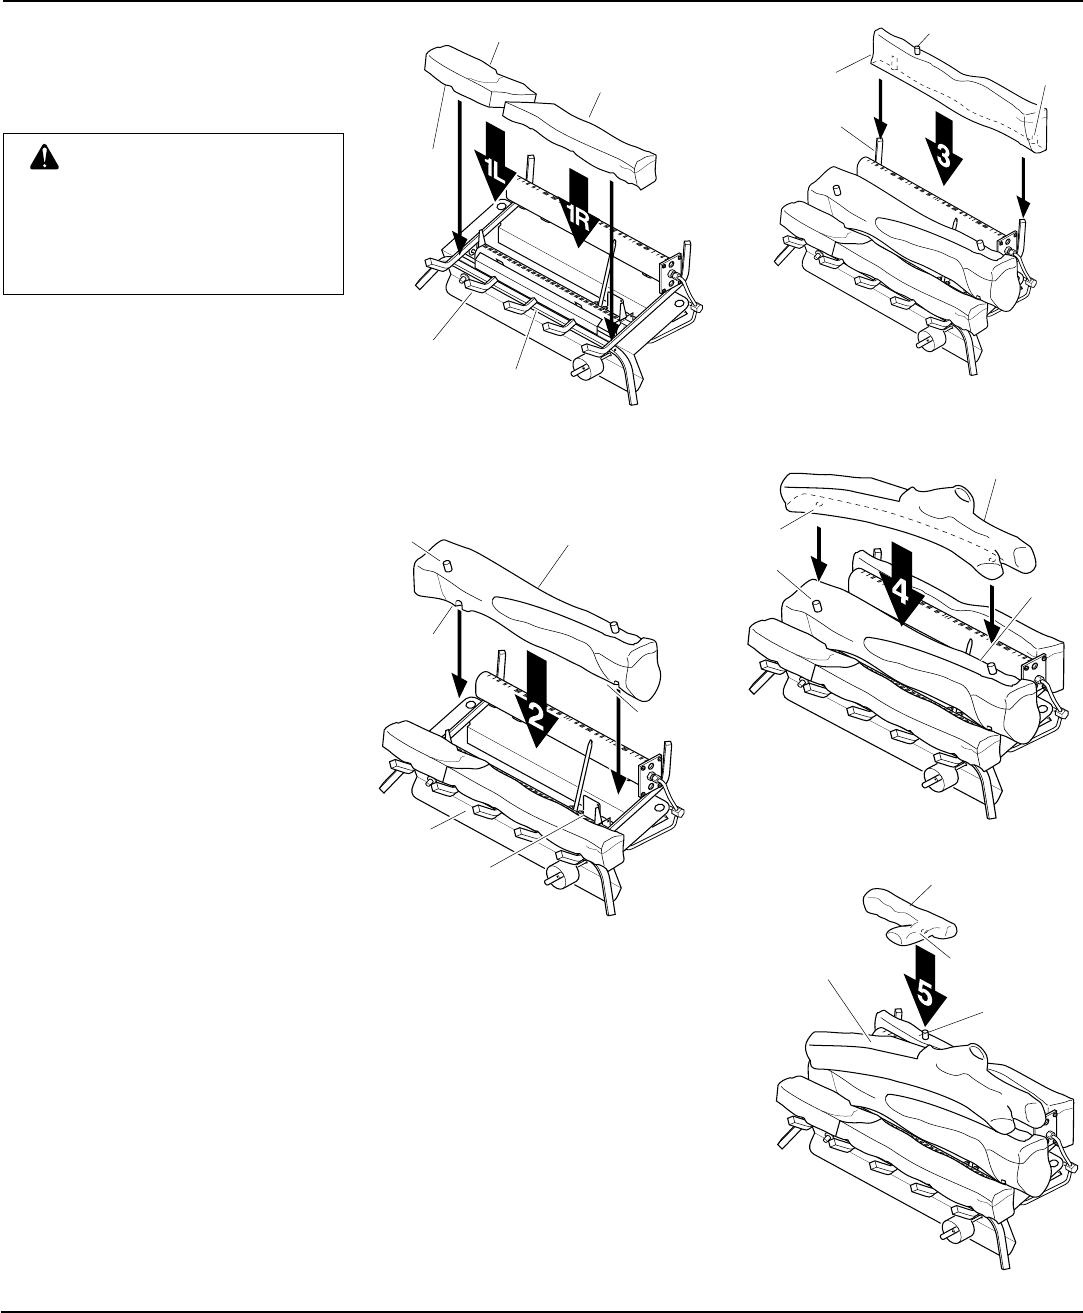
WARNING: Failure to posi-
tion the parts in accordance with
these diagrams or failure to use
only parts specifically approved
with this heater may result in prop-
erty damage or personal injury.
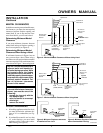
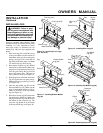
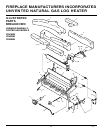
INSTALLING LOGS
Each log is marked with a number. These
numbers will help you identify the log when
installing. It is very important to install
these logs exactly as instructed. Do not
modify logs. Only use logs supplied with
heater.
1. Place front log (#1L and #1R) on top
of the grate. Make sure the notches in
the bottom of the logs fit over the grate
prongs (see Figure 16). Push back of
logs flush with metal grate bar.
Note:
18" model only has one front log.
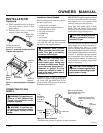
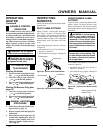
2. Rest bottom middle log (#2) behind
metal posts on front burner. Make sure
the grooves in the bottom of the log fit
over the grate. Bring the log forward
next to the metal posts. The pegs on
the log must be on top (see Figure 17).
3. Slide the grooves in the back of the rear
log (#3) against the rear grate prongs.
Make sure the peg on the log is on top
(see Figure 18).
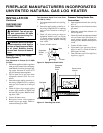
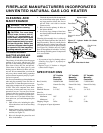
4. Place the top middle log (#4) on the
bottom middle log (#2). Make sue the
pegs of the bottom middle log fit se-
curely in the holes of the top middle
log (see Figure 19).
5. Place the crossover log (#5) on the back
log and the top middle log. Make sure
the peg on the rear log is in the hole in
the bottom of the crossover log. The
crossover log should fit in the cutout
of the top middle log (see Figure 20).
Front Log (#1L)
Front Log (#1R)
Grate Prongs
Notch
Metal Grate Bar
Figure 16 - Installing Front Logs
(#1L and #1R)
Peg
Groove
Grate
Bottom Middle
Log (#2)
Groove
Figure 17 - Installing Bottom Middle
Log (#2)
Metal Post
Figure 18 - Installing Rear Log (#3)
Peg
Rear Log
(#3)
Groove
in Back
of Log
Grate Prong
Figure 19 - Installing Top Middle Log (#4)
Peg
Hole
Top Middle
Log (#4)
Peg
Figure 20 - Installing Crossover Log (#5)
Crossover
Log (#5)
Hole
Cutout
Peg