


www.desatech.com
116292-01D
8
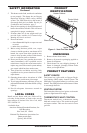
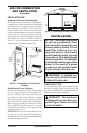
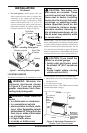
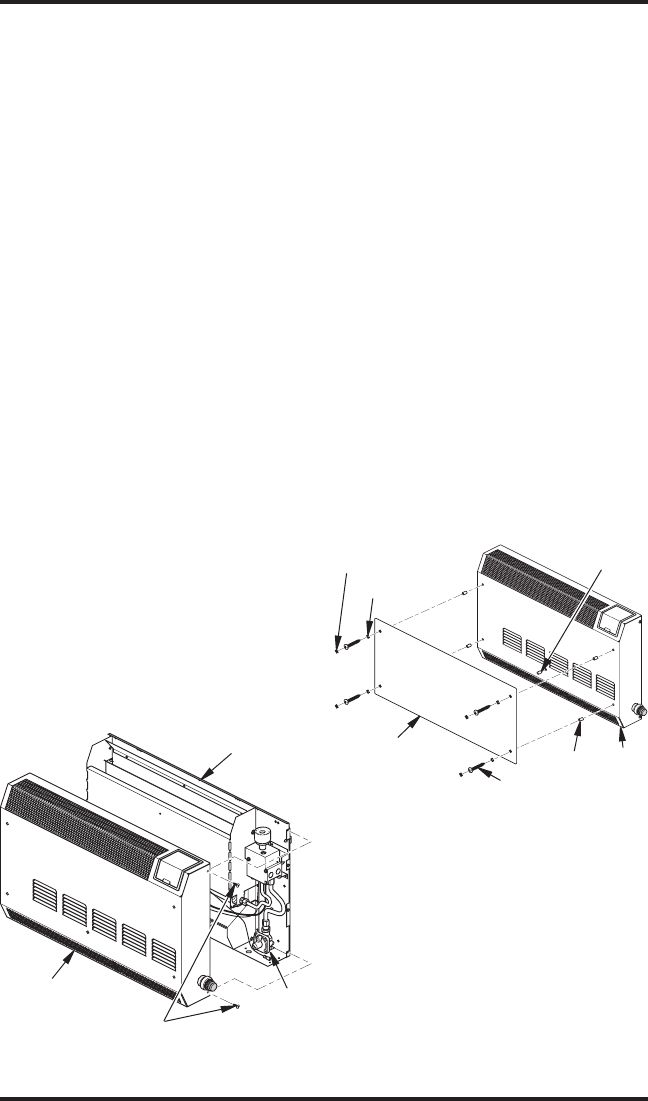
Figure 5 - Installing Glass Panel
INSTALLATION ITEMS
Before installing heater, make sure you have the
items listed below.
• for propane/LP gas, external regulator (supplied
by installer)
• piping (check local codes)
• sealant (resistant to propane/LP gas)
• equipment shutoff valve *
• ground joint union
• sediment trap
• tee joint
• pipe wrench
• for natural gas, test gauge connection*
* A CSA design-certified equipment shutoff valve
with 1/8" NPT tap is an acceptable alternative to
test gauge connection. The optional CSA design-
certified equipment shutoff valve can be purchased
from your dealer. See
Accessories, page 23.
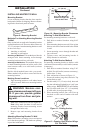
REMOVING FRONT PANEL OF
HEATER
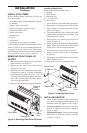
1. Remove and discard shipping screw from back
panel of heater (see Figure 4).
2. Remove the four screws, two on each side of
front panel. Set aside.
3. Pull front panel forward from the bottom, then
lift panel up to remove. If ignitor is installed,
pull front panel forward only 2" to 3" (5 to 7.6
cm) away from back panel. Reach into lower
right side of heater and disconnect ignitor
wire. Set front panel aside.
4. Remove any remaining packaging materials.
INSTALLATION
Continued
Installing Glass Panel
Items needed from hardware packet:
1 - Bushing
4 - Black spacers
4 - Retaining clips
4 - 1.5" long screws
4 - Screw covers
1. Locate hardware packet and dark acrylic glass.
2.
Peel protective coating from both sides of glass.
3. Snap bushing into center front hole of front
panel (see Figure 5).
4. Turn front panel face down. Gently press onto
a hard surface to snap bushing into hole. Turn
panel back over, face up.
5. Place spacers over 4 holes on front panel as
shown in Figure 5.
6. Position glass on top of spacers, aligning holes.
Note: If glass gets scratched or marred from
normal use, it may be reversed on heater.
7. Place 4 retaining clips on glass over holes.
8. Install screws in each hole, but do not tighten
at this time.
9. Square glass up with top front surface of front
panel. Tighten screws.
10. Snap screw covers over retaining clips.
Glass Panel
Screw Cover
Front
Panel
Spacer
Screw
Retainer Clip
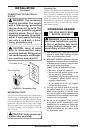
Figure 4 - Removing Front Panel Of Heater
Screw
Front Panel
Ignitor
Wire
Bushing
Shipping
Screw
Location
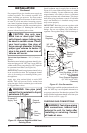
INSTALLING IGNITOR
1.
Locate ignitor in hardware bag. Determine if
your heater is equipped with piezo ignitor or an
electronic ignitor (see Figures 6 and 7, page 9.
2. For Piezo Ignitor, snap ignitor into hole
located on right side of heater as shown in
Figure 6, page 9.
3. For Electronic Ignitor, install ignitor through
hole located on right side of heater as shown
in Figure 7, page 9.