


www.desatech.com
56131-F6
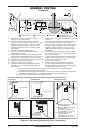
PRE-INSTALLATION
PREPARATION
LOCATION AND SPACE
REQUIREMENTS
Determine the safest and most efcient location
for your DESA direct-vent replace. Make sure
that rafters and wall studs are not in the way of the
venting system. Choose a location where the heat
output is not affected by drafts, air conditioning
ducts, windows or doors. Be aware of all restric-
tions and precautions before deciding the exact
location for your replace and termination cap.
When deciding the location of your replace,
follow these rules:
• A projection may be ideal for a new addition
on an existing nished wall. Refer to horizontal
termination congurations on page 15 or verti-
cal congurations on page 18.
• Do not connect this replace venting to a chim-
ney ue serving a separate solid-fuel burning
replace or appliance.
• Due to high temperatures, do not locate this
replace in high trafc areas, windy or drafty
areas or near furniture or draperies.
• Never obstruct the front opening of the appli-
ance or ow of combustion and ventilation air.
Keep control compartments accessible.
• Do not locate close to where gasoline or other
ammable liquids may be stored. The appliance
must be kept clear and free from combustible
materials.
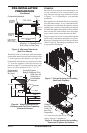
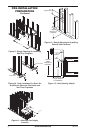
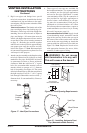
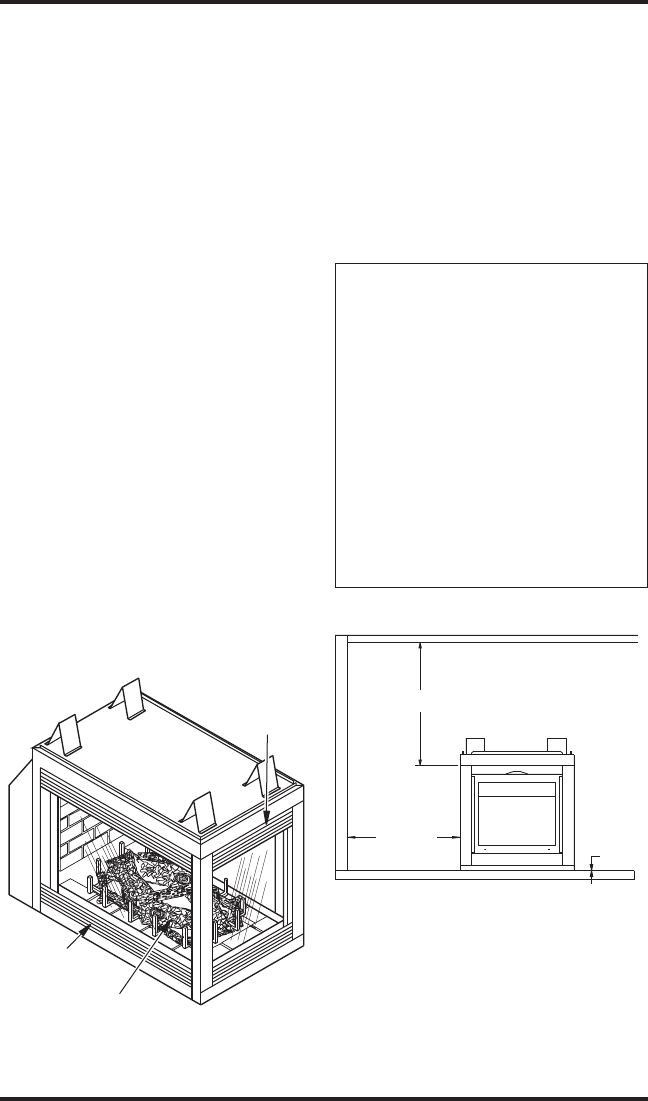
CLEARANCES
Minimum clearances to combustibles for the re-
place are as follows:
*Back and sides of surround 0"
Vent Surfaces (side and bottom) 1"
Top Vent Surface (horizontal run) 2"
Ceiling to Opening 36"
Floor 0"
Wall to Front of Glass 36"
Perpendicular Wall to Opening of Unit 2"
Top Spacer 0"
-
-
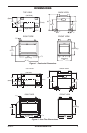
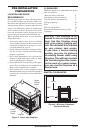
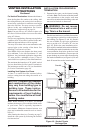
MANTEL CLEARANCES
Figure 3 - Direct-Vent Fireplace
Log Set
Upper
Louver
Panel
Lower
Louver
Panel
Figure 4 - Minimum Clearances
(Peninsula Shown)
CEILING
WALL
36" Min.
36" Min.
0" Floor