


www.desatech.com
116292-01A 9
INSTALLATION
Continued
INSTALLING HEATER TO WALL
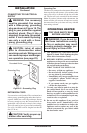
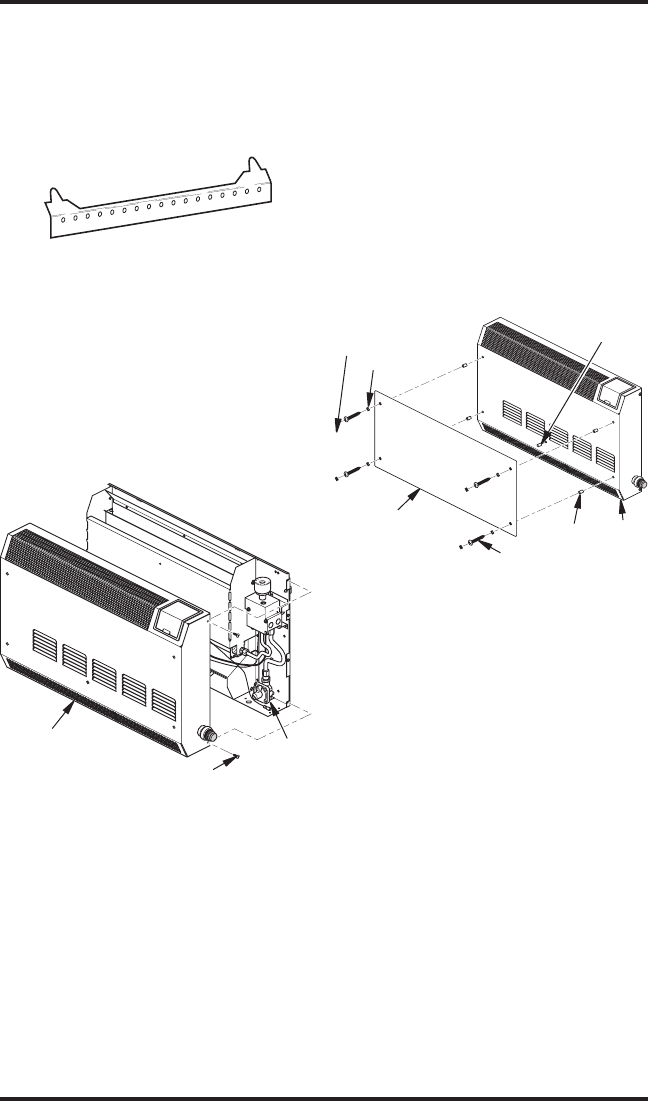
Mounting Bracket
Locate mounting bracket in heater carton. Remove
mounting bracket from heater carton.
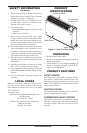
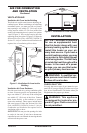
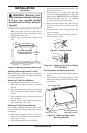
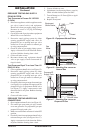
Figure 7 - Installing Glass Panel
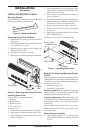
Figure 5 - Mounting Bracket
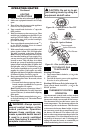
Removing Front Panel Of Heater
1. Remove the four screws, two on each side of
front panel.
2. Pull front panel forward from the bottom, only
2 to 3 inches (5 to 7.6 cm).
3. Reach into lower right corner of heater and
disconnect ignitor wire.
4. Lift panel up to remove, set aside.
5. Remove any remaining packaging materials.
4. Turn front panel face down. Gently press onto
a hard surface to snap bushing into hole. Turn
panel back over, face up.
5. Place spacers over 4 holes on front panel as
shown in Figure 7.
6. Position glass on top of spacers, aligning holes.
Note: If glass gets scratched or marred from
normal use, it may be reversed on heater.
7. Place 4 retaining clips on glass over holes.
8. Install screws in each hole, but do not tighten
at this time.
9. Square glass up with top front surface of front
panel. Tighten screws.
10. Snap screw covers over retaining clips.
Glass Panel
Screw Cover
Front
Panel
Spacer
Screw
Retainer Clip
Installing Glass Panel
Items needed from hardware packet:
1 - Bushing
4 - Black spacers
4 - Retaining clips
4 - 1.5" long screws
4 - Screw covers
1. Locate hardware packet and dark acrylic glass.
2.
Peel protective coating from both sides of glass.
3. Snap bushing into center front hole of front
panel (see Figure 7).
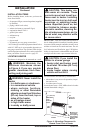
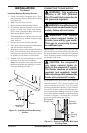
Figure 6 - Removing Front Panel Of Heater
Screw
Front Panel
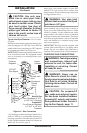
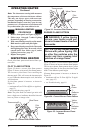
Methods For Attaching Mounting Bracket
To Wall
Only use last hole on each end of mounting bracket
to attach bracket to wall. These two holes centers are
13 inches (33 cm) apart. Attach mounting bracket to
wall in one of two ways:
1. Attaching to wall stud
2. Attaching to wall anchor
Attaching to Wall Stud: This method provides the
strongest hold. Insert mounting screws through
mounting bracket and into wall studs.
Attaching to Wall Anchor: This method allows you
to attach mounting bracket to hollow walls (wall
areas between studs) or to solid walls (concrete
or masonry).
Decide which method better suits your needs.
Either method will provide a secure hold for the
mounting bracket.
Marking Screw Locations
1. Tape mounting bracket to wall where heater
will be located. Make sure mounting bracket
is level.
Ignitor
Wire
Bushing