


www.desatech.com 113101-01A
28
OBSERVED PROBLEM
Heater shuts off in use (ODS op-
erates)
Gas odor even when control knob
is in OFF position
Gas odor during combustion
Log set cycles to pilot, but room
temperature drops to a lower than
ideal level before log set comes
back on
POSSIBLE CAUSE
1. Not enough fresh air is avail-
able
2. Low line pressure
3. ODS/pilot is partially
clogged
1. Gas leak. See Warning
statement on page 27
2. Control valve defective
1. Foreign matter between con-
trol valve and burner
2. Gas leak. See Warning
statement on page 27
1. Thermostat sensing bulb
needs to be repositioned
REMEDY
1. Open window and/or door for
ventilation
2. Contact local natural or pro-
pane/LP gas company
3. Clean ODS/pilot (see Cleaning
and Maintenance, page 23)
1. Locate and correct all leaks (see
Checking Gas Connections,
page 15)
2. Replace control valve
1. Take apart gas tubing and re-
move foreign matter
2. Locate and correct all leaks (see
Checking Gas Connections,
page 15)
1. Reposition thermostat sensing
bulb (see Optional Positioning
of Thermostat Sensing Bulb,
page 28
TROUBLESHOOTING
Continued
OPTIONAL POSITIONING
OF THERMOSTAT
SENSING BULB
FOR MASONRY AND FACTORY-
BUILT METAL FIREPLACE
If your log set cycles to pilot, but the room tem-
perature drops to a lower than ideal comfort level
before the log set comes back on, you may want
to reposition the thermostat sensing bulb.
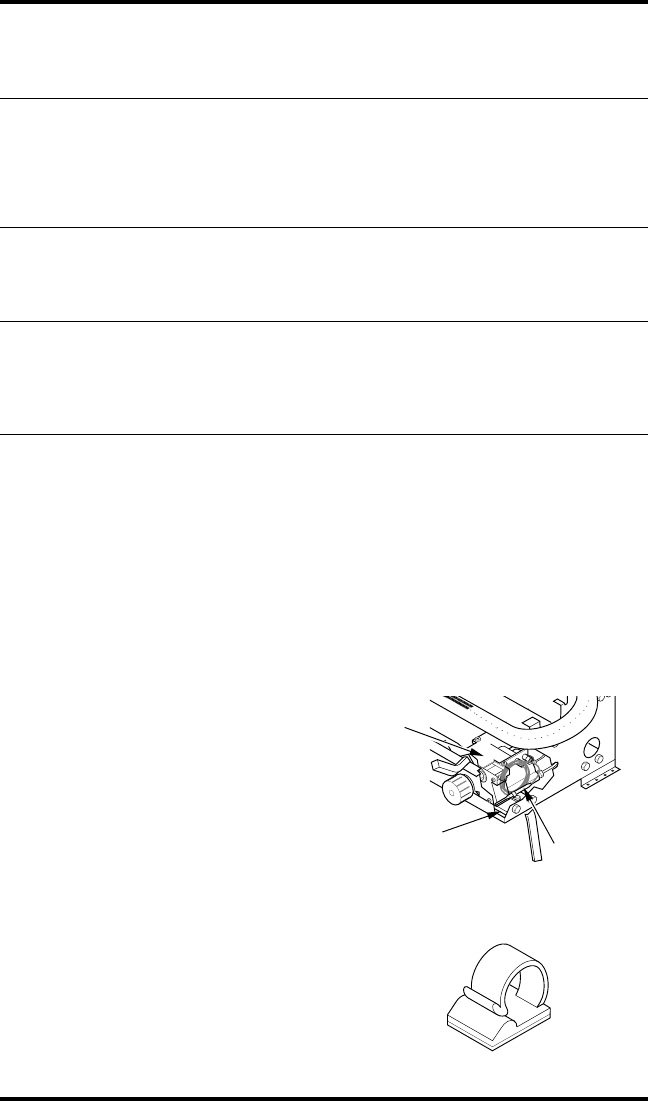
The thermostat sensing bulb is located near the
gas valve assembly on the mounting bracket. This
location allows the thermostat to keep the room
temperature at an ideal comfort level for most fire-
place applications. For positioning the thermostat
sensing bulb elsewhere, an adhesive-backed
mounting clip is available.
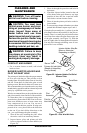
Tools needed: 1/4" hex driver or socket
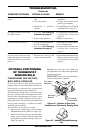
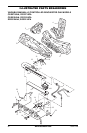
1. Remove logs. Locate the gas valve assembly
and thermostat sensing bulb (see Figure 34).
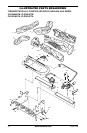
2. With 1/4" hex driver or socket, loosen the ther-
mostat screw. Carefully slide the thermostat
sensing bulb out of the retaining clamp (see
Figure 36, page 29).
Note:
Do not remove the screw. Make sure
you tighten the screw after removing the ther-
mostat sensing bulb.
IMPORTANT:
Do not force or bend the ther-
mostat sensing bulb or capillary.
Thermostat
Sensing Bulb
Figure 34 - Location of Gas Valve
Assembly and Thermostat Sensing Bulb
Gas Valve
Assembly
Mounting
Bracket
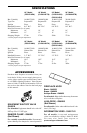
Figure 35 - Adhesive-backed Mounting
Clip