


www.desatech.com
113097-01E 11
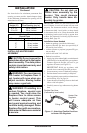
not meet the minimum clear-
ances shown, you must do one
-
• remove the mantel
INSTALLATION
Continued
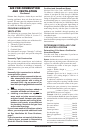
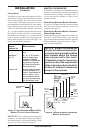
Minimum
Noncombustible
Material
8"
Min.
12" 15" 18"
All minimum
distances are
in inches
Log Set
18", 24",
30" Models
20"
2
1
/2"
6"
8"
10"
12"
Distances to
Underside of
Mantel
Hood
(GA6050,
GA6052)
Top of
Fireplace
Opening
Underside
of Mantel
Shelf
Mantel Shelf
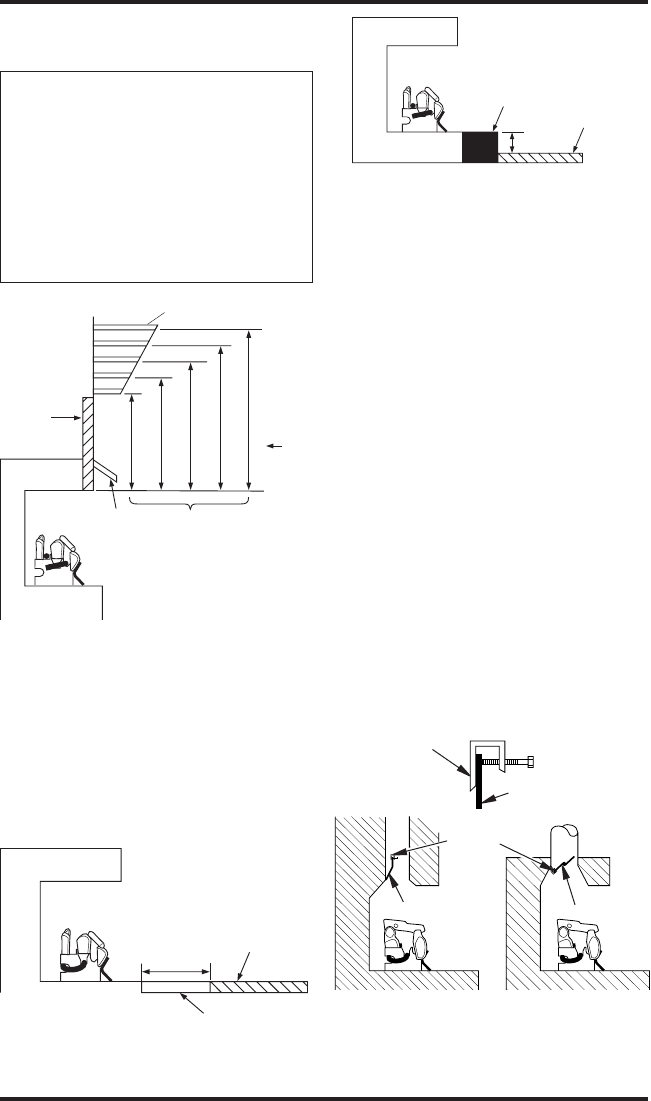
Figure 7 - Minimum Mantel Clearances
When Using Hood
(GA6050,
GA6052 and
GA6053)
All
Models
14"
Min.
Combustible
Material
Noncombustible
Material
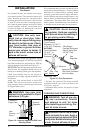
Hearth
5"
Min.
Combustible
Material
Figure 9 - Minimum Fireplace Clearances
Above Combustible Flooring
Figure 8 - Minimum Fireplace Clearances
if Installed at Floor Level
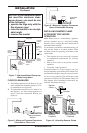
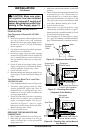
Figure 10 - Attaching Damper Clamp
Manufactured
Fireplace
Masonry
Fireplace
Damper
Damper
Clamp
Damper
Damper
Clamp
Damper
A. If installing appliance on the oor level, you
must maintain the minimum distance of 14"
to combustibles (see Figure 8).
B. If combustible materials are less than 14" to
the replace, you must install appliance at
least 5" above the combustible ooring (see
Figure 9).
OpERATION
Note: When used as a vented heater, appliance
must be installed only in a solid-fuel burning
replace with a working ue and constructed of
noncombustible material.
If your heater is a manually-controlled model, you
may use this heater as a vented product. There
are three reasons for operating your heater in the
vented mode.
1. The replace does not meet the clearance
to combustibles requirements for vent-free
operation.
2. State or local codes do not permit vent-free
operation.
3. You prefer vented operation.
If reasons number 1 or 2 above apply to you, you
must permanently open chimney ue damper. You
must install the damper clamp accessory (to order,
see Accessories, page 38). This will insure vented
operation (see Figure 10). The damper clamp will
keep damper open. Installation instructions are
included with clamp accessory.