


23
105539
OWNER’S MANUAL
1
2
3
4
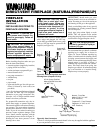
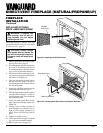
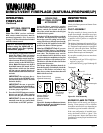
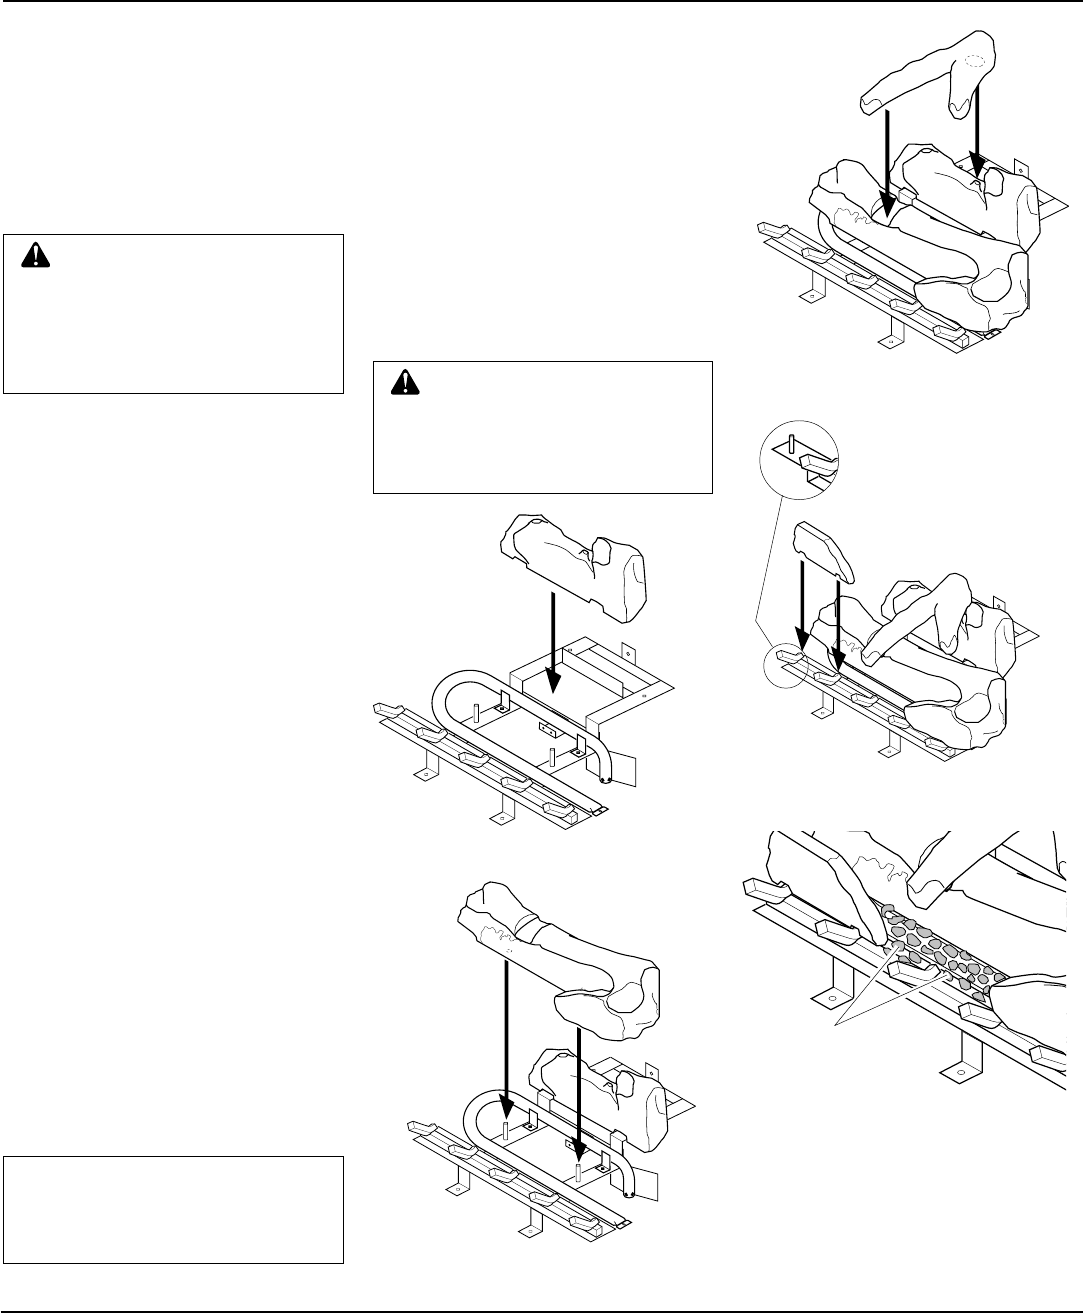
6. Pull ember material apart into pieces
no larger than a dime. Place these
pieces loosely and sparingly directly
onto the exposed section of the front
burner and along the space between the
burner and grate prongs (see Figure 49).
This will create the glowing ember ap-
pearance as the flame touches the em-
ber material. Do not block air slots by
using too much ember material in one
area. It is not necessary to use all of the
ember material provided.
7. Replace the glass door. See Removing/
Replacing Glass Door, page 21.
WARNING: The glass door
must be securely in place before
running this fireplace. Do not run
this fireplace if glass is missing
or broken.
Ember Material
Figure 49 - Placing Ember Material on
Burner
WARNING: Failure to position
the parts in accordance with these
diagrams or failure to use only
parts specifically approved with
this heater may result in property
damage or personal injury.
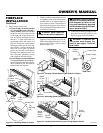
Each log is marked with a number. These
numbers will help you identify the log when
installing. It is very important to install
these logs exactly as instructed. Do not
modify logs. Only use logs supplied with
fireplace.
Remove glass door. See Removing/Replacing
Glass Door, page 21. Install logs according to
instructions for fireplace model numbers.
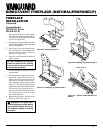
Fireplace Models
BDV37N/P(A, B) and
BDV41N/P(A,B)
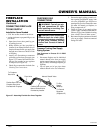
1. Place log #1 (back log) on top of grate.
Make sure the notches in the bottom of
the log fit over the grate (see Figure 45).
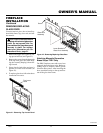
2. Rest log #2 (large front log) on the pins on
the front part of the grate (see Figure 46).
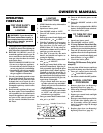
3. Place log #3 (crossover log) onto the
rear and front logs. Make sure it is seated
properly into the notch on the front log
and over the raised triangular portion of
the rear log as shown in Figure 47.
4. Place log #4 (small log) onto the front
left part of the grate making sure the
notches fit over the prong of the grate (and
hole over pin on 41" set). See Figure 48.
5. Place lava rock along sides and front
of firebox bottom in areas that are vis-
ible only. It is not necessary to use all
of the lava rock provided.
Figure 45 - Installing Log No. 1
INSTALLING LOGS, LAVA
ROCK AND GLOWING
EMBERS
Figure 46 - Installing Log No. 2
Figure 47 - Installing Log No. 3
Figure 48 - Installing Log No. 4
41" Set Only
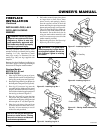
FIREPLACE
INSTALLATION
Continued
NOTICE: Do not put lava rock on
burner or under burner. Placing
lava rock on burner could cause
performance problems.
Continued