


www.desatech.com
118127-01B 5
OPERATING INSTRUCTIONS
1. Check heater for damage. If heater is
damaged, promptly inform dealer where
you bought heater.
2. Follow all of the safety and operating
precautions.
3. Check the "O" ring on the POL before
each use. Replace the "O" ring if there is
any sign of wear or damage.
4. Make sure heater regulator knob is in the
"OFF" position.
5. 2 Burner Models Only Attach the heater
to the guard on the propane/LP cylinder
with the support arm on the inside of the
guard and bolts through two holes in the
guard (see Figure 5). Tighten the support
arm bracket into place using the wing nuts
provided.
6. For All Models Connect the POL tting at
regulator to the propane/LP cylinder by
rotating the POL nut counter clockwise
into the propane/LP cylinder's valve outlet
and securely tighten with a wrench.
WARNING: Attach heater in
upright position. Never attach
heater in a horizontal position.
This could lead to dangerous
are-ups or re.
7. Securely tighten all gas connections.
8. Open the cylinder's gas valve and check
all connections for leaks. Apply mixture
of liquid soap and water to gas joints.
Bubbles forming show a leak that must
be corrected. DO NOT USE A FLAME.
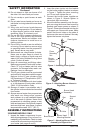
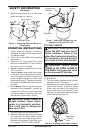
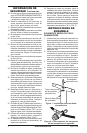
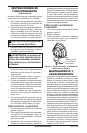
Figure 4 - Attaching Electrode Wires to
Piezo Ignitor
Piezo Ignitor
Electrode Wires
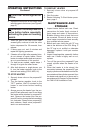
Figure 5 - Attaching Support Arm and
Regulator to Propane/LP Tank
Regulator
Support
Arm
Bolt
Support Arm
Bracket
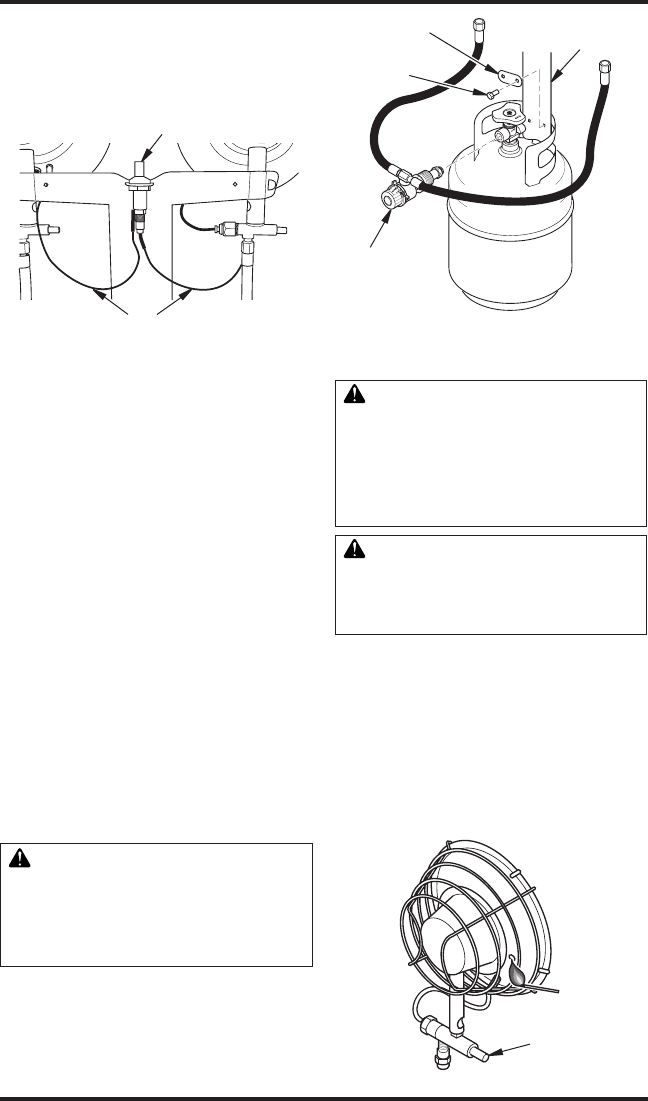
Red Button
on Safety
Valve
TO START HEATER
WARNING: When lighting the
heater DO NOT look over top of
heater (reector). Stand to the
side of the heater during ignition.
Do not stand or have any part of
your body in front of the heater.
WARNING: MAKE SURE
THERE IS NO OPEN FLAME IN
THE AREA. Fully open the valve
on the propane/LP cylinder.
Read all lighting instructions before attempting
to ignite heater.
1. Turn the heater regulator knob counter-
clockwise to the "HI" position.
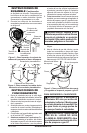
2. Repeatedly push and release the piezo
ignitor (dual burner), or place a lighted
match near the face of the heating ele-
ment (mesh screen) of the burner you are
lighting, using the hole located on the side
of the reector. See Figure 6.
Figure 6 - Lighting Heater With a Match
5. Attach the electrode wires to the piezo
ignitor as shown in Figure 4.
SAFETY INFORMATION
Continued