


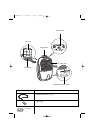
fig. 1
fig. 2
Dehumidifier
3
Thank you for choosing this dehumidifier. To get the very best
out of your dehumidifier it is advisable to read these instructions
before using the appliance. By doing so you will obtain optimum
results and maximum safety.
Electrical connections
Before plugging the appliance into the power socket, check that:
• The mains power supply corresponds to the power supply indicat-
ed on the rating plate.
• The power socket and electrical circuit are adequate for the appliance.
• The power socket matches the plug. If this is not the case, have the
plug replaced by a qualified electrician;
• The power socket must be adequately earthed;
Failure to respect this safety rule absolves the manufacturer from all liability.
This appliance is manufactured in compliance with EEC standard EN
55014 on the suppression of radio interference.
• The cable must be replaced by approved service personnel only.
Installation
1) Positioning
Position your dehumidifier wherever your condensation or damp problem is. A
clear area of at least 50cm must be left at the front and back of the dehumidi-
fier to ensure adequate ventilation. Do not place the dehumidifier next to a
radiator or other heat source as this will reduce its performance.
For ongoing usage we suggest positioning in a hallway or on a landing.
Please remember to keep internal doors ajar to allow air circulation.
Before using your dehumidifier for the first time, it should be stood
upright for 24hrs prior to use. When moving it from room to room
it is advisable to wait an hour before using it again.
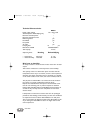
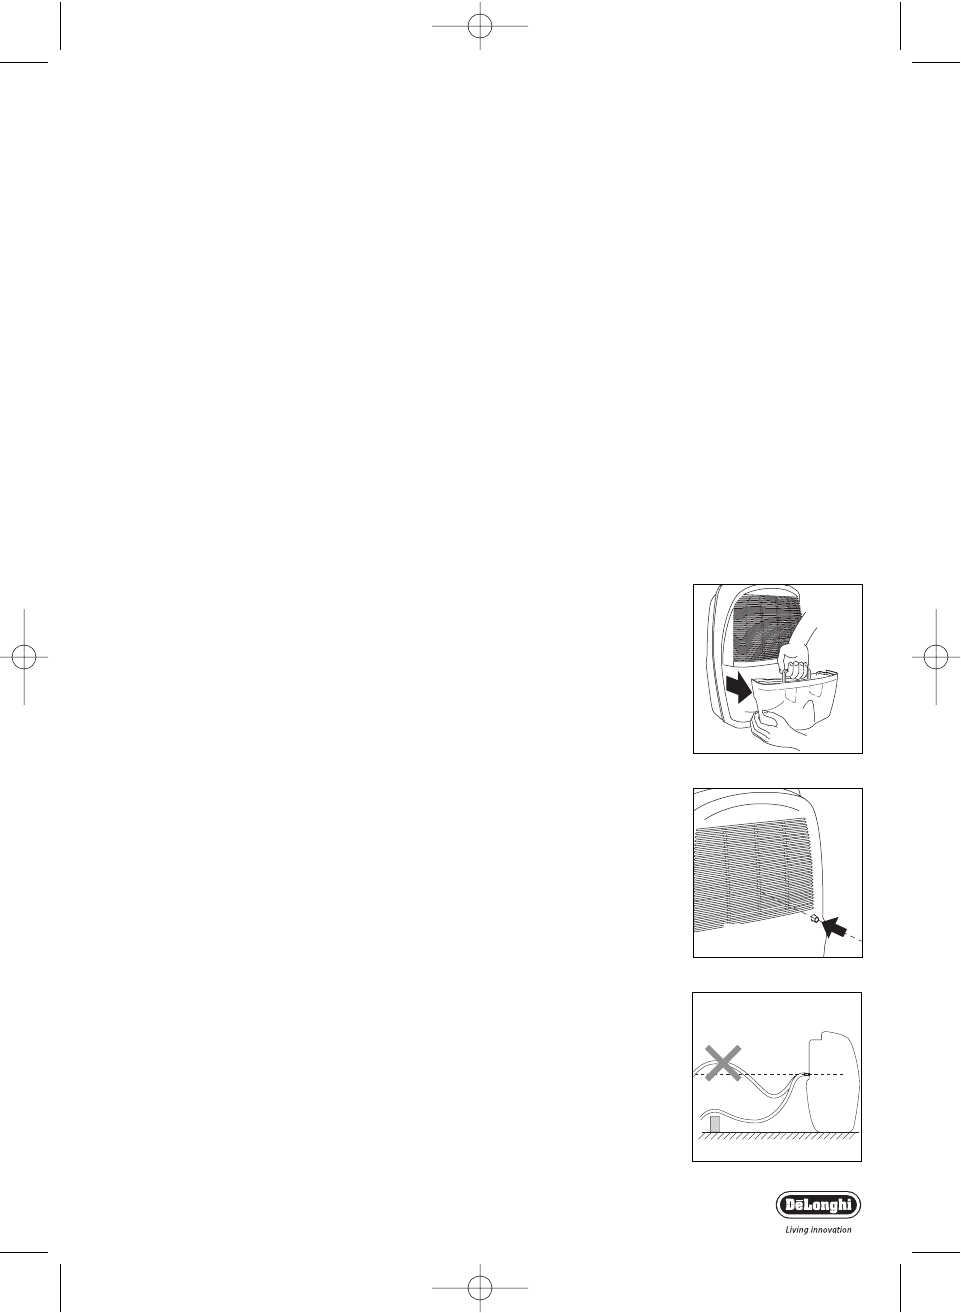
2) Water Collection
The water collected (condensate) can be drained in one of two ways:
A) Draining into the tank
The condensate can be drained directly into the tank located inside
the appliance ).
The tank can be easily removed and has a handle making it sim
ple to carry and empty. (fig. 1).
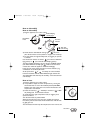
B) Continuous external draining
If the appliance is to be operated for long periods of time but you are
unable to empty the tank, you are recommended to use the continu-
ous drain facility.
• Drill the inside of the drain spout using a small drill bit. (Fig. 2).
• Fasten the rubber hose to the spout. For models without drain
hoses supplied, we suggest you purchase a rubber hose around 2m
long, with an internal diameter of 9.5 mm.
• Make sure that the hose is not higher than the spout (Fig. 3), otherwise
water will remain in the tank; also check that the hose is not twisted.
N.B: Keep the rubber bung.You will need it to plug the hose or close
the spout if you revert to draining into the tank (see point A).
fig. 3
NO
YES
drain spout
5748010000 6-08-2003 18:02 Pagina 3