


THERMOSTAT INSTALLATION
Visit www.dansons.com/support for further technical assistance.
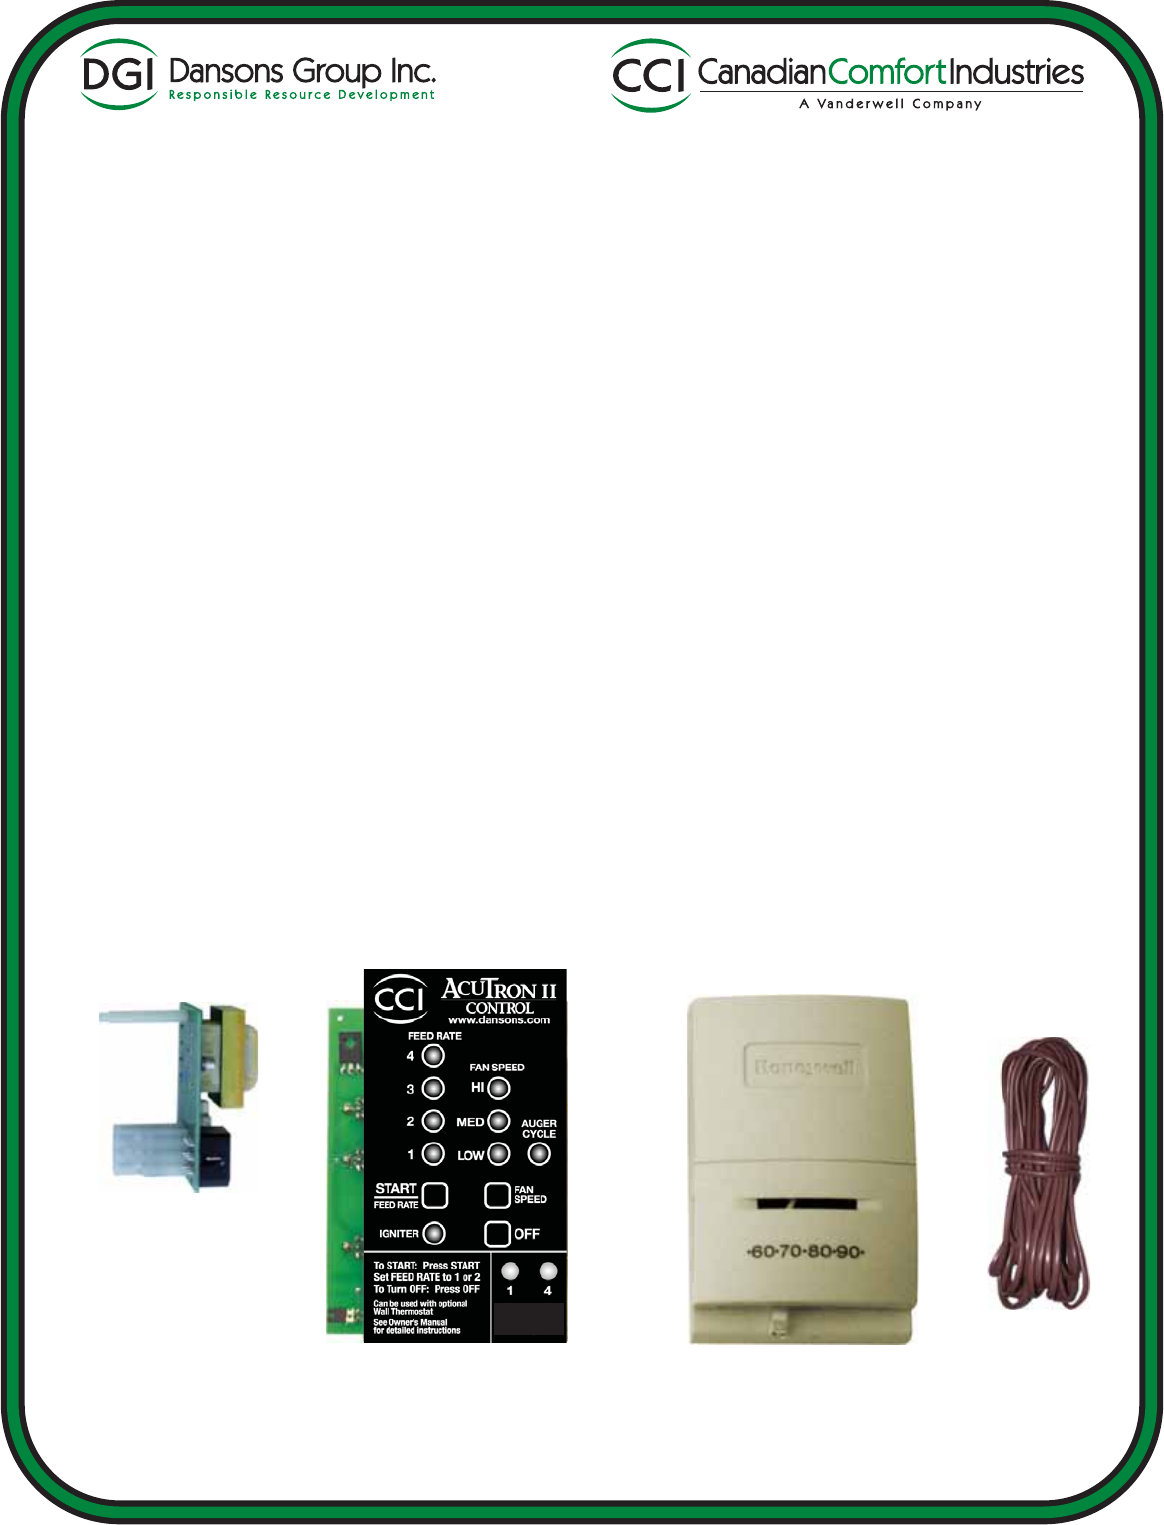
Thermostat Module
AcuTron Control Board Thermostat
Thermostat
Wire
INSTALLATION STEPS
Follow the thermostat manufacturer’s installation procedures
TOOLS REQUIRED
1/4” hex nutsetter & driver
wirestripper
small sized flat head screwdriver
NOTE: Always disconnect power before performing the thermostat installation
1. Unplug the stove’s power cord from the wall outlet
2. Remove the 6 x 1/4” hex screws from the slotted back access panel
3. Unscrew the control board from the side of the heater (2 x 1/4” hex screws)
4. Unplug the 9 pin wire harness from the back of the board
5. Install the thermostat module by plugging it into the 9 pin plug on the back of the control board
6. Locate the thermostat terminal block marked T’STAT INPUT, found on the back of the module
7. Be sure to run the thermostat wires through one of the slots of the rear access panel before
connecting the wires
8. Connect the 2 wires from your thermostat to the terminals on the module, 1 per terminal. Ensure
the wires are firmly connected
9. Connect the 2 wires at your wall thermostat to their terminals. Ensure the wires are firmly connected
10. Reinstall the 9 pin wire harness to the 9 pin plug now found on the thermostat module
11. Reinstall the control board and the slotted rear access panels
12. Plug in the stove and you are ready to operate with your thermostat
asdesir edasdesir ed