3) Completing the Installation (cont’d)
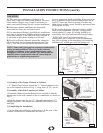
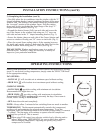
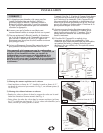
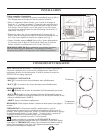
• Carefully place the air conditioner into the window with the “L”
shaped mounting bracket (on top) positioned in front of the upper
window sash. The bottom of the cabinet should be positioned on
the “recessed” portion of the window frame. Pull the window
down until it rests just behind the front flange of the (top) “L”
shaped mounting bracket (See Fig. 5).
• Expand the shutter frames (fully) on each side and secure the
top of the frames to the window sash using one 3/4” screw on
each side and one in the “L” shaped mounting bracket (Fig. 5).
• Secure the shutter clamp on each side of the (lower) shutter and
secure to window sill using one 3/4” screw on each side (Fig. 5).
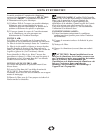
• Place the second foam sealing strip to fit the opening between
the inside and outside windows, then attach the safety lock to the
outside window frame using one 3/4” screw (See Fig. 6).
PLEASE NOTE: Window applications come in a variety of
different styles. Therefore, it may be necessary to modify or
improvise your particular installation.
Window sash
“L” Shaped
Mounting
Bracket
Shutter clamps
3/4” screws
Fig. 5
Safety Lock
3/4” screw
Foam Seal
Fig. 6
INSTALLATION INSTRUCTIONS (cont’d)
5
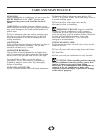
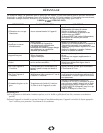
SELECTOR SWITCH: The selector switch controls fan speed and/or cooling
speed. To set desired cooling temperature, simply rotate the SELECTOR knob
to the appropriate setting.
FAN SPEEDS:
• LOW FAN will circulate air at minimum speed without cooling.
• HIGH FAN will circulate air at maximum speed without cooling.
COOLING MODES:
• LOW COOL provides cooling with minimum air circulation.
Recommended for night-time use.
• HIGH COOL provides cooling with maximum air circulation.
Recommended for quick cooling or for extremely hot days. Once room is
cooled, reduce setting to LOW COOL.
• OFF shuts-down the unit completely
NOTE: Always allow 3 minutes before switching from one mode to another.
THERMOSTAT: The thermostat automatically controls the (compressor)
cooling cycle and maintains the selected room temperature. To set the
thermostat, rotate the thermostat knob to the desired cooling setting (1 warmest
- 7 coldest). The fan motor will continue to operate after the compressor
(cooling) has cycled off. This is normal.
When using FAN control, turn selector switch slowly, allowing unit to
adjust. When using THERMOSTAT, be sure to allow three minutes
before changing temperature. Adjusting too quickly may cause
compressor to overload.
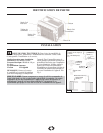
OPERATING INSTRUCTIONS
Thermostat
Selector
Switch


