Installation Step 5
Hang the Opener
I
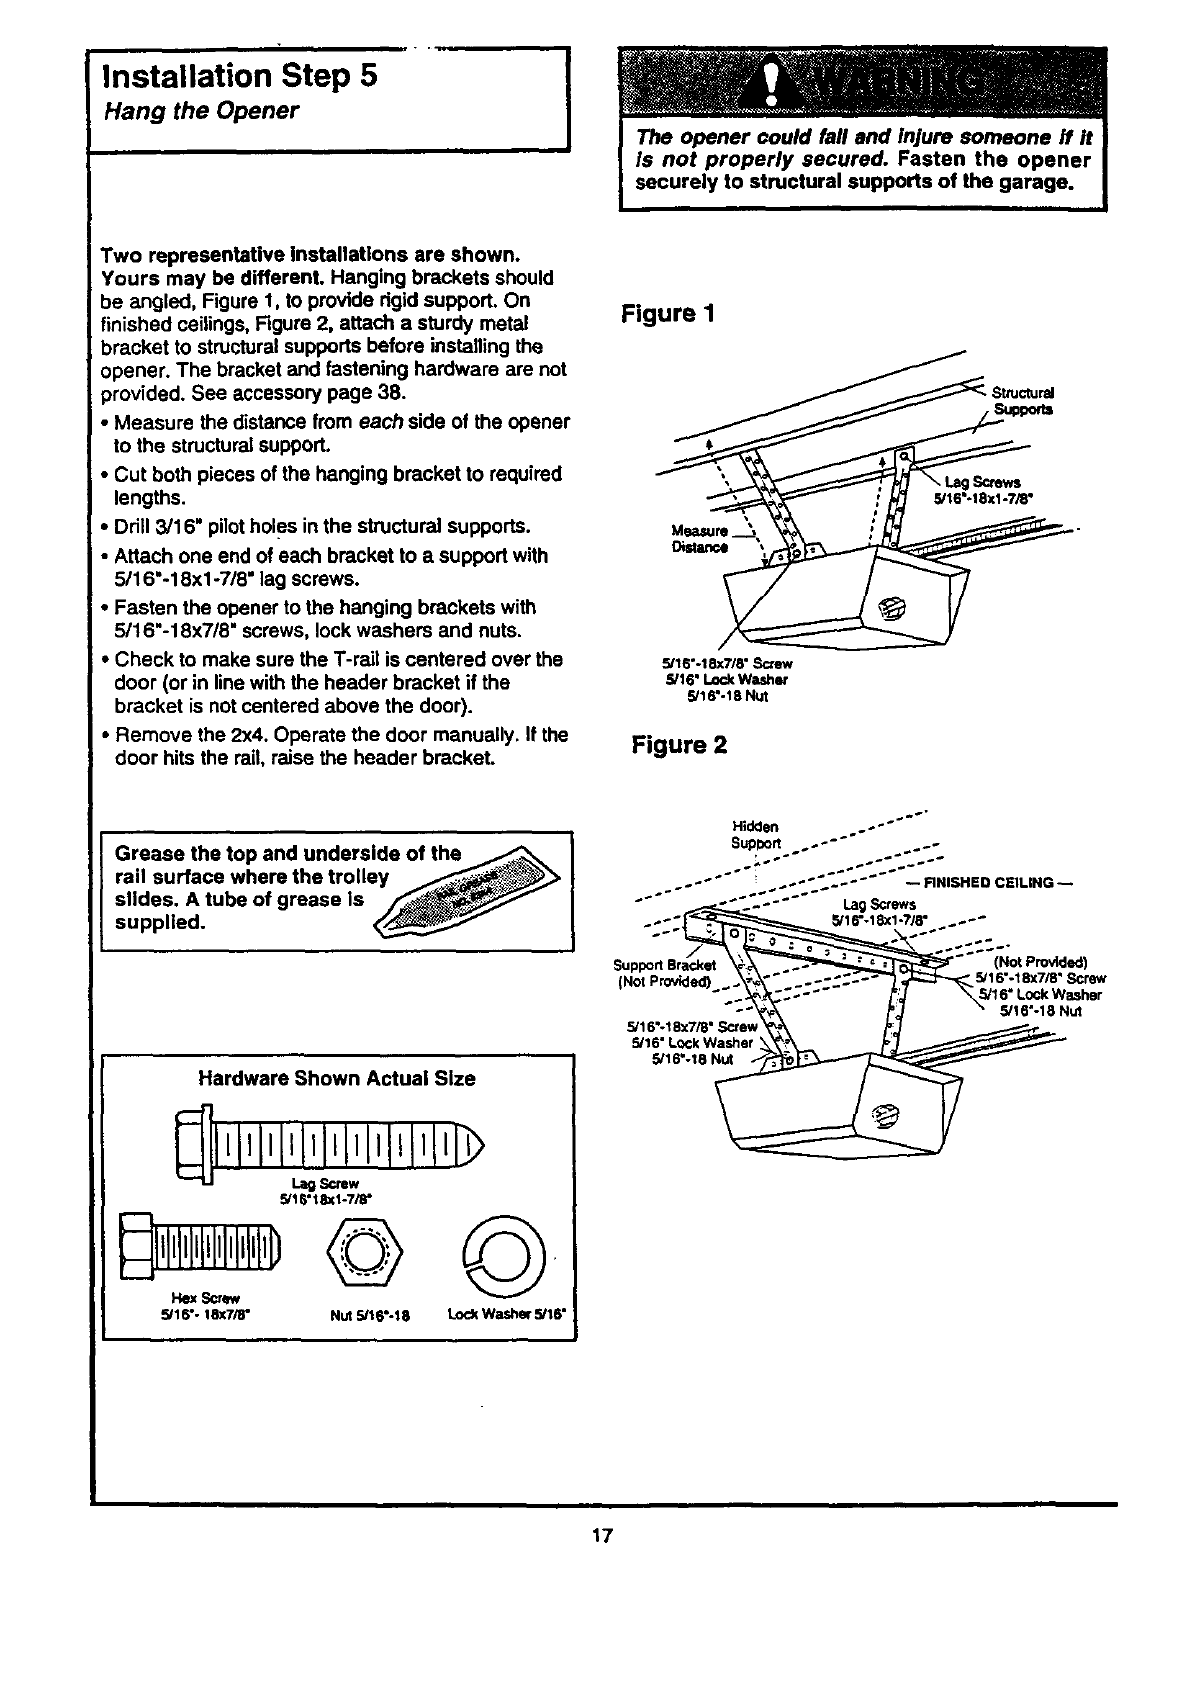
Two representative Installations are shown.
Yours may be different. Hanging brackets should
be angled, Figure 1, to provide dgid support. On
finished ceilings, Figure 2, attach a sturdy metal
bracket to structuralsupports before installing the
opener. The bracket and fastening hardware are not
provided. See accessory page 38.
• Measure the distance from each side of the opener
to the structural support.
• Cut both pieces of the hanging bracket to required
lengths.
• Drill 3/16" pilotholes in the structural supports.
• Attach one end of each bracket to a support with
5/16"-18xl -7/8" lag screws.
• Fasten the opener to the hanging brackets with
5/16"-18x7/8" screws, lock washers and nuts.
• Check to make sure the T-rail is centered over the
door (or in linewith the header bracket if the
bracket is not centered above the door).
• Remove the 2x4. Operate the door manually. If the
door hits the rail, raise the header bracket.
Figure I
_ StructuraJ
5/16 -18xl -7/8"
Measure.__,
5/16"-18x7/8" Screw
5/16" Lock Washer
5/16".18 Nut
Figure 2
Grease the top and underside of the
rail surface where the trolley __,_
slides. A tube of grease is _-__
supplied.
Hardware Shown Actual Size
5/16"18xl-7/8"
11111111111111111,llD
5/16"- 18X7/8" Nut5/16"-18
LockWasher 5/16"
Hidden . o....° o-"" "'"
SupDort .
o,..- ...;-:::-
..... "" _ ..;-;'.;;"'°"--_.0SH=OCSlU,G--
"" ° - "".'.. - °"" LagScrews•
..-'_ 5/16"-18X1-?/8 ..-"
SupportSra_dxet_ _ _'" 5/ (Not Prodded)
Not Provided) _.\_, ..°-:.°- _ 16"-18x7/8 Screw
5/I 6"-I 8X7/8" Scte_ _ _---_..-
17


