


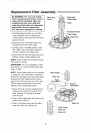

Vac Assembly
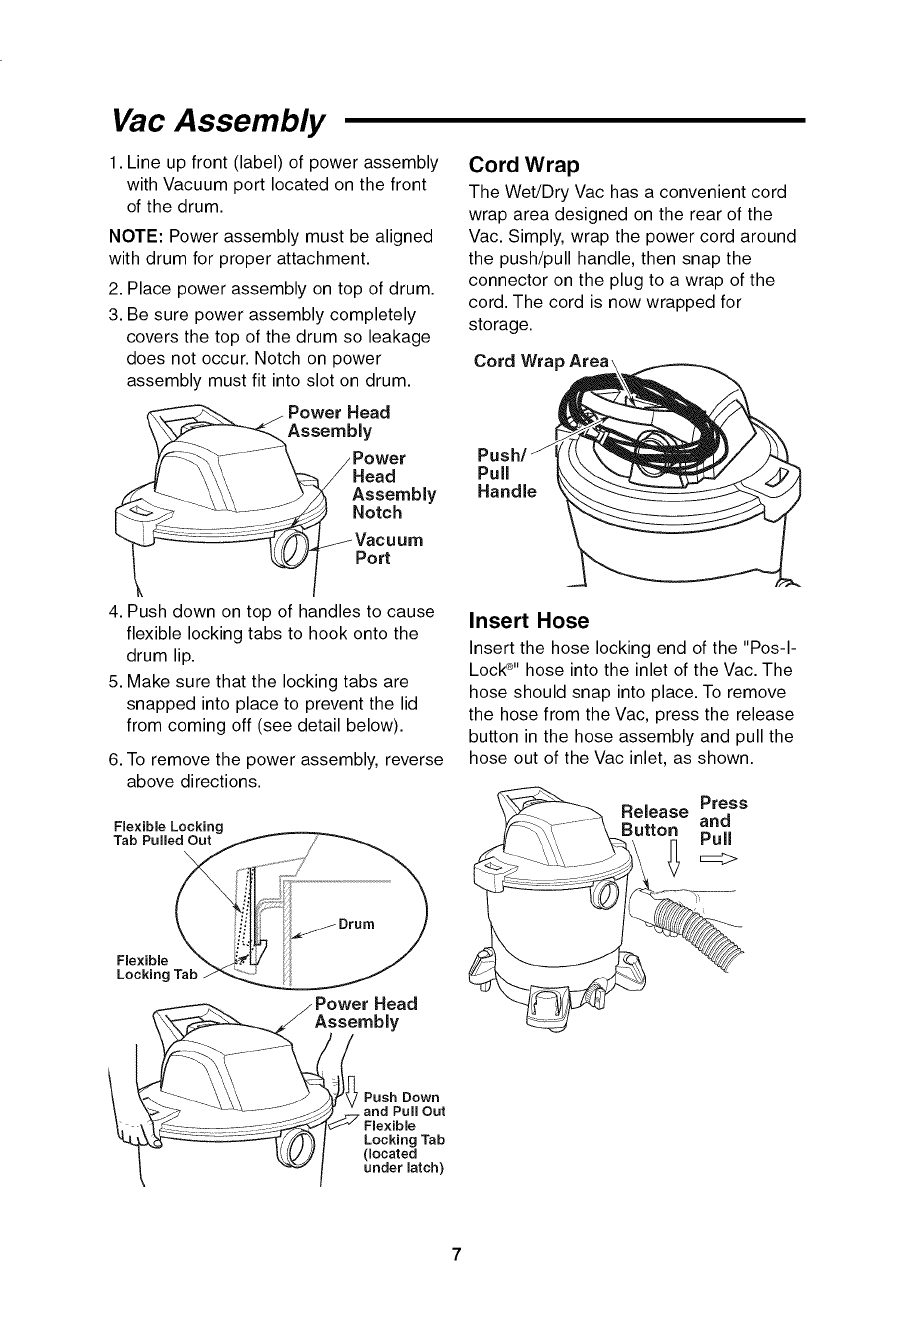
1. Line up front (label) of power assembly
with Vacuum port located on the front
of the drum.
NOTE: Power assembly must be aligned
with drum for proper attachment.
2. Place power assembly on top of drum.
3. Be sure power assembly completely
covers the top of the drum so leakage
does not occur. Notch on power
assembly must fit into slot on drum.
Power Head
Y
/ Power
Head
Assembly
Notch
lure
Port
4. Push clown on top of handles to cause
flexible locking tabs to hook onto the
drum lip,
5. Make sure that the locking tabs are
snapped into place to prevent the lid
from coming off (see detail below).
6. To remove the power assembly, reverse
above directions.
Flexible Locking
Tab Pulled Out
Flexible
Locking
Head
Assembly
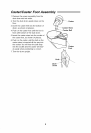
Cord Wrap
The Wet/Dry Vac has a convenient cord
wrap area designed on the rear of the
Vac. Simply, wrap the power cord around
the push/pull handle, then snap the
connector on the plug to a wrap of the
cord, The cord is now wrapped for
storage.
Cord Wrap
Push/
Pull
Handle
Insert Hose
Insert the hose locking end ofthe "Pus-I-
Lock_'' hose into the inlet of the Vac. The
hose should snap into place. To remove
the hose from the Vac, press the release
button in the hose assembly and pull the
hose out of the Vac inlet, as shown.
Push Down
and Pull Out
Locking Tab
(located
under latch)