W415-0327 / B / 12.07.07
20
B
A
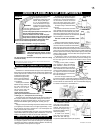
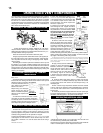
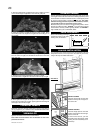
Randomly place the charcoal embers along the front and sides of
the log support tray in a realistic manner. Fine dust found in the
bottom of the bag should not be used.
Sprinkle vermiculite around the charcoal embers.
Note: Both charcoal embers and vermiculite are not to be
placed on the burner.
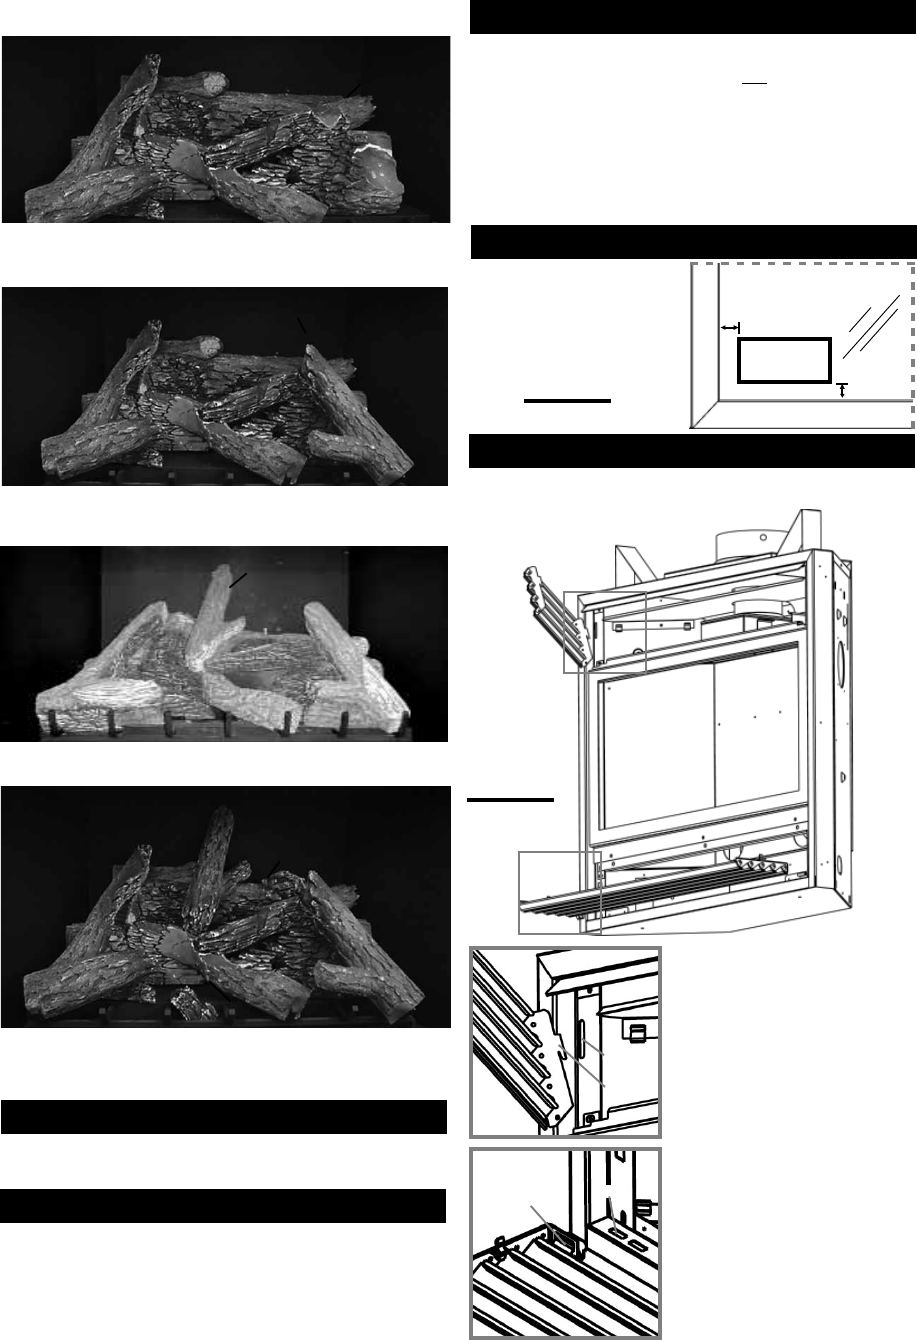
4. Place the small branch of log#5 into the notch on log#3. The notch
on the charred edge of log#5 sits on the outer left grate post.
5. Place the small end of log#6 into the front notch of log#4. Place
the locating hole in the large end of log#6 onto the locating pin on
top of log#2.
6. Place log#7 onto the pin located on top of log#6. The log should
sit in the notch on log#2, and the bottom should rest on the outer
right grate post.
#6
#7
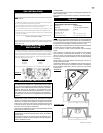
The protective wrap is best removed when the assembly is at room
temparature but this can be improved if the assembly is warmed,
using a hair dryer or similar heat source.
7. Place the large end of log#8 into the rear notch of log#4.
The small branch of log#8 sits in the notch located on top of log#1.
8. Place log#9 onto the grate as though it had burnt off log#5. Place
log#10 onto the locating pin on log#1. Again, log#10 should be aligned
as though it has burnt off of log#7.
CHARCOAL EMBERS
VERMICULITE
FIGURE 43
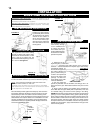
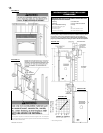
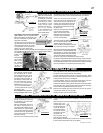
UPPER LOUVRES
Insert the louvre tabs into the slots
located at the top left and right cor-
ners of the unit.
SLOT
TAB
A
LOWER LOUVRES
Insert the hinge clips into the slots
located at the bottom left and right
corners of the unit.
To remove the louvres, pull the
back tabs of the clips forward, while
pushing the louvre assembly back.
Lift the clip.
B
HINGE
CLIP
SLOT
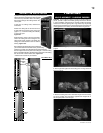
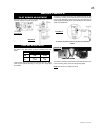
Tear the embers into pieces and place along the front row of ports
covering all of the burner area in front of the small logs (#2 & #3). Care
should be taken to shred the embers into thin, small irregular pieces
as only the exposed edges of the fi bre hairs will glow. The ember
material will only glow when exposed to direct flame; however,
care should be taken to not block the burner ports.
Blocked burner ports can cause an incorrect fl ame pattern, carbon
deposits and delayed ignition. PHAZER
TM
logs glow when exposed
to direct fl ame. Use only certifi ed "glowing embers" and PHAZER
TM
logs available from your Continental® dealer.
GLOWING EMBERS
Remove the backing of the logo
supplied and place on the glass
viewing door, as indicated.
LOGO PLACEMENT
FIGURE 42
LOUVRE INSTALLATION
LOGO
½"
½"
#8
#10
#9


