111487-01A
For more information, visit www.desatech.com
For more information, visit www.desatech.com
11
11
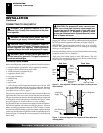
OPERATING HEATER
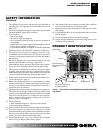
FOR YOUR SAFETY
READ BEFORE LIGHTING
WARNING: If you do not follow these instructions
exactly, a fire or explosion may result causing prop-
erty damage, personal injury or loss of life.
A. This appliance has a pilot which must be lighted by hand.
When lighting the pilot, follow these instructions exactly.
B. BEFORE LIGHTING smell all around the appliance area
for gas. Be sure to smell next to the floor because some gas
is heavier than air and will settle on the floor.
WHAT TO DO IF YOU SMELL GAS
• Do not try to light any appliance.
• Do not touch any electric switch; do not use any phone in
your building.
• Immediately call your gas supplier from a neighbor’s
phone. Follow the gas supplier’s instructions.
• If you cannot reach your gas supplier, call the fire de-
partment.
C. Use only your hand to push in or turn the gas control knob.
Never use tools. If the knob will not push in or turn by
hand, don’t try to repair it, call a qualified service techni-
cian or gas supplier. Force or attempted repair may result
in a fire or explosion.
D. Do not use this appliance if any part has been under water.
Immediately call a qualified service technician to inspect the
appliance and to replace any part of the control system and
any gas control which has been under water.
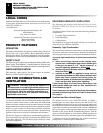
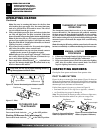
1. STOP! Read the safety information, abovc.
2. Make sure equipment shutoff valve is fully open.
3. Turn control knob clockwise
Clockwise
to the OFF position.
4. Wait five (5) minutes to clear out any gas. Then smell for
gas, including near the floor. If you smell gas, STOP! Fol-
low “B” in the safety information, above. If you don’t smell
gas, go to the next step.
5. Turn control knob counterclockwise
C-clockwise
to the PI-
LOT position. Press in control knob for five (5) seconds
(see Figure 16, page 12).
LIGHTING
INSTRUCTIONS
NOTICE: During initial operation of new heater, burning
logs will give off a paper-burning smell. Orange flame
will also be present. Open a window to vent smell. This
will only last a few hours.
INSTALLATION
Installing Log Set
OPERATING HEATER
For Your Safety Read Before Lighting
Lighting Instructions
L
O
P
I
L
O
T
O
F
F
HI
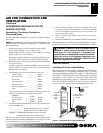
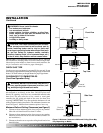
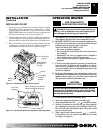
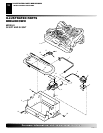
Figure 14 - Installing One-Piece Stove Log Set
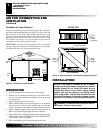
Burner Porting Areas (double
slotted rectangular openings
Figure 15 - Top View of One-Piece Log Set on Gas Log Heater
Safety Pilot
Location
One-Piece
Log Set
One-Piece
Log Set
Heater
Base
"U" Shaped
Cutout in
Chassis
Burner
Middle Section
at Bottom of
Log Set
INSTALLING LOG SET
1. Set one-piece log on heater base as shown in Figure 12. Make
sure middle section at bottom of log is seated into "U" shaped
cutout in center of heater base. Log will fit securely on base.
IMPORTANT:
Make sure log does not cover any burner ports
and does not touch the stove cavity (see Figure 14).
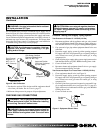
2. Fasten back panel to stove with four (4) bolts and washers re-
moved in step 4 of Unpacking, page 6. Make sure product iden-
tification label is located on the outside lower left-hand corner.
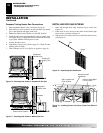
3. Place freestanding stove in desired position being careful not
to damage gas connections. Be sure to maintain clearances to
combustibles and wall clearances as outlined on page 7.
INSTALLATION
Continued


