


TO INSTALL OR REPLACE BATTERIES
Carefully read all instructions before use and save for future
reference.
Your new light operates on 3 “AAA” cell batteries. For longest life,
use alkaline batteries.
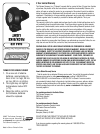
1. Remove 3 screws from back of light, with a small Phillips-
head screwdriver, and lift off back cover. (Fig. 1)
2. Install 3 “AAA” cell batteries in the correct orientation as
shown on the battery housing. Make certain all 3 batteries are
installed correctly. (Fig. 2)
3. Replace back cover on light, then install and tighten the 3
screws. (Fig. 3)
OPERATING THE LIGHT
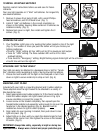
1. Your Pack/Bike Light turns on by pushing the button located on top of the light
(Fig. 4). The number of times you push the button will let you choose your
lighting preference:
• Once for “HIGH” setting. All four LED’s will be lit for maximum light output.
• Twice for “LOW” setting. The three outside LED’s will be lit for more
subdued lighting.
• Three times for “Emergency” setting. Bright flashing signal strobe light will be activated.
• Fourth time will turn the light off.
ATTACHING LIGHT TO PACK OR BELT
Your light can easily be attached to a backpack strap or belt for “hands-
free” operation while navigating at night or during low-light conditions.
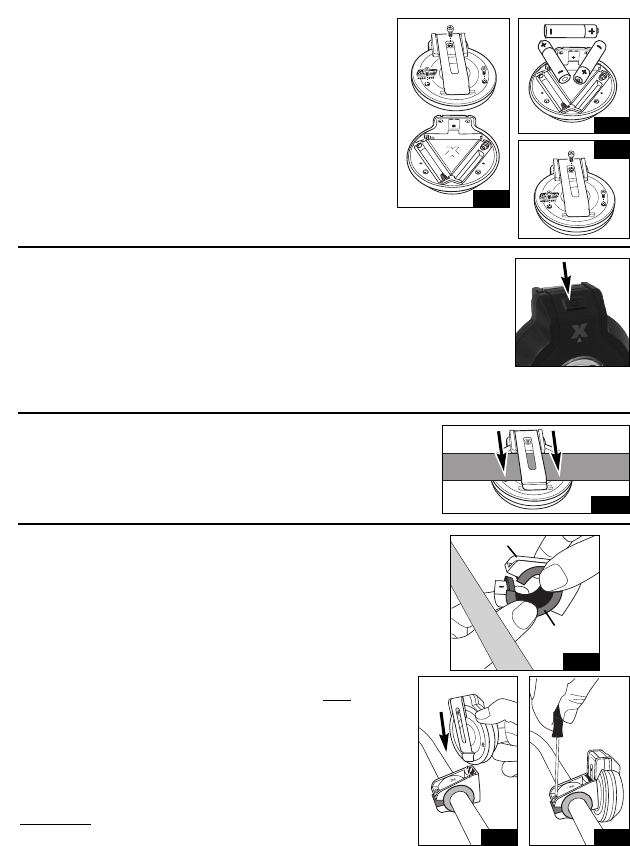
1. Choose the best location for the light on the backpack or belt. Push
down on light to secure metal clip to strap or belt. (Fig. 5)
MOUNTING LIGHT TO BIKE
Included with your light is a mounting bracket and 3 rubber adaptors.
These adaptors allow the light bracket to be attached to a variety of
bike handle bar sizes.
1. Select appropriate sized rubber adaptor to fit the bike’s handle bar.
Install the rubber adaptor into light bracket (shown in Fig. 6) to
ensure orientation is correct for proper fit.
2. Loosen screw on the bracket completely, then spread open the
bracket/rubber adaptor sub-assembly wide enough to slip over the
handle bar in the desired position (Fig. 6).
Bracket must be
installed as shown for light to attach properly.
3. Align metal clip over opening in bracket, then push down to lock
light into place. (Fig. 7)
4. Adjust light up or down until you reach the desired angle for best
lighting of the road or trail, then tighten the screw on the bracket
to secure. (Fig. 8)
IMPOR
TANT: Always bike safely, especially at night or during low-
light conditions. Always wear a helmet and proper protective gear.
Fig. 1
Fig. 3
Fig. 2
Fig. 5
Fig. 7 Fig. 8
Fig. 4
Fig. 6
Rubber
Adaptor
Bracket
Handle Bar