


EN
ENGLISH
-14- Clarke
®
Operator's Manual (EN) - BOOST 28
How To Charge The Batteries (On-Board Charger
Option)
WARNING: Charging the batteries in an area
without adequate ventilation could
result in an explosion. To prevent an
explosion, charge the batteries only
in an area with good ventilation.
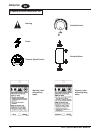
WARNING: Lead acid batteries generate gases
which could explode. Keep sparks
and flames away from batteries. NO
SMOKING!
To charge the batteries, follow this procedure:
1. Make sure the key switch is in the “OFF” position.
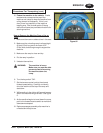
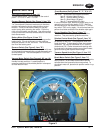
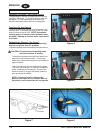
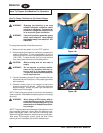
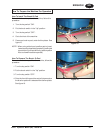
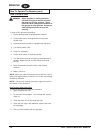
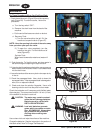
2. Before charging the batteries, the battery compartment
needs to be vented. To vent compartment, tip up the
recovery tank until it locks in the open position (see figure
14A & 14B). To close the tank, pull up on the arm and
then slowly lower the tank to the closed position.
CAUTION: Before raising tank, be sure tank is
empty.
WARNING: Do not operate or perform mainte-
nance on the machine while the re-
covery tank is in the open position.
The tank can be accidentally bumped
and it may slam shut.
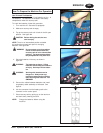
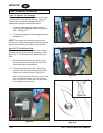
3. Connect the battery charger AC cord located at the rear
of the machine to a 15 amp (min) 120V properly grounded
wall receptacle.
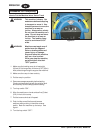
4. Observe indicator light on the charger to ensure the
charging process has started. Yellow light indicates
state of charge. Steady on green light indicates the
batteries are fully charged.
NOTE: Make sure you plug into a circuit that is not loaded by
other equipment. Wall breakers may be tripped and no charge
will occur.
WARNING: Never charge a GEL battery with an
unsuitable battery charger. Carefully
follow the instructions given by the
manufacturer of the batteries and bat-
tery charger.
NOTE: To prevent permanent damage to the batteries, avoid
their complete discharge. Never leave the batteries com-
pletely discharged, even if the machine is not being used.
When recharging the batteries, keep the recovery tank open.
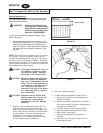
After every 20 recharging cycles, check the level of the
electrolyte and if necessary top off with distilled water.
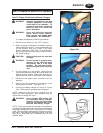
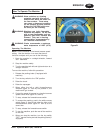
How To Prepare the Machine For Operation
Figure 14A
Figure 14B