


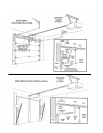
ONE-PIECE DOOR WITHOUT TRACK
PLEASE READ AND COMPLY WITH THE WARNINGS ON PAGE 10. THEY APPLY TO THE INSTALLATION OF
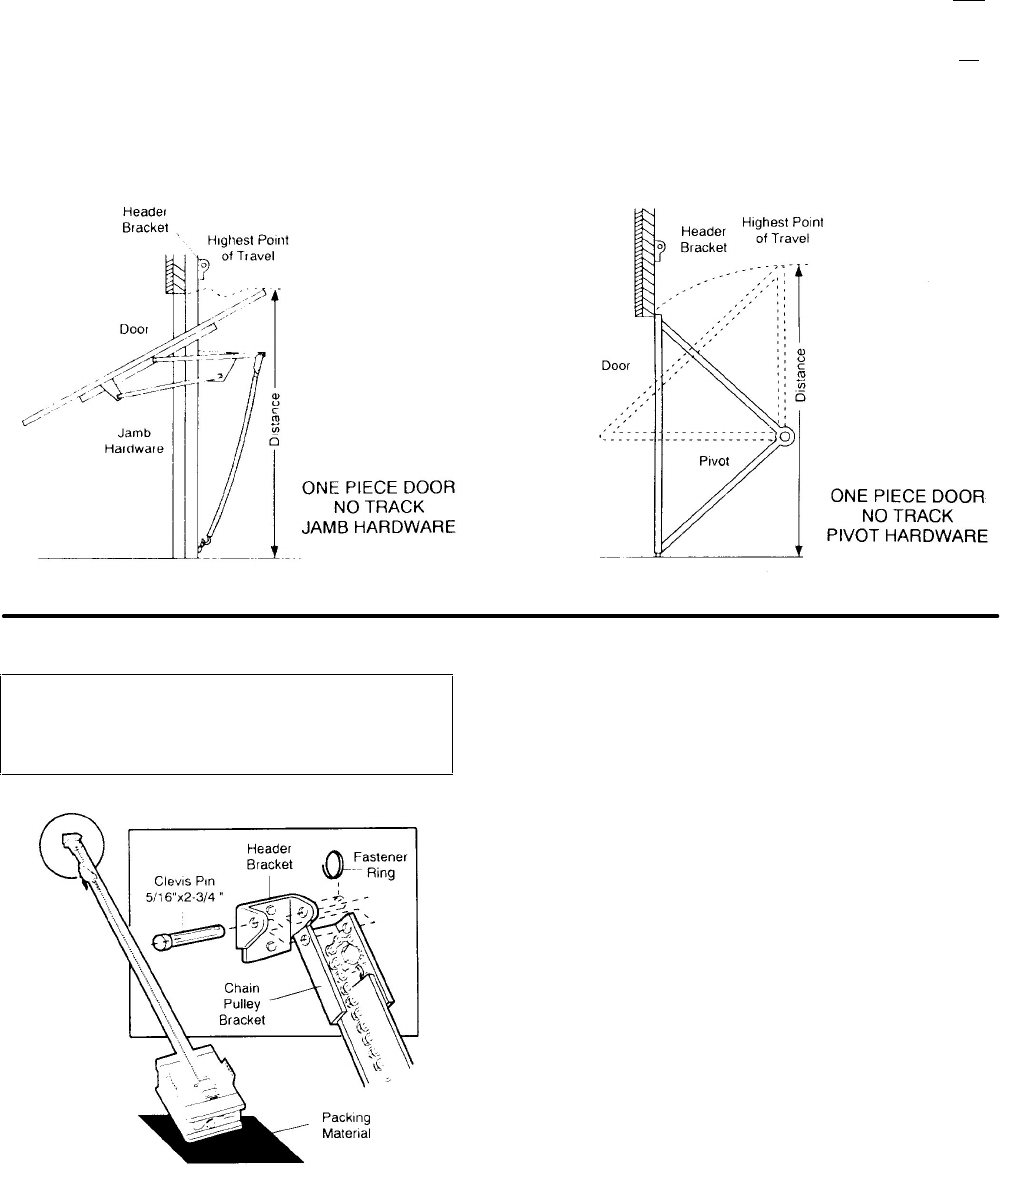
THE HEADER BRACKET REGARDLESS OF DOOR TYPE.
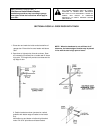
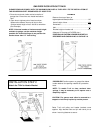
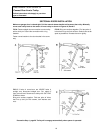
1. Close door and mark inside vertical centerline of
garage door. Extend line onto header wall above
door.
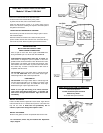
2. Open door to highest point of travel as shown.
Measure the distance from top of door to floor.
Subtract actual height of door. Add 8" to remainder
(See Example).
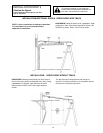
EXAMPLE
Distance from top of door (at
highest point of travel) to floor
................................................................................92”
Actual height of door ..............................................-88”
Remainder.................................................................4"
Add .........................................................................+8
Bracket height on header wall ...............................=12”
(Measure UP from top of CLOSED door.)
NOTE: If the total number of inches exceeds height
available In garage, use the maximum height
possible. On finished ceilings, do not position the
bracket closer than 1/2" from ceiling.
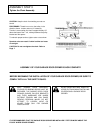
POSITION AND FASTEN HEADER BRACKET AS
DESCRIBED AND SHOWN IN NO. 3 ON PAGE 10.
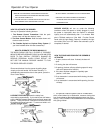
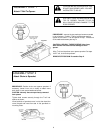
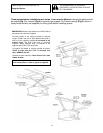
INSTALLATION STEP 2
Attach the T-Rail to Header Bracket
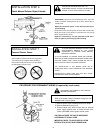
PROCEDURE: Position opener on garage floor below
header bracket. Use packing material as a protective
base.
NOTE: To enable T-rail to clear sectional door
springs, it may be necessary to lift opener onto a
temporary support.
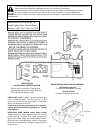
CAUTION: The opener must either be secured to a
support or held firmly In place by another person.
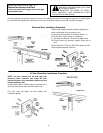
Raise T-rail until pulley and header brackets come
together. Align bracket holes and join with clevis pin as
shown. Insert ring fastener to secure.
11