


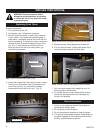
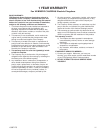

Remove Screws
Fig. 5 Remove screws that hold refractory bracket with
ember bed.
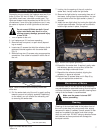
6. Pull the ember bed out of the unit, by gently pulling
towards you and only slightly upwards. Depending
on the model, you can remove the refractory prior
to removing the ember bed.
Cleaning
Cleaning of the touchpad label at the bottom front of
the unit is to be done only using a soft cloth, slightly
dampened in water (if needed, a small amount of dish
soap can be added to the water) and dried using a
clean, dry soft cloth. DO NOT use any abrasive house-
hold cleaners as these products will damage the
touchpad controls.
7
10007176
Depending on your model, the fireplace uses two (2) or
three (3) clear 120 Volt, 60 Watt, E-12 socket base
light bulbs (small base, chandelier candle type). The
lights are located under the ember bed of the unit. For
convenience, if one of the light bulbs burns out, it may
be easier to replace all of the light bulbs at the same
time.
Do not exceed 60 Watts per bulb. Use of
higher rated bulbs may result in a fire,
causing property damage, personal injury
or loss of life.
1. Turn off power to the unit.
2. Let fireplace cool if it has been operating.
3. Remove fixed front panel, or open doors (depend-
ing on model).
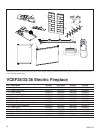
4. Locate two (2) screws that hold the refractory (brick
patterned) bracket together with the ember bed.
(Fig. 5)
5. Remove those two (2) screws using an appropriate
screwdriver. One screw is located on either side of
the unit.
Replacing the Light Bulbs
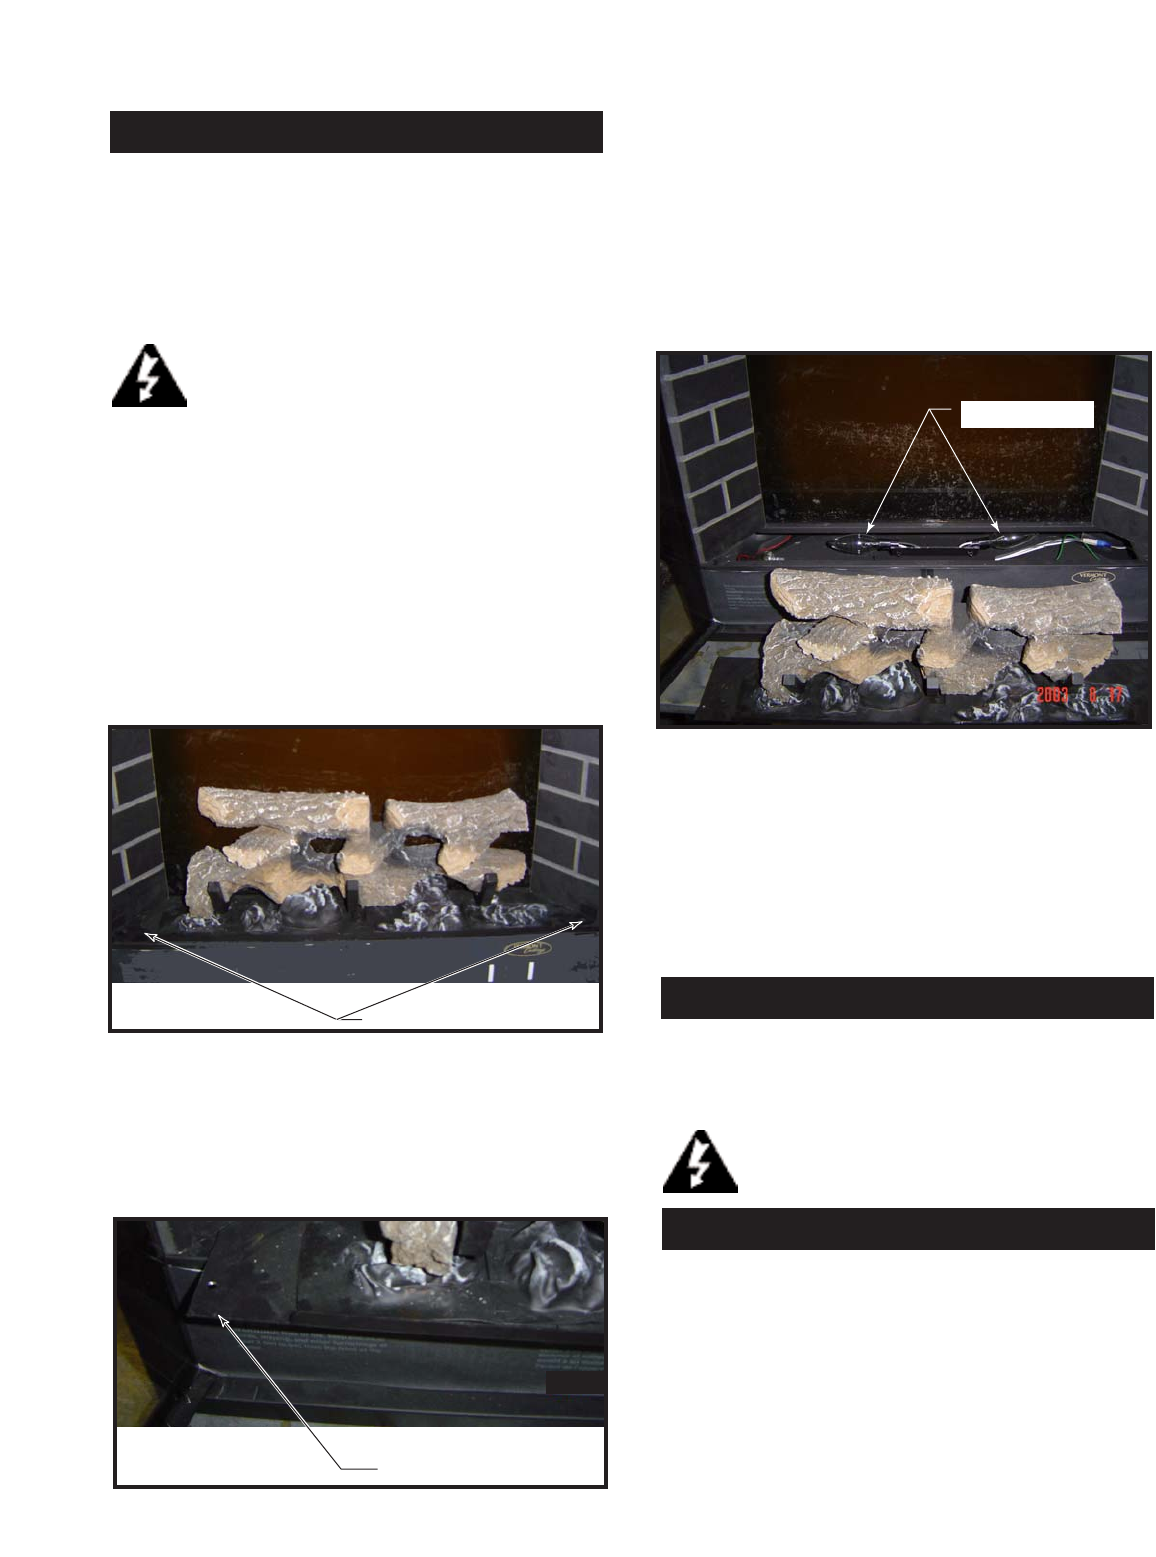
Pull Here (both sides)
Fig. 6 Pull ember bed out of unit.
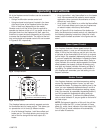
7. Looking into the opening of the unit under the
ember bed, visually locate the light bulbs.
8. Remove the light bulbs by unscrewing them out of
the bases, turning them counterclockwise. You can
use one hand to hold the light socket in place, if
required.
9. Install the new light bulb(s) by turning the light bulb
into the base clockwise. You can use one hand to
hold the light socket in place, if required.
60 W Light Bulbs
Fig. 7 Remove and replace light bulb(s).
10.Reposition the ember bed. If required, gently raise
the refractory panels, one at a time, to tuck the
ember bed edge underneath them.
11.Reposition the refractory bracket, aligning the
refractory in place as required.
12.Replace two (2) screws taken out in Step 5, by
using an appropriate screwdriver.
Maintenance of Motors
The motors used on the fan and the drum assembly
are prelubricated for extended bearing life and require
no further lubrication. However, periodic cleaning/vacu-
uming of the fan/heater is recommended.
Make sure the power is turned OFF
before proceeding.