


40
Stardance Direct Vent - Rear Vent Gas Heaters
20012950
CO106a
DV360/580
Gas Conversion
Pilot2
1/28/00 djt
Index Tab
Snap Ring
Allen Wrench
CO106a
Fig. 71 Remove pilot orifice.
CO105a
gas conversion
Pilot
1/28/00 djt
Pilot Hood
Pilot
Bracket
CO105a
Fig. 70 Remove pilot hood.
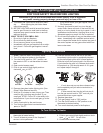
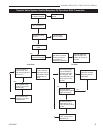
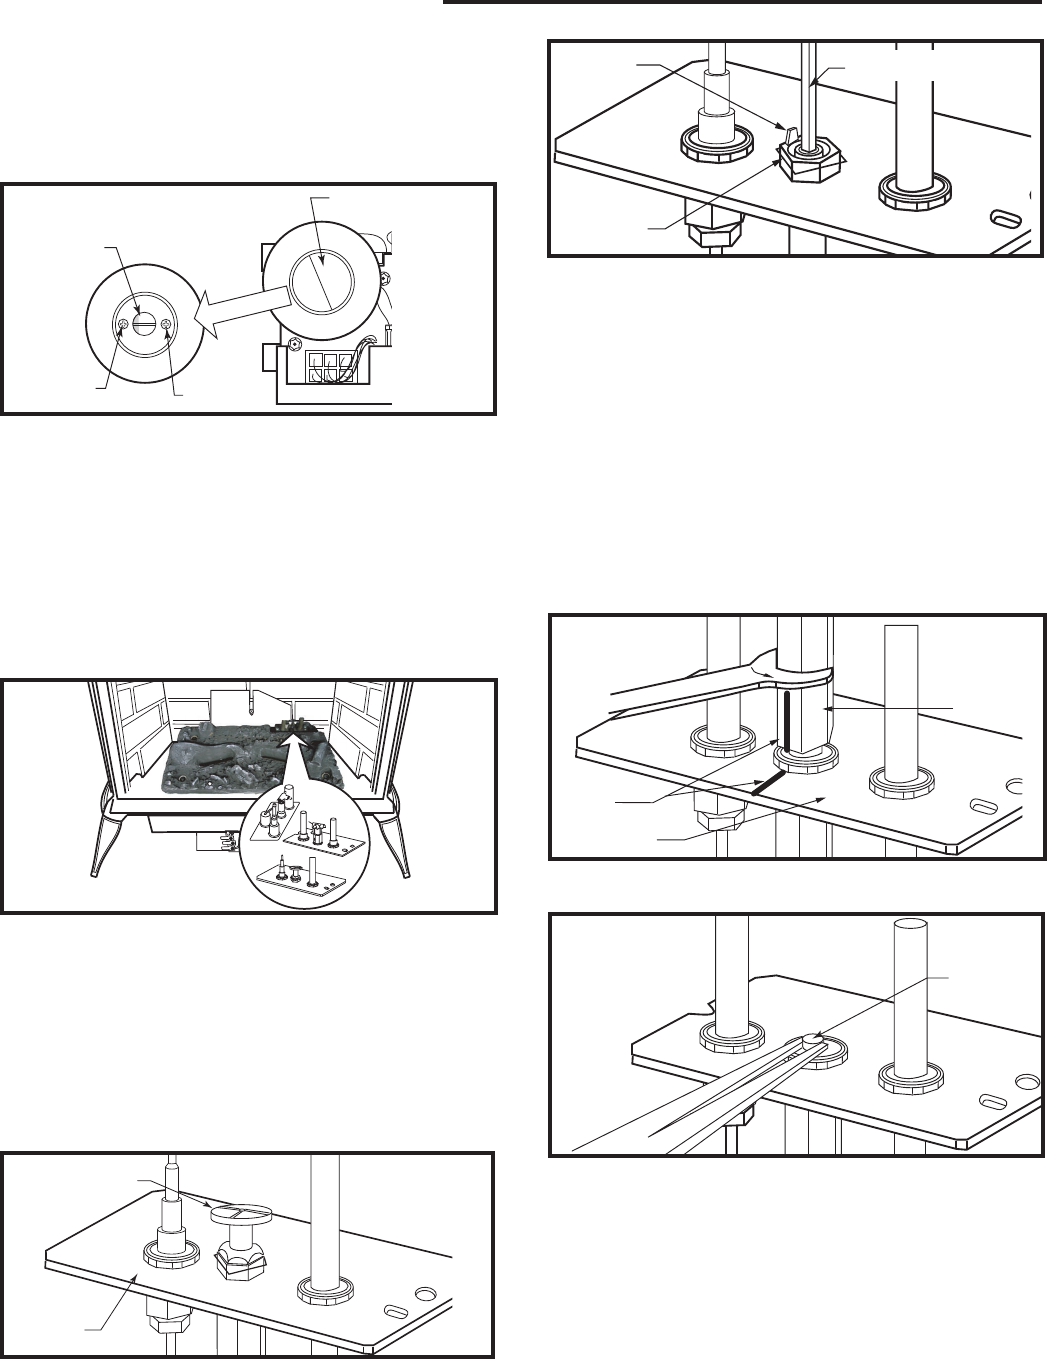
3. Remove motor top cap using a standard slotted
screwdriver. Depress and turn center plunger until
arrow points to correct screw. Red for LP and Blue
for NG. NOTE: Plunger will “snap” into NG position
when arrow is close to blue screw. It will not “snap”
at LP (Red) position. (Fig. 68)
FP1037b
comfort valve
convert
3/6/01 djt
LOCAL
REMOTE
O
N
•
P
IL
O
T
OFF
•
LED
Center
Plunger
Motor Top Cap
Red - LP
Blue - NG
FP1037b
Fig. 68 Depress and turn center plunger.
Valve
4. Insure manifold pressure remains between 3.2” - 3.5”
w.c. for NG and 9.5” - 10” w.c. for LP. To adjust the
manifold pressure, for NG, using a Torx #10 key turn
the blue screw clockwise to increase the manifold
pressure. Turn the screw counterclockwise to de-
crease the pressure. Use the red screw to adjust LP.
5. Replace motor top cap.
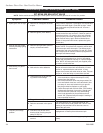
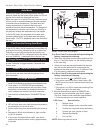
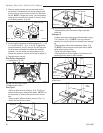
Pilot Orifice Conversion
1. Locate pilot. (Fig. 69)
ST935
SDDVT
pilot location
6/07
ST935
Fig. 69 Pilot assembly location.
2. Replace pilot orifice.
Pilot Type 1
• Remove pilot hood by lifting up. (Fig. 70) Do not
remove snap ring to remove pilot hood. NOTE: It is
not necessary to remove the pilot tube for conver-
sion.
• Remove pilot orifice with Allen wrench. (Fig. 71)
• Install the conversion orifice.
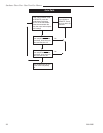
CO142
Rf pilot Conversion
6/07 djt
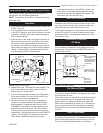
Pilot Hood
Index
Marks
Pilot Bracket
CO105
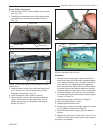
Fig. 72 Remove pilot hood. (Your pilot may have a different
appearance.)
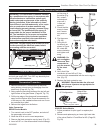
CO144
RF Pilot conversion
6/07 djt
Pilot
Orifice
CO106b
Fig. 73 Remove pilot orifice.
• Reinstall pilot hood. Be sure to align hood with
index tab.
Pilot type 2
• Loosen pilot hood turning counterclockwise using a
7/16” wrench. (Fig. 72) NOTE: You may use pen-
etrating oil to prevent pilot hood threads from seizing
up.
• Remove pilot orifice with needlenose pliers. (Fig.
73) NOTE: Use a wrench to hold pilot tube in place
while removing the orifice.
• Install the conversion orifice.
• Reinstall pilot hood and tighten until mark on pilot
hood aligns with mark on pilot bracket.