


16
Dutchwest
7001135
Your convection heater requires some assembly.
Follow the directions carefully and refer to the parts
diagram at the back of this manual.
Unpack the Parts
Remove all loose parts from the firebox and the ash
pan. Check to make sure all the parts are included and
intact. You should have received:
• 1 fully assembled heater body, (with catalytic burner
installed at the factory)
• 4 legs
• 1 ash pan
• 1 probe thermometer
• 1 ceramic handle assembly
• 1 strip of Interam™ gasket (for the catalytic burner)
• 1 hardware bag, containing the following parts:
• (3) #10 x 1/2” sheet metal screws, (to attach the
chimney connector to the flue collar)
• (1) 1/8” Allen wrench, (to tighten the door latch)
• (1) 5/32” Allen wrench, (to tighten the damper
handle)
• (4) washers, (used with the leg bolts to attach legs
to the stove)
• (1) door handle insert holder for storing the ceram-
ic handle assembly when it is not in use.
The four hex-head leg bolts have been installed in
the appropriate holes in the bottom of the stove.
If any parts are missing or damaged, immediately
notify your Dutchwest dealer for replacements. Do not
install your stove without having all necessary parts or
by using damaged parts.
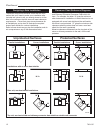
* A Bottom Heat Shield is required in many instal-
lations. Refer to the floor protection information
found in the Installation Section of this manual.
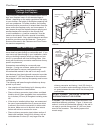
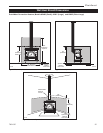
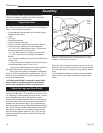
Attach the Legs and Heat Shield
Place the stove on its back on a soft surface such as a
couple of old blankets. Tilt it carefully; it is heavy. Use
4 x 4 blocking to make it easier to tilt the stove. Protect
surrounding flooring with an old blanket or sheet.
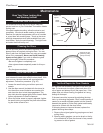
The tops of the legs are slotted. Remove each leg bolt
from the bottom of the stove and then replace it with a
washer from the hardware bag. If you are attaching a
bottom heat shield, place a heat shield bracket on each
bolt. Place the door handle insert holder on the bolt for
the left rear or either front leg. Slide the legs onto the
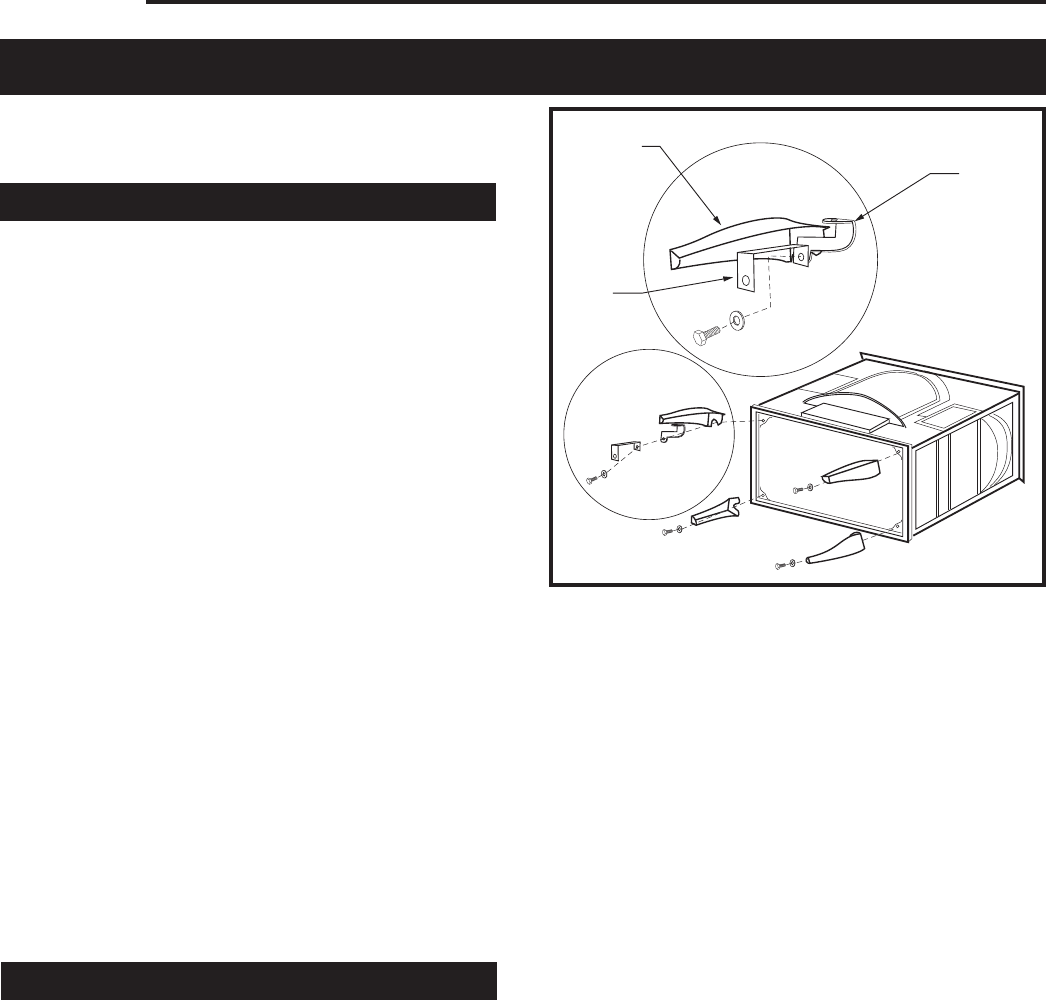
bolts and gently tighten each bolt. (Fig. 19) If you are
attaching a bottom heat shield, screw it onto the heat
shield brackets.
Assembly
ST431
dutchwest
attach legs
7/5/00 djt
Left Leg
Door
Handle
Holder
Heat
Shield
Bracket
Hex Head Bolt
& Washer
ST431
Fig. 19 To attach the legs, remove the bolts from the stove
bottom and reassemble with the handle holder, heat shield
brackets (if necessary) and washers.
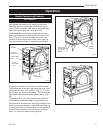
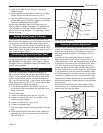
Stand the stove upright and carefully move it to its final
position. A trick for moving it easily over smooth flooring
is to stand the stove on a piece of scrap carpet, upside
down.
If the installation includes an optional rear heat shield,
attach it before you begin installing the chimney con-
nector.