


6
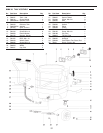
(Every six to twelve months):
1. Check filter for wear, replace dirt saturated filters that
do not respond to normal cleaning.
2. Inspect gasket seals and replace those which have
begun to leak.
3. Examine carbon motor brushes and commutator.
PERIODIC MAINTENANCE
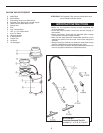
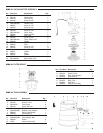
The filter is accessed by lifting the head assembly off the tank.
Polyester filter is easily removed by simply lifting the filter basket out of the tank.
Cartridge filters – Remove the filter retainer by turning the black knob 90 degrees counter-clockwise.
Cartridge filter will then slide off of float assembly.
NOTE:
Be sure to frequently clean the filter.
Allow filter to dry after being used for wet pick-up.
Filters used for wet pick-up including stripper must be thoroughly cleaned before being allowed to dry.
Worn filters can affect vacuum performance. Replace the filter when it becomes worn out and normal cleaning
will not restore vac performance.
SERVICING THE FILTER
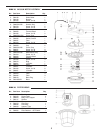
MOTOR REPLACEMENT
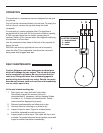
1. Disconnect power cord from power source.
2. To access the vac motor, remove the screws that attach the main cover to the head assembly and set
the cover to one side.
3. Disconnect the motor’s 2 red lead wires from the main switch.
4. Disconnect green/yellow wire by removing screw from motor core.
5. Remove the four motor mounting screws.
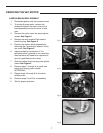
6. Remove motor plate and set aside.
7. Take out the motor and remove the upper and lower gaskets.
8. Inspect gaskets. If they shown any wear or tear in the material, replace.
9. Install gaskets onto new motor. Make sure gaskets are properly seated.
10. Install the new motor. Make sure foam mufflers are positioned properly.
11. Attach motor plate to motor.
12. Connect green/yellow wire to motor core.
13. Connect motor’s 2 red lead wires to main switch.
14. Re-assemble vac cover.
15. Test for proper operation.
SERVICING THE VAC MOTOR
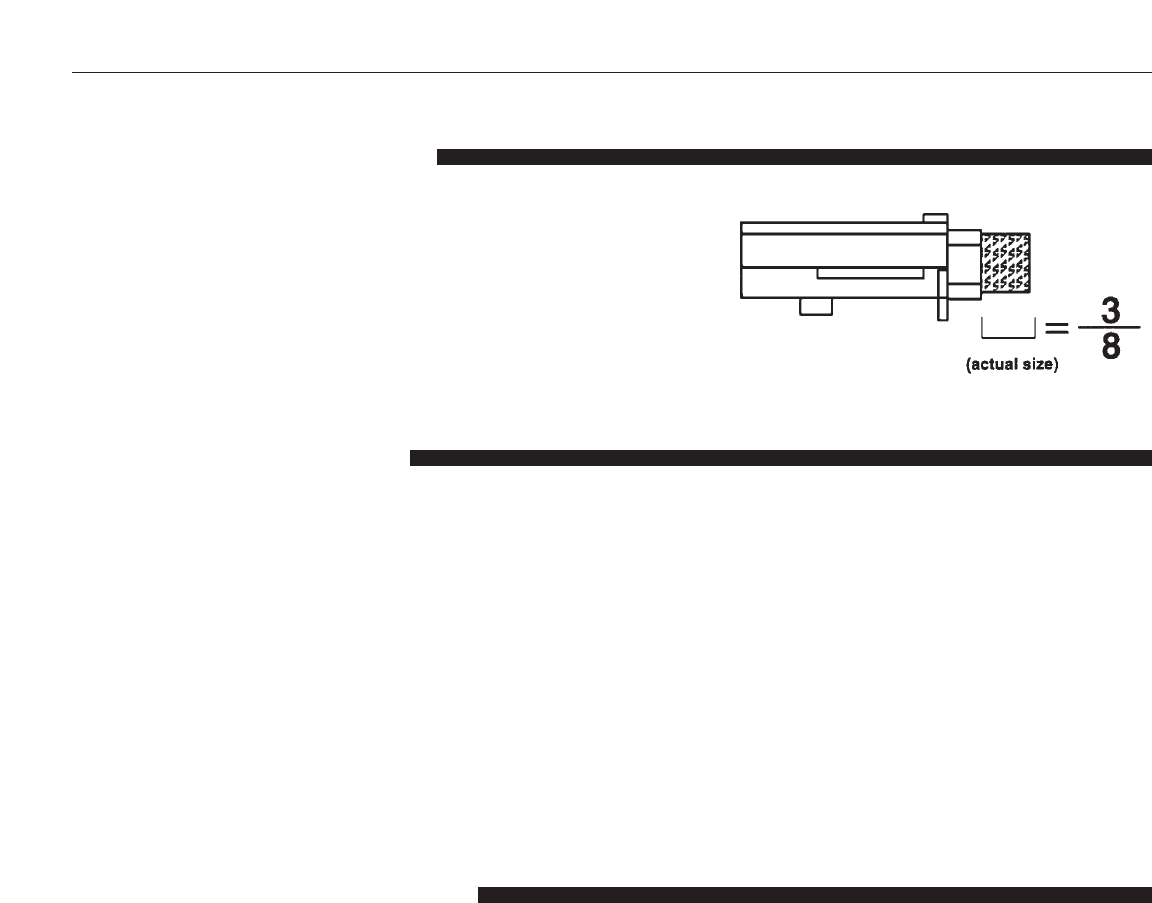
Replace both carbon
brushes when either is
less than 3/8" long. (PN S8TOEG845)