


11
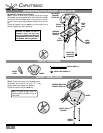
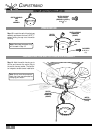
COLLAR
SWITCH
HOUSING
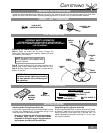
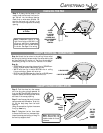
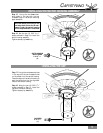
3-SPEED ♦ OPTIONAL LIGHT FIXTURE INSTALLATION
REVERSE
SWITCH
3-SPEED ♦ OPERATION
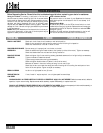
Pull-chain switches on the fan control the fan and lights.
Using the fan control pull-chain switch: Fan off at start.
First pull: fan ON, low speed
Second pull: medium speed
Third pull: high speed
Fourth pull: fan OFF
Using the optional light pull-chain switch: Light off at start.
First pull: light ON
Second pull: light OFF
Direction of blade rotation is controlled by the reverse slide
switch on the side of the switch housing.
No changes in household wiring are required.
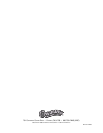
1. Refer to light kit instructions to assemble and attach your light
kit correctly.
2. Remove the two 8-32 screws from the switch housing cap.
3. Remove the plug from switch housing.
4. Install pull-chain switch and finger tighten collar on switch.
5. Connect one wire from pull-chain switch to the BLUE D1-Option
wire. Secure splice with a wire nut.
6. Connect other wire from pull-chain switch to BLACK wire from
light kit. Secure splice with a wire nut.
7. Connect WHITE wire from switch housing to WHITE wire from light
kit. Secure splice with a wire nut.
8. At the canopy, connect the BLACK and BLUE wires.
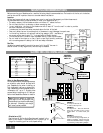
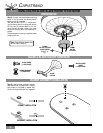
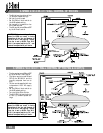
3-SPEED ♦ OPTIONAL WALL CONTROL
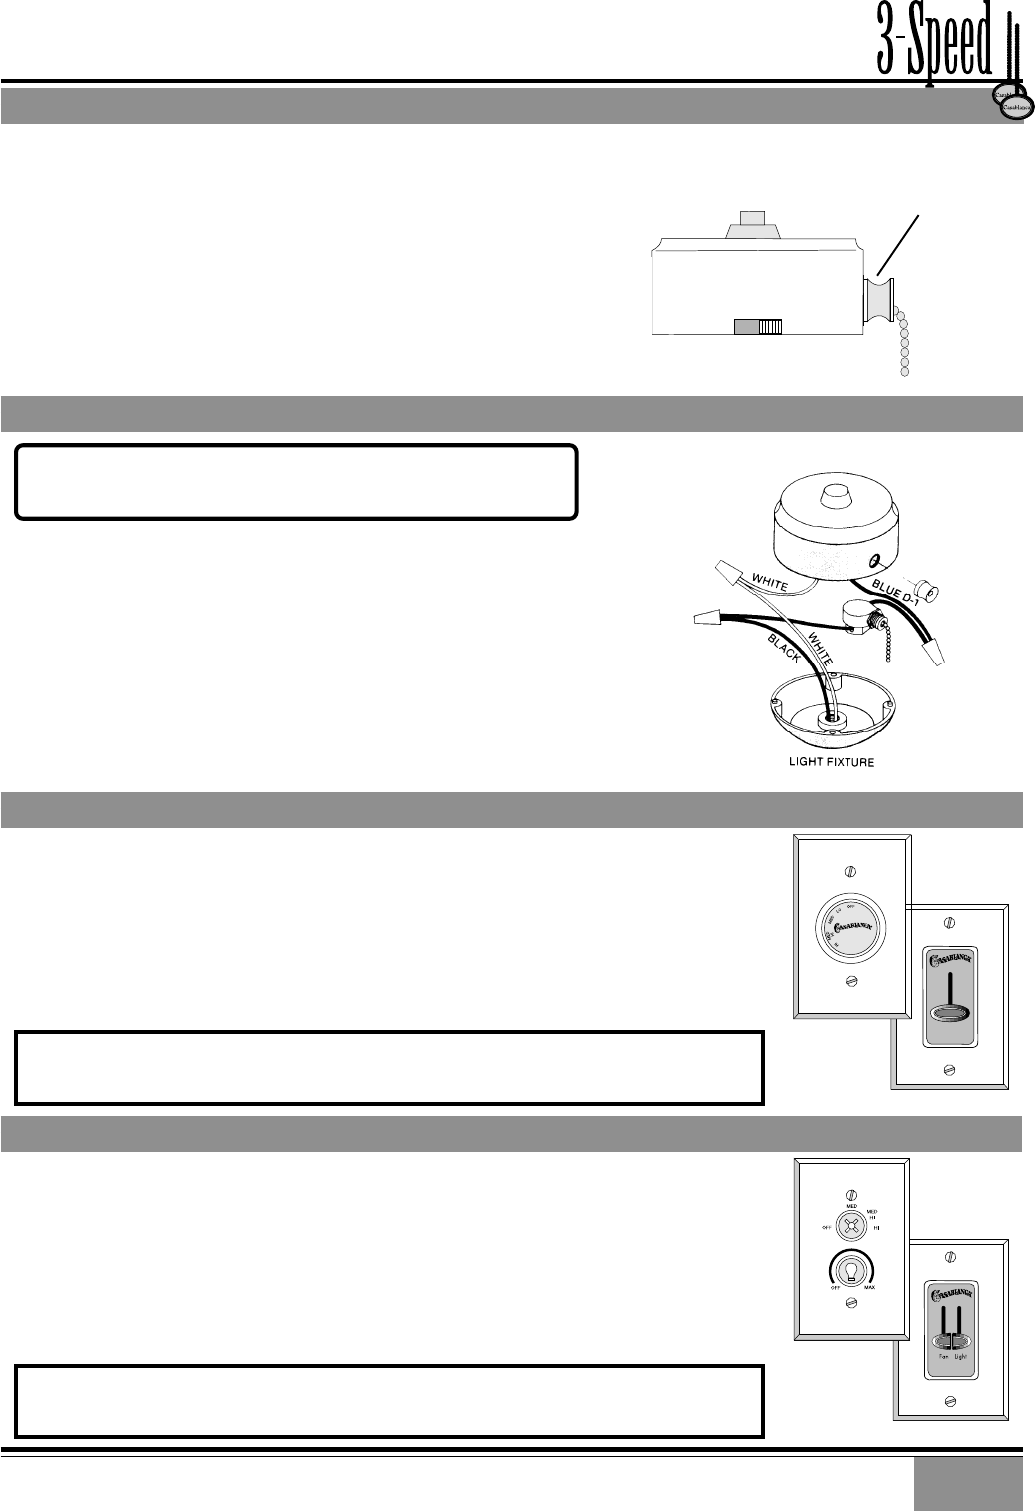
The W-4/W-411 wall control provides four-speed control of fan from a convenient wall
location. The W-4 is designed to replace a standard wall switch and will fit wall boxes with
a depth of 2" or greater. Not for use with single pull-chain fan/light option wiring.
To install a W-4/W-411 wall control in place of an existing wall switch, follow the instruc-
tions on the W-4/W-411 package.
Note: No rewiring is required if the fan is replacing an existing light fixture.
Operation of the fan from the wall switch is simple:
1. Turn knob to obtain desired speed setting.
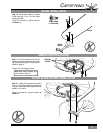
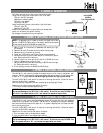
3-SPEED ♦ OPTIONAL WALL CONTROL
The W-8/W-811 wall control provides separate control of fan and light with two separate
knobs from a convenient wall location. The W-8/W-811 is designed to replace a standard
wall switch and wall boxes with a depth of 2" or greater. Requires two hot leads from wall
box to ceiling wiring box.
To install a W-8/W-811 wall control in place of an existing wall switch, follow the instruc-
tions on the W-8/W-811 package.
Operation of the fan from the wall switch is simple:
1. Turn the upper knob to the desired fan speed.
2. Turn the lower knob to the desired light setting.
FAN & SPEED
CONTROL
PULL CHAIN SWITCH
CAUTION! Failure to set the pull-chain speed to HIGH can result in faulty operation of
the fan and damage to the W-4/W-411 wall control. To confirm fan is set to HIGH: Turn
W-4/W-411 fan speed switch to 'HI'—set fastest fan speed with pull chain.
CAUTION! Failure to set the pull-chain speed to HIGH can result in faulty operation of
the fan and damage to the W-8/W-811 wall control. To confirm fan is set to HIGH: Turn
W-8 fan speed switch to 'HI' - set fastest fan speed with pull chain.
NOTE: If a separate circuit is used to control the lights from a wall
control, the BLUE D1-Option wire in the canopy should be connected
to that switch leg with the BLACK fan power wire.
R
LO
W-4/W-411
W-14/W-1411
W-8/W-811
W-18/W-1811