32
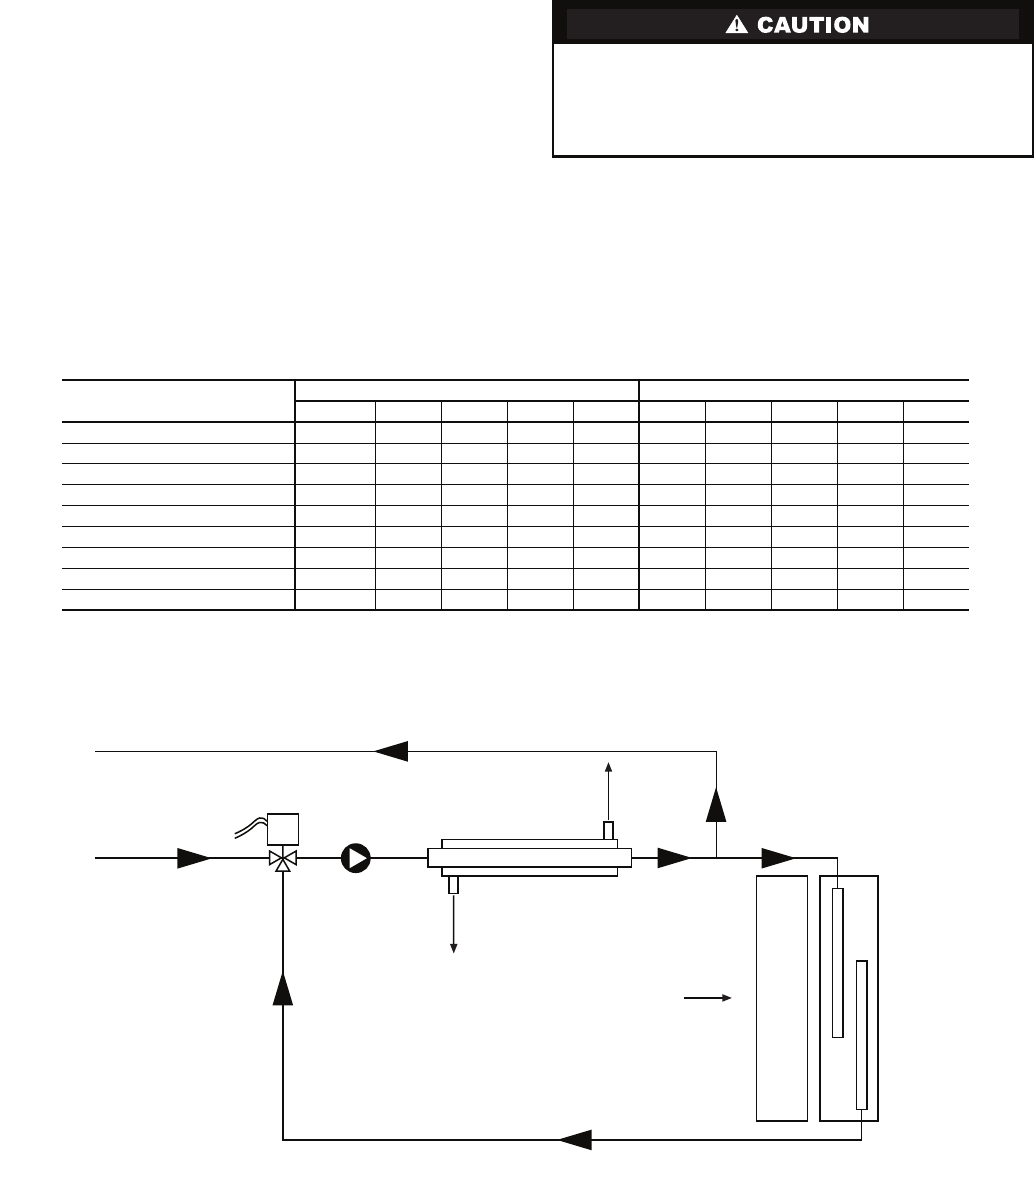
during the reheat mode of operation. The hydronic coil is uti-
lized during the reheat mode of operation to reheat the air to the
set point of the proportional controller. Condenser water is di-
verted by the motorized valve and pumped through the hydron-
ic coil by the loop pump in proportion to the control set point.
The amount of reheating is dependent on the set point and how
far from the set point the supply air temperature is. The factory
set point is 70 to 75 F, generally considered "neutral" air.
D Control Accessory Relay Configurations —
The following accessory relay settings are applicable for both
D controls only:
CYCLE WITH FAN — In this configuration, the relay will be
ON any time the Fan Enable relay is on.
CYCLE WITH COMPRESSOR — In this configuration, the
relay will be ON any time the Compressor relay is on.
DIGITAL NIGHT SET BACK (NSB) — In this configura-
tion, the relay will be ON if the NSB input is connected to
ground C.
NOTE: If there are no relays configured for digital NSB, then
the NSB and override (OVR) inputs are automatically config-
ured for mechanical operation.
MECHANICAL NIGHT SET BACK — When NSB input is
connected to ground C, all thermostat inputs are ignored. A
thermostat set back heating call will then be connected to the
OVR input. If OVR input becomes active, then the D control
will enter Night Low Limit (NLL) staged heating mode. The
NLL staged heating mode will then provide heating during the
NSB period.
Water Valve (Slow Opening) — If relay is config-
ured for Water Valve (slow opening), the relay will start 60 sec-
onds prior to starting compressor relay.
Outside Air Damper (OAD) — If relay is configured
for OAD, the relay will normally be ON any time the Fan
Enable relay is energized. The relay will not start for
30 minutes following a return to normal mode from NSB,
when NSB is no longer connected to ground C. After 30 min-
utes, the relay will start if the Fan Enable is set to ON.
START-UP
Use the procedure outlined below to initiate proper unit
start-up.
NOTE: This equipment is designed for indoor installation only.
To avoid equipment damage, DO NOT leave system filled
in a building without heat during the winter unless anti-
freeze is added to system water. Condenser coils never
fully drain by themselves and will freeze unless winterized
with antifreeze.
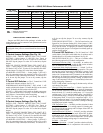
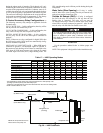
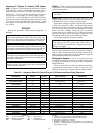
Table 17 — HWR Operating Modes
*Not applicable for single stage units; Full load operation for dual capacity units.
†Cooling input takes priority over dehumidify input.
**Deluxe D is programmed to ignore the H demand when the unit is in heating mode.
NOTE: On/Off is either on or off.
MODE
INPUT
OUTPUT
O
G Y1 Y2* H O G Y1 Y2* Reheat
No Demand On/Off
Off
Off Off Off On/Off Off Off Off Off
Fan Only On/Off On Off Off Off On/Off On Off Off Off
Cooling Stage 1
On On On Off Off On On On Off Off
Cooling Stage 2
On On On On Off On On On On Off
Cooling and Dehumidistat
†
On On On On/Off On On On On On/Off Off
Dehumidistat Only
On/Off Off Off Off
On On On On On On
Heating Stage 1
Off
On On Off Off Off On On Off Off
Heating Stage 2
Off
On On On Off Off On On On Off
Heating and Dehumidistat**
Off
On On On/Off On Off On On On/Off Off
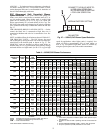
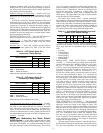
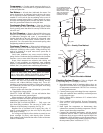
Fig. 28 — HWR Schematic
Water Out
(To Water Loop)
Water In
(From Water Loop)
Mixing Valve
COAX
Evaporator Coil
Reheat
Coil
Refrigerant Out
(Cooling)
Refrigerant In
(Cooling)
Entering Air
Leaving
Air
Internal Pump
NOTE: All components shown are
internal to the heat pump unit.
a50-8145.eps


