2
5. The dehumidistat consists of two pieces, a mounting
plate and the cover. Remove cover from the mounting
plate. Pull wiring through the hole in the mounting
plate.
6. Connect wiring to the terminals on the mounting plate
of the dehumidistat. Two spade connector are provided
in the dehumidistat for wiring connections. See Fig. 3.
7. Mount the dehumidistat on the wall with the two
screws and wall anchors provided.
8. Snap on the cover on the mounting plate.
OPERATION
When the dehumidistat is installed, the humidity dial should
be set to the desired level. When the indoor humidity level at
the dehumidistat is exceeded, the ventilator will go into Over-
ride mode. Override mode will continue until relative humidity
drops below the set point of the dehumidistat.
It is not necessary to change the humidity setting every day.
To avoid window condensation, monitor the average weekly
temperature to find a comfortable level. Adjust the control
when needed.
WALL CONTROL
TIMER
+-
EXTERNAL CONTACTS
ON VENTILATOR
DEHUMIDISTAT
DEHUM
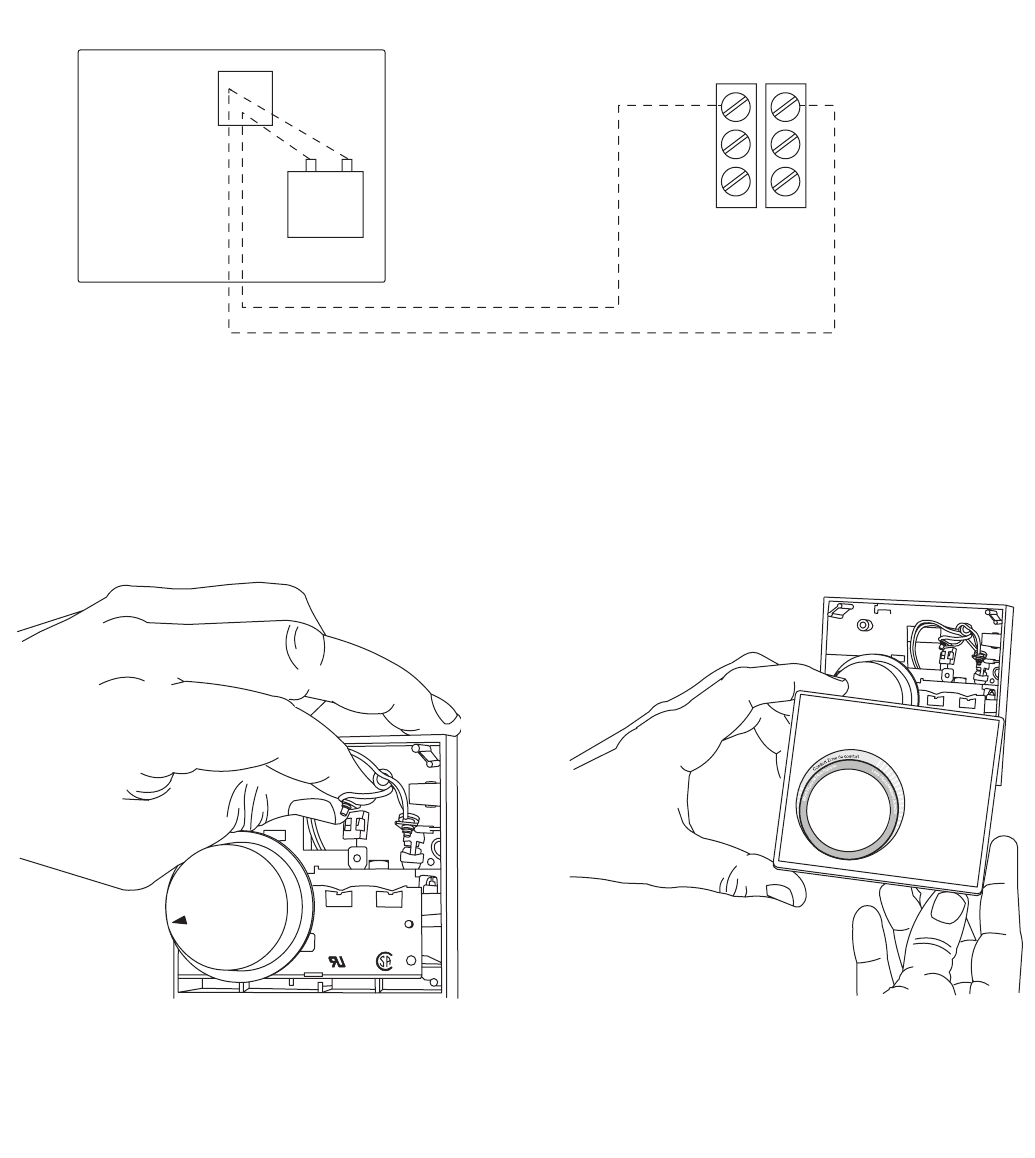
Fig. 2 — Dehumidistat Wiring
Fig. 3 — Dehumidistat Terminal Connections
Fig. 4 — Replacing Cover


