


5
4. Remove the front door from the humidifier. Rotate the
latches one-half turn, then pull the door forward.
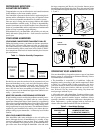
5. Remove and inspect the evaporator pad assembly. Lift the
bearing from its retainer. (See Fig. 10.) Pull the assembly
away from the motor to disengage the assembly shaft from
the motor coupling. Remove assembly through the access
opening.
Inspect the evaporator pad. If the pad is heavily loaded with
scale, or if the local water has a high sulfate content, replace the
pad. Contact your dealer for replacement part.
NOTE:
For best performance, the evaporator pad should be
replaced before each heating season.
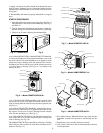
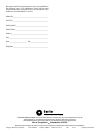
6. Inspect the float assembly. Remove the float arm from the
valve body by sliding out the pin and lifting off the float
arm. (See Fig. 11.) Inspect the rubber valve seat located in-
side the float arm. If the seat appears to be nicked or worn,
invert the seat or replace it with the spare valve seat located
on the float arm. Inspect the water opening in the valve
body. If the opening is clogged, use a pin to remove the
obstruction. Remove any accumulated deposits from the
valve body and float arm.
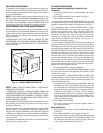
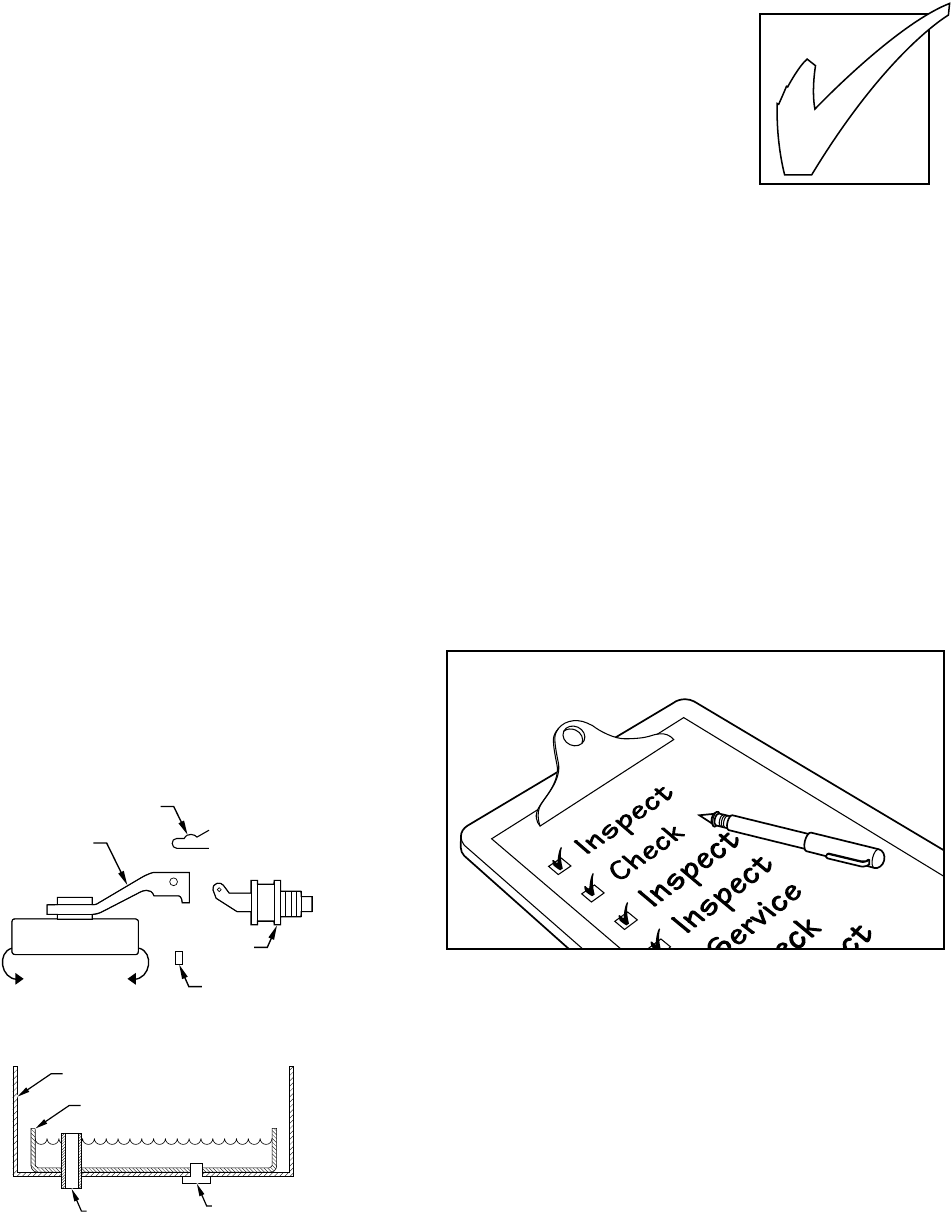
7. Clean the water pan and unit cabinet. Tilt the water pan and
lift it from the unit. Wash the pan with warm, soapy water.
Flex the pan to loosen accumulated scale. Wash the unit in-
terior, removing any accumulated deposits. Inspect the
drain line to insure that no blockage has occurred. Clean as
required. (See Fig. 12.)
8. Reassemble your Model HUMCCWTR humidifier. Rein-
sert the water pan and drain plug. Ensure that the overflow
tube is inserted into the hole at the bottom of the cabinet.
Attach the float arm to the valve body by aligning the holes
on both parts and reinserting the pin.
Do not force or bend
the pin.
The float arm should have free up-and-down move-
ment. Install the evaporator pad assembly. Ensure that the
square shaft engages the motor coupling and that the bear-
ing washer is located inside the bearing retainer. Turn the
water on. Adjust float by rotating until water covers inside
of foam drum. Attach the access door and turn the latches.
Fig. 11 — Float Arm Removal
Fig. 12 — Cleaning Water Pan and Unit Cabinet
9. Turn on electrical power supplies. Refer to startup proce-
dures listed on page 3.
BEFORE YOU REQUEST A “SERVICE CALL’’
BEFORE YOU CALL FOR SERVICE, CHECK FOR
THESE EASILY SOLVED PROBLEMS:
•
Check the main power disconnect
switch. Verify that the circuit break-
ers are on and that fuses have not
blown. If you must reset breakers or
replace fuses, do so only once. Con-
tact your servicing dealer for assis-
tance if the breakers trip or the fuses
blow a second time.
•
If the humidity level is too low, check the humidistat setting.
Confirm that the saddle valve is turned on. Check the evapora-
tor pad, and clean or replace the pad as necessary. Check water
level in Model HUMCCWTR.
•
Check for sufficient airflow. Check the furnace filter or elec-
tronic air cleaner for excessive accumulations of dirt. Check for
blocked return- or supply-air grilles. Be sure grilles are open
and unobstructed.
•
If water drips from the humidifier, check the drain hose for
kinks or obstructions. If your unit is a Model HUMCCWTR,
dripping may indicate that the float valve requires adjustment.
If your comfort system still fails to operate properly, contact
your servicing dealer for troubleshooting and repairs. Specify
your apparent problem, and state the model and serial numbers
of your equipment. (You should have them recorded where
noted in this booklet.) With this information, your dealer may be
able to offer helpful suggestions over the phone, or save valuable
time through knowledgeable preparation for the service call.
REGULAR DEALER MAINTENANCE
In addition to the routine maintenance that you perform, your
humidifier should be inspected regularly by a properly trained
service technician. The inspection (preferably each year, but at
least every other year) should include the following:
•
Routine inspection of the humidifier. Cleaning, if necessary.
Cleaning or replacement of the evaporator pad as required.
•
A check of all electrical wiring and connections.
•
A check of water connections to the unit.
•
Operational check of the complete comfort system to deter-
mine actual working condition. Necessary repair and/or adjust-
ment should be performed at this time.
Your servicing dealer may offer an economical service contract
that covers seasonal inspections. Ask for further details.
FLOAT ARM
PIN
VALVE
BODY
VALVE SEAT
HIGHER
LOWER
HUMIDIFIER HOUSING
WATER PAN
OVERFLOW TUBE
DRAIN PLUG