


set...
scheduleoccupied
mode
fellow schedule _ auto _ off
held _ on _ heat
_,- holiday o/,_ _- cool
checkUV light _ !_- Em heat
p[essdone
checkhum
pod
[] 3sec to
checkfilter
actual temp cancel alert
...clock ...calendar ...dailyschedule ...holiday settings
700 auxiliary
ll_ TU _. ooc oteside temp heat on 1
_We _o star[at returnon heat cool |
Th -- occ3 temporaryholdf .... tat: setat: r
2 ...................... ......
©<-b©dbdb©
softkeys
A
V
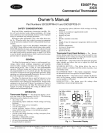
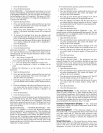
Fig. 2 -- Thermostat Front Panel Buttons
UP BUTTON -- This button is used to increment the current-
ly chosen value (temperature, clock, calendar, etc.).
DOWN BUTTON- This button is used to decrement the
currently chosen value (temperature, clock, calendar, etc.).
"SOFT" BUTTON -- There are 6 soft buttons (or keys). The
soft buttons are used to select the onscreen indicator directly
above that specific button. These indicators can change based
on the actions of the user.
Set Time and Date -- The user must set the time and
date before the thermostat's progralmning features can be used.
Perform the following procedure:
1. Open the thermostat front panel door.
2. Press the set button. The screen will show the word
"clock" on the left of the display and the thne will be
shown on the bottom. Press the set button again.
3. To set the correct hour, press the soft button underneath
the hour indicatoc and then press the up or down buttons
to adjust the value.
4. To set the correct minutes, press the soft button under-
neath the minutes indicatoc and then press the up or
down buttons to adjust the value.
5. To set the correct date, press the set button until the screen
displays the word "calendar" and the date is shown on the
bottom of the screen.
6. To set the correct month, press the soft button underneath
the letter M (month), and then press the up or down but-
tons to adjust the value.
7. To set the correct day of the month, press the soft button
underneath the letter D (day), and then press the up or
down buttons to adjust the value.
8. To set the correct year, press the soft button underneath
the letter Y (year), and then press the up or down buttons
to adjust the value.
9. Press the done button to finish.
10. Close the thermostat door.
Setting or Changing Heating and Cooling Set
Points -- The Edge (R_Pro thermostat is installed with preset
heating and cooling temperature settings. The user can use
these settings or change them. The user can also temporarily
change the temperature from the progralmned set points.
To temporarily hold the temperature for two hours, perform
the following. Open the front thermostat door. An arrow will be
displayed next to the words "off," "heat," or "cool" in the upper
right corner on the screen, depending on the mode the system is
in. If it is the first time the thermostat is being used, the "heat"
indicator will be displayed. The preprogrmmned heating or
cooling temperatures are displayed in a box at the bottom of the
screen. Change the displayed temperature set point by pressing
the up or down buttons until the desired setting is reached.
To change other temperature set points, press the mode but-
ton. The arrow will move to the next mode and the screen will
show the related temperature set point in a box. Then press the
up or down buttons to change the displayed set point.
When there are arrow indicators next to both of the heat and
cool indicators, the heating and cooling set points are both dis-
played at the bottom of the screen. The user can change either
one by pressing the soft button underneath the set point to be
changed. Press the up or down buttons to adjust the tempera-
rare. Repeat the process for the other set points if necessary.
Press the done button when finished.
The thermostat will hold these changes for two hours or un-
til the next progralmned cycle begins. The words "temporary
hold" will be displayed while this is in effect. To change the
amount of thne that the temperature is on hold, press the soft
button under the hold hours or minutes indicators. Then press
the up or down buttons to adjust the time hold time. Close the
door when done.
Holding Temperature Set Points -- The user can
ovemde the progralruned temperature settings and hold the
temperature at a specific setting without the temperature
changing during the next progralmned period. To ovemde the
temperatures, perform the following:
1. Open the door.
2. Press the schedule button. The arrow will move to the
hold indicator.
3.
The screen will display the set point temperature. To
change the set point temperature, press the up or down
buttons. The temperature will stay atthe new setting until
it is released from the hold.
4. To change the heating set point when the cooling set
points are displayed (and vice versa), press the mode but-
ton until the arrow moves to the desired mode. Press the
up or down buttons to change the set point.
5. To return the temperature to the preset level for that time
period, press the schedule button until the arrow moves to
the following schedule indicator.
6. Close the door.
Programming Schedules _ Unlike many other
thermostats, the Edge Pro thermostat gives the user the option
of progrmr_ning every day of the week differently. The ther-
mostat is preprogralmned at the factory with the same settings
for all seven days. See Table 1.
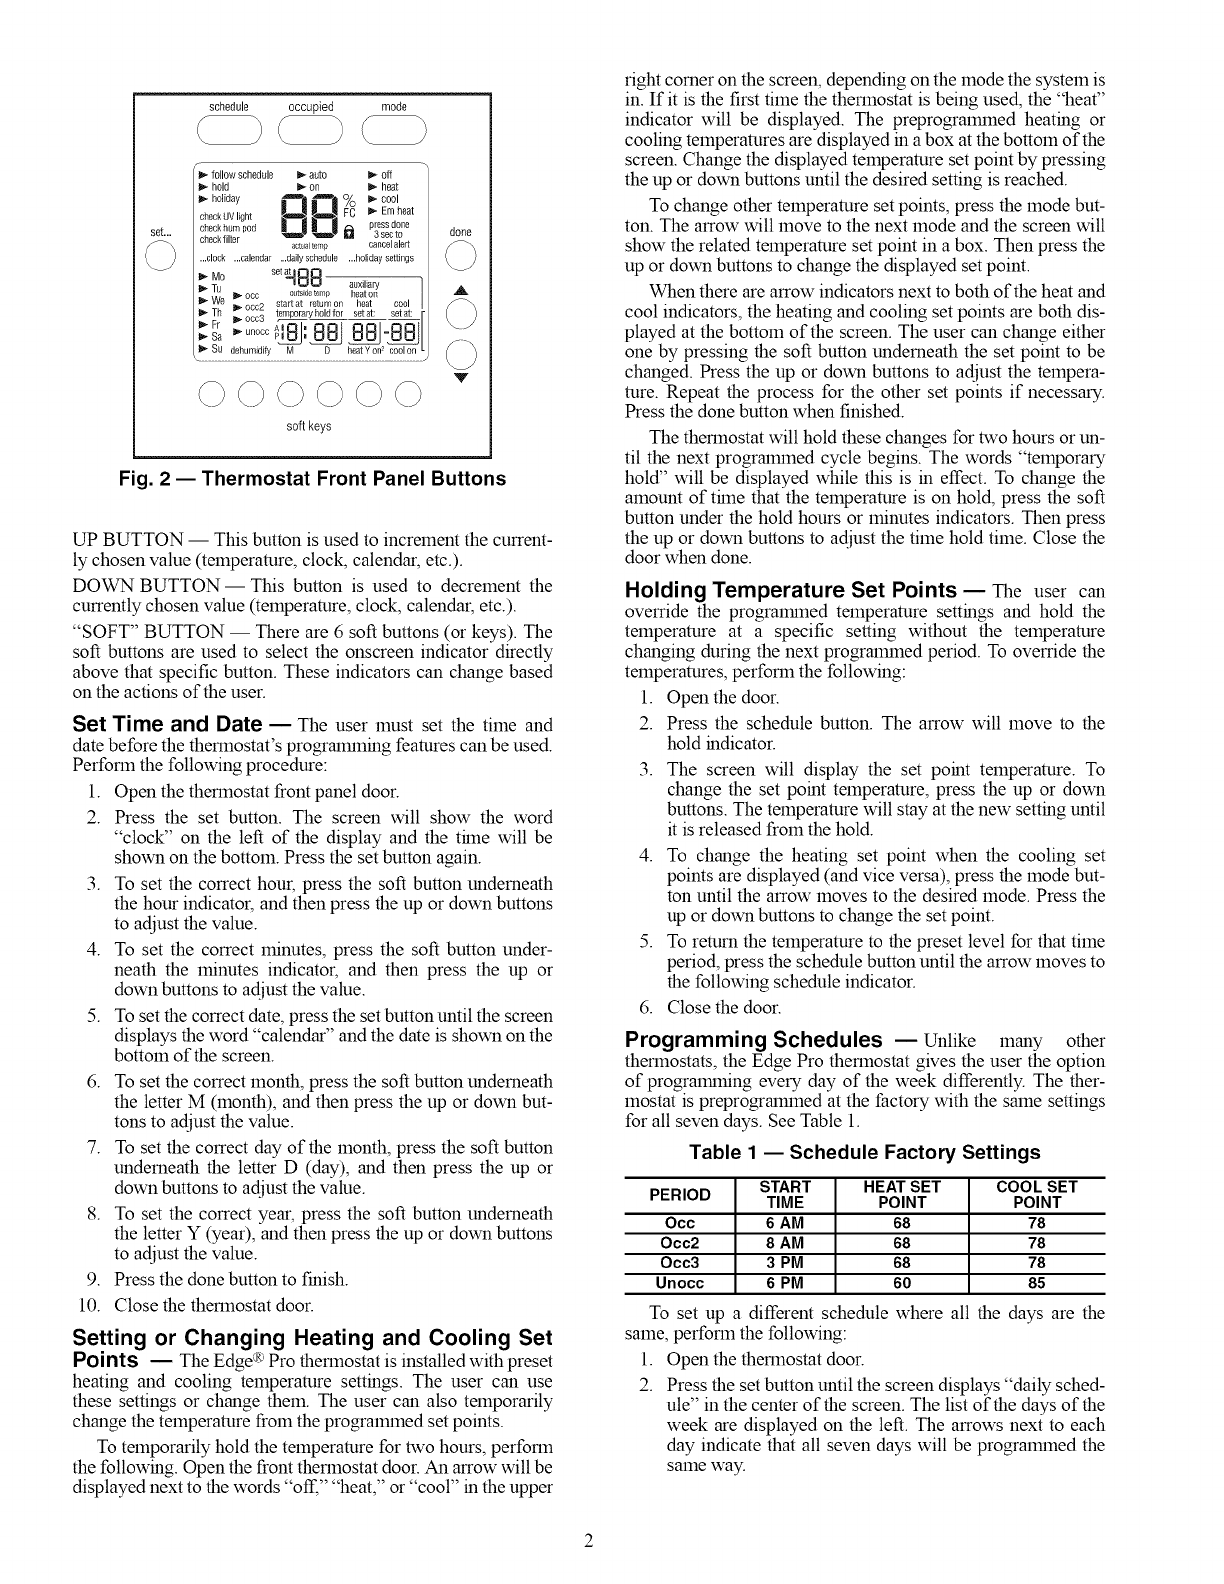
Table 1 -- Schedule Factory Settings
START HEAT SET COOL SET
PERIOD TIME POINT POINT
Occ 6 AM 68 78
Occ2 8 AM 68 78
Occ3 3 PM 68 78
Unocc 6 PM 60 85
To set up a different schedule where all the days are the
same, perform the following:
1. Open the thermostat door.
2. Press the set button until the screen displays "daily sched-
ule" in the center of the screen. The list of the days of the
week are displayed on the left. The arrows next to each
day indicate that all seven days will be progralmned the
same way.